
 Tweet
Tweet
Looking good. How about throwing the ignition switch under the tank, just forward and above the carbs? Maybe put a bracket on the frame cross-member?
-
-
That's not a bad idea. There's plenty of space under there to hide it.Comment
-
Got some more done, but its not much. Spent all day Friday chasing down a shop to fill my argon cylinder. Aparently my normal supplier decided to shut down that day, and nobody else would touch that cylinder. Finally got a full cylinder from Napa, but I had to buy another one. Guess thats my Christmas present.
With a fresh bottle I was able to weld the under tail up
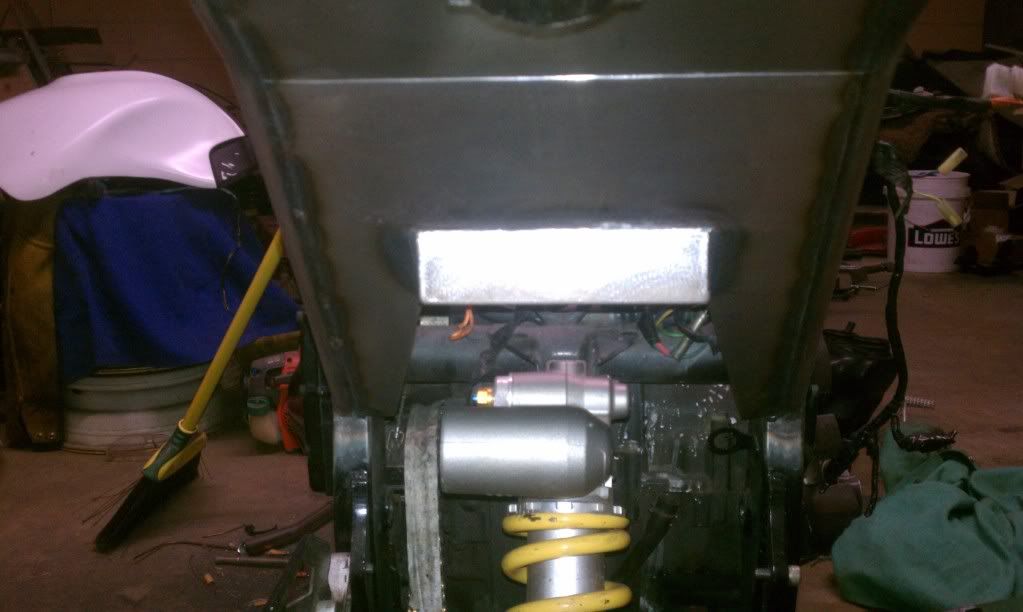
Also got the side panels finished up. Last time I did them I was a little under the weather and messed up. Forgot that I was welding on sheet metal and warped them pretty bad. It worked out though, because I was able to stash the rear brake rez behind one side panel

Here is the new, unwarped panel welded in place.

And here is the other side. This side didn't get warped as bad so I just hammered out the warps. You can see the hammer marks but once I'm done they will dissapear. I just couldn't bring myself to cut this side out when it wasnt that bad

I'm going to add a little more sheet metal under the battery box around the shock. With the wires ran where they will be going, they are visable and I'm not likeing that. Plus it will give me a place to mount the relays. There is room under the seat but I would have to extend the wires.Comment
-
Little bit more done. Finished the undertail and started on some body work. First sanding is done and a skim coat is drying. Primer is also drying under the seat.
Here is the roughed in undertail

And one of the side plates

Comment
-
Got some more done. Mostly alot of wiring. Since last post I have fininshed all the body work and sprayed on some semi- gloss black. I let that sit for about 24 hours before I started wiring, Guess I should have waited another day because there are some spots that will need touched up. Paint was still soft.
The ignition control box and BOO switch wiring what to be extended. The relays and licensce plate lights wiring had to get shorter. Plus all the wires now needed to run in different directions. All that started this.

Which eventually turned into a nice clean harness. Took most of my free time yesterday to do it, but it needed to be done. The hardest part by far was cleaning the old wires for a nice solder connection. For some reason this bikes wiring has some black residue on the wires under the insulation. I still need to do the tail light wiring, its just sitting there right now

After all that was out of the way I was able to start re-assembly. There is a clearance issue between the kickstand and the rearsets foot peg/linkage. With the kickstand up it contacts both. Also with it up there is no way to put the stand down. The little nipple for your foot to catch is conveniently hiding under the foot peg. Going to try and bend the stand a little to see if that helps.
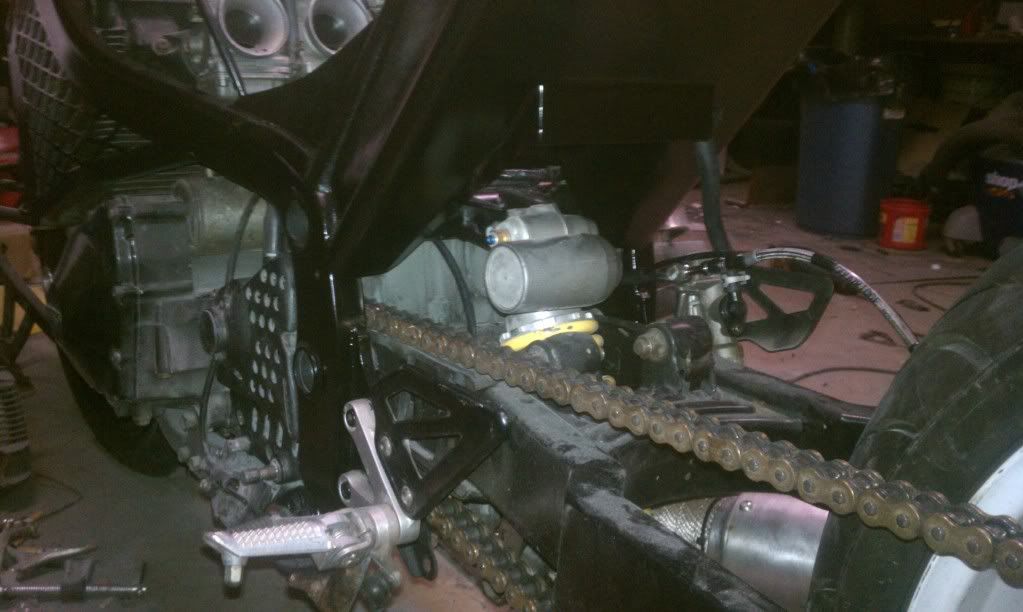
Here is the right side done. Just need to blead the rear brake. The brake line is a little long but it's gonna stay like that for a little while. Sometime soon a newer shorter rear end will be going in. No point buying another line just to have to buy another later

Comment
-
Time for some more pictures. Had a little scare with the wiring that took some time to diagnose. Spent quite a few hours trying to figure why I had a no start issue. Wound up being a ground in the bundle of connections normally near the battery, that I forgot to hook back up.
The ignition got its new home under the carbs. Its not really where I wanted to put it but everywhere I liked had clearance issues or would have been a pain to get to.

A picture of the bike mostly back together

Here is the kickstand in the vise after 1 bend. It took alot of work to get it right. A total of 3 bends had to be made, had to extend the contact to reach the side stand switch plunger, had to weld a pad to prevent the stand from contacting the foot peg, and also had to make the foot catch a little bigger.

And here is the finished stand on the bike now. You can also see the shift linkage I made in this picture.

Here is the extension to allow me to put the stand down. Without it there was nothing that my boot would catch to be able to put it down.

After working on the stand I moved on to the rear brakes. Spent about an hour or so trying to get a pedal. Tried normal bleeding and even reverse bleeding and still nothing. I finally realized that that the GSXR master wasn't operating even though I was told it was good. The Kats master is very simular, infact the only differences is push rod length and the plastic fill spout that fills from the rez. I swapped the plastic things however the pushrods wouldn't come free and the Kat masters pushrod is about an inch shorter. To solve that I took these 2 brackets and threw them together to make up the difference in length

Its not pretty, but it was either that or wait a week and a half for a new master to get here and spend money that didn't need to be spent. This is where it goes

I also painted the belly pan satin white like the tank and got that mounted. Here she is basically finished up for now, sitting by the door waiting to go out

I also hacked the remaining subframe tubes off. In about a month or so I will have access to a good tube bender and can finish that.Comment
-
Very nice work bro. 1992- project katfighter
2005- GSXR750
2001- TL1000R
http://katriders.com/vb/showthread.php?t=111130
www.lunchtimecigar.com


KATRIDERS RALLY 2014 - cintidude04
KATRIDERS RALLY 2015 - cintidude04
KATRIDERS RALLY 2016 - cintidude04Comment
-
Looking really good!sigpic Mulholland Hwy Ride
1992 Katana GSX600F (on permanent loan to a family member)
2000 Suzuki Hayabusa
First Hayabusa Commercial Hayabusa Design
Hayabusa #1 Wonder of MotorcyclesComment
-
ThanksComment
-
Time for an update, I had no plans to bring my bike back into the shop. However, while I was out riding on new years eve, something managed to get thrown into my headlight and cause this

I was mad, but what can you do. Now I was faced with a choice, to buy another light or move foreward with my projector swap. I chose to not wait a week and a half for a replacement. This headlight I made is a prototype and the final housing will be made from aluminum. If I stick with the single projector it will be an exact replica, however I really would like to run duals stacked vertically. Thats just not possible with the projectors I currently have. The smallest the housing can be is 5.5" diameter and even then its a tight fit inside.
Anyways on with the build. With a projector in hand I searched thru all my scrap metal piles, trying to find something big enough to make a housing. I couldnt find a thing. So, I just started looking around the shop for ideas. As I was on the hunt I came accross this

It's a rear output shaft bearing retainer plate for my NP203/205 doubler transfer case. I had to open to hole slightly for the projector to fit as shown by the pile of aluminum shavings beside it. Here the projector is fitted inside

Now I head back to this scrap pile for something to make a mounting ring. This time I have an old air bag suspension plate from another project. The best part about it is the perfect 5.5" circle and that it's thick enough to just drill and tap the holes. Here it is mounted to the plate

And the backside of said plate

Next, I need to cut some weight. 1/4" plate is a little heavy and overkill for this. So out comes the torch and a few minutes later I have this

Here the projector is setting inside as I am trying to figure out a way to secure it to the ring

This is what I came up with. Took some 1/4" rod and threaded the ends making 4 studs. Those are welded to the ring. 2 of them are bent to clear the bolts below

Once the projector was secured, I took some 16 gauge gauge and ripped it to 2", then rolled it around the ring and welded it in.

Next up was to cap the back of the housing. There wasn't anything in my scrap piles big enough, that had the rolled look I was after. What I did was sacrifice my old housing. Would have really liked something a little thicker than the 24 gauge it was, but thats what you get with a cheep housing. Here it is completely welded in

A shot of it mounted

And another

I decided that the front end needed a little white, so thats what color the housing was painted

And of course a shot of the wiring in a mess yet again. Since this is my first time messing with projectors, I had to figure out how everything worked and what hooked to what. After that it was a matter of finding available free space to put the relays and ballast. And free space is something that is not of abundance.

Here is the bike in its finished state after a little ride. I have to say these FX-R projectors are great

I will probably go back into the wiring soon and tap into the oil pressure sensor circuit for a trigger for the headlight. Right now the light comes on when I turn the key, cuts off while cranking, and back on when running. From my understanding thats bad news for the bulbs.Comment
-
loooooks awsomeee!!! Lol the welds are great!Originally posted by 92gsx750 View PostIts not that i don't care... wait , that's exactly what is!!

Comment
-
WOW! Very nice bike!Comment
-
Ur creativity is amazing.. And ur execution is just as good!! I gotta say ive seen other mods where people just ruin the bike.. But this is great. The light is sweet, so is the extension,, and the frame and the weld and and and
lol.... Cant wait till summer so i can take my bike apart!!!..Its not that i don't care... wait , that's exactly what is!!
Comment
-
Finally an intelligent approach to the "streetfighter" bikes, looks awesome man, you got some vision
90% of motorcycle forum members do not have a service manual for their bike.
Originally posted by BadfaerieOriginally posted by soulless kaos
Comment
-
Thanks for the kind words
That actually means a lot comming from an anti fighter like yourself. Thanks.Originally posted by scottynoface View PostComment


Comment