
 Tweet
Tweet
Edit (7/31) to add: this is a revised new and improved version from the one I posted yesterday (7/30). Since I uploaded the photos to a new hoster, I have added photos insted of making links to them.
I wasn't able to post this in the "How To"section, since I'm not a Mod, so it's here.
I first got the idea of installing an oil cooler fan last summer when, on Cyber's oil temp gage, I saw a reading of 350F (177C). It wasn't a particularly hot day but I was going from stop light to stop light without any significant constant speed. Therfore the oil never had a chance to cool down.
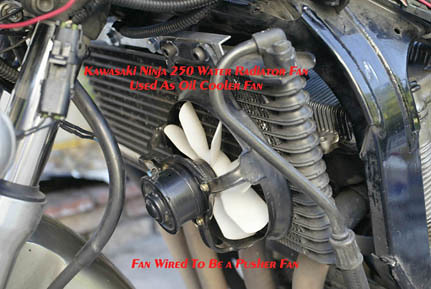
I did some R&D work with a Kawasaki Ninja 250 water radiator fan wired backwards so it would blow. Normally it sits behind the radiator and pulls the air through it.
There is also an exsisting thread on the subject of Oil Cooler Fan(s) that I did some posting.
But now on with the show.
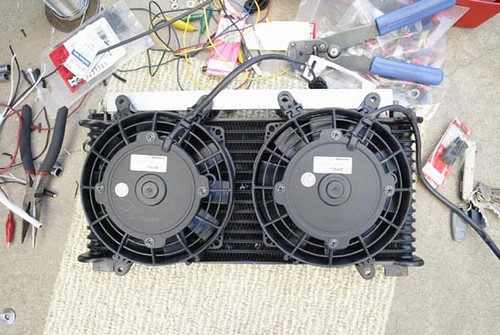
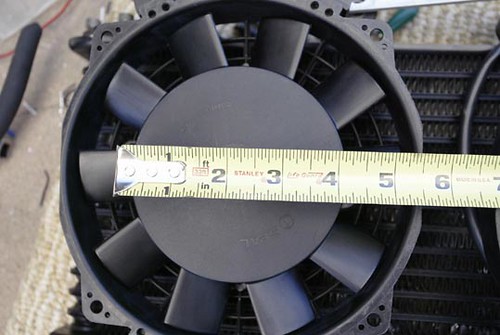
I came to the conclusion of using 2 SPAL 6-1/2" fans which are designed for motorcycles & ATV's for the reason that they are very thin. You can see the spec sheet here. I bought the fans from A1 Electric Automotive Accessories. Edit to add: I used the raised 3/4" (0.75) mounting tabs. Part #30130017. They are sold in a set of four.
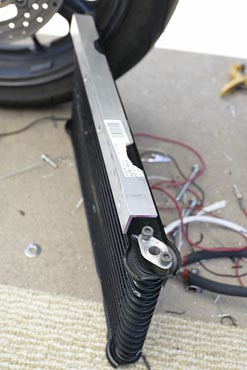
Now these size fans fit the cooler just about perfect.
However, the intake side, which will face the cooler has about 4 inches of dead space.
Yet even so the actual installation of the fan shows that the fans do not completely block the air from entering. Time will tell if this fan works or not.
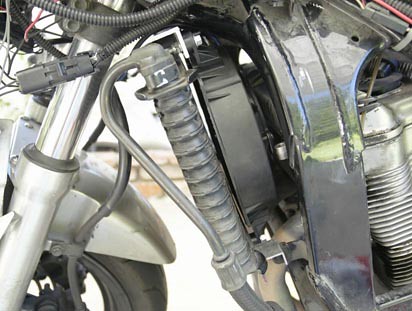
After choosing the fan the next step is fabricating a mounting system for the two fans.
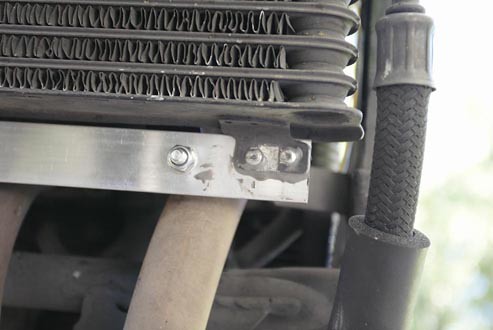
One thing I found out is that the cooler needs to be positioned forward from the stock location. Even though the fans are thin, the oil cooler still needed to be relocated. I originaly was going to cut the lower OEM brackets off with my Dremel tool and weld them back on. However, there was no way I was going to be able to maneuver the cut off wheel in such a tight place. So plan B. Using some scrap aluminium I already had, I fabed up 2 C shaped brackets along with a length of 1/8" thick aluminum cut to the length of the OEM tabs to mount the lower fans to. I used JB Weld & pop rivets to attach everything together, then I let it set overnight.
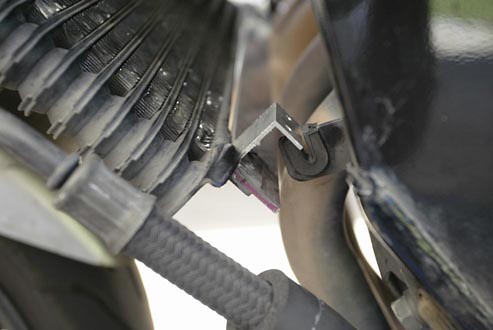
Now to tackle the top bracket. Again I used what I already had, so I cut a length of L-shape aluminum to mount the fan to.
The cutouts in the L-bracket are for clearence. The lower triple tree contacts the aluminum bracket. If I had used just plain 1/8" bar like the bottom, cutouts would not be necessary. But I figured using the L-bracket for more rigidity, since the top bracket is carring the load of the two fans.
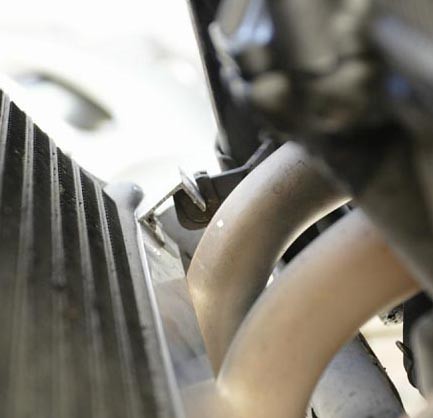
Now I just realised I did not take a picture of how the fans are bolted to the top bracket. But I do have one pic that shows the outside mounting tab bolted to the bracket.

The top inside plastic fan mounting tab was enlarged with a drill bit to allow the bolt that attaches the oil cooler to the frame to also fasten the inside mounting tabs on both fans. I did not drill holes for the lower center brackets because the dificulty in getting an accurate measurement. So the fans are mounted at 3 points.
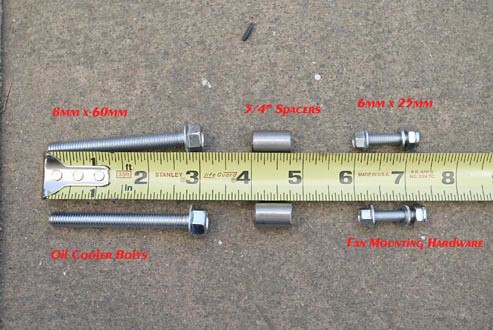
The hardware needed was two 8mm x 60mm bolts to replace the oil cooler's OEM mounting bolts. Two spacers: 1/2" inside diameter x 3/4" in length for the top spacer mounts in between the L-bracket and the frame. And four nuts & bolts: 6mm x 25mm (I think, or 20mm), with washers to mount the fans to the brackets.
These materials I bought at Ace Hardware since they have a greater collection of metric stuff than what Orchard Super Harware does.
Now that the mounting brackets are done, next is the electrical.
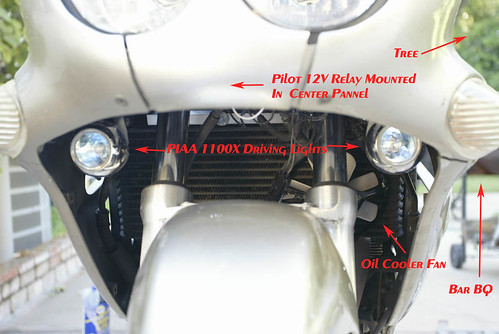
I went to Pep Boys to buy Pilot Automotive's pre-wired harness with relay and switch. It's designed for driving lights etc. I mounted the relay on the lower nose cowling.

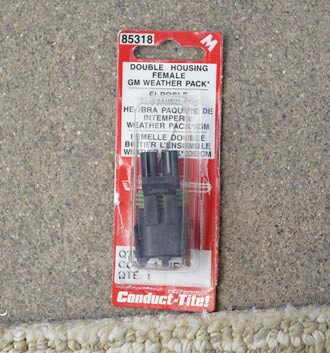
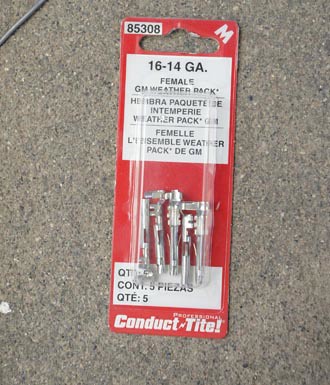
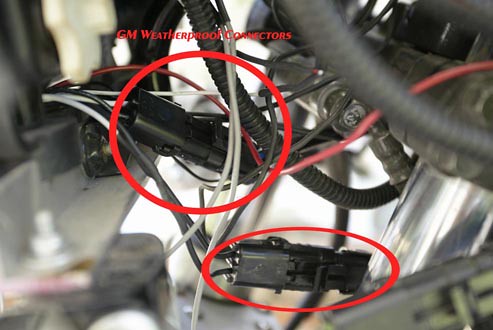
Then I used a DIY GM electrical connectors, that I bought at Pep Boys, to make two male/female plugs to power the fans via the relay.
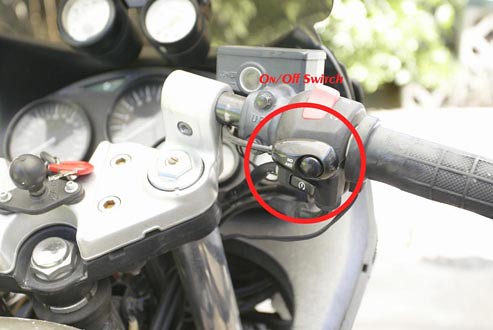
The main power for the the fans came from my Blue Sea fuse box. The power for the relay switch came from taping into the the parking/third eye light. And the switch was installed at the handlebars to manually turn on and off the fans.
I also wired in a LED so I can tell when the fans are on. With that Kawasaki fan I could not hear if the fan was on or not.
All electrical connections were spliced, soldered then protected with heat shrink tubing.
I connected my multimeter to determine what the amps it was drawing so I could use the correct fuse. It spiked at 20-21 amps then settled down to around 8 +- amps. I put in a 20 amp fuse and cycled the fans a couple times to see if it would blow. Nothing so far. Mind you, this was with the engine off. If someone has a way off improving the spiking, post it.
I finished everything this evening so I have not been able to test the cooling effect. This week it's supposed to be just under 100F (38C) so I should be able to post the actual results at the end of the week.
If you have any questions post them and I'll try to answer them in a timely fashion.
Materials Needed:
2 - Spal fans, pull type (part #30100402) ($55.00 x 2)
2 - Sets (8 total) of 0.75" raised mounting tabs. (Part #30130017) ($3.00 x 2)
Miscelanous aluminum harware
JB Weld (your option)
Pilot wiring harness (part #PL-HARN3) ($20.00)
All of nuts/bolts/washers & spacers below cost no more than $20.00. I ended up buying more than what I needed.
2 - 8mm x 60mm x 1.5 (I believe the pitch is 1.5)
4 - 6mm x 25mm (20mm?) x 1.0 (again, I did not pay much attention to the pitch)
4 - 6mm washers
4 - 6mm nylon lock nuts
2 - male electrical connectors (your choice here)
2 - female electrical connectors (ditto)
2 - 3/4"L x 1/2"I.D. spacers (plastic or metal, I used metal)
20 amp fuse
I believe that's everything. If I miss something I'll add it later.
I wasn't able to post this in the "How To"section, since I'm not a Mod, so it's here.
I first got the idea of installing an oil cooler fan last summer when, on Cyber's oil temp gage, I saw a reading of 350F (177C). It wasn't a particularly hot day but I was going from stop light to stop light without any significant constant speed. Therfore the oil never had a chance to cool down.
I did some R&D work with a Kawasaki Ninja 250 water radiator fan wired backwards so it would blow. Normally it sits behind the radiator and pulls the air through it.
There is also an exsisting thread on the subject of Oil Cooler Fan(s) that I did some posting.
But now on with the show.
I came to the conclusion of using 2 SPAL 6-1/2" fans which are designed for motorcycles & ATV's for the reason that they are very thin. You can see the spec sheet here. I bought the fans from A1 Electric Automotive Accessories. Edit to add: I used the raised 3/4" (0.75) mounting tabs. Part #30130017. They are sold in a set of four.
Now these size fans fit the cooler just about perfect.
However, the intake side, which will face the cooler has about 4 inches of dead space.
Yet even so the actual installation of the fan shows that the fans do not completely block the air from entering. Time will tell if this fan works or not.
After choosing the fan the next step is fabricating a mounting system for the two fans.
One thing I found out is that the cooler needs to be positioned forward from the stock location. Even though the fans are thin, the oil cooler still needed to be relocated. I originaly was going to cut the lower OEM brackets off with my Dremel tool and weld them back on. However, there was no way I was going to be able to maneuver the cut off wheel in such a tight place. So plan B. Using some scrap aluminium I already had, I fabed up 2 C shaped brackets along with a length of 1/8" thick aluminum cut to the length of the OEM tabs to mount the lower fans to. I used JB Weld & pop rivets to attach everything together, then I let it set overnight.
Now to tackle the top bracket. Again I used what I already had, so I cut a length of L-shape aluminum to mount the fan to.
The cutouts in the L-bracket are for clearence. The lower triple tree contacts the aluminum bracket. If I had used just plain 1/8" bar like the bottom, cutouts would not be necessary. But I figured using the L-bracket for more rigidity, since the top bracket is carring the load of the two fans.
Now I just realised I did not take a picture of how the fans are bolted to the top bracket. But I do have one pic that shows the outside mounting tab bolted to the bracket.
The top inside plastic fan mounting tab was enlarged with a drill bit to allow the bolt that attaches the oil cooler to the frame to also fasten the inside mounting tabs on both fans. I did not drill holes for the lower center brackets because the dificulty in getting an accurate measurement. So the fans are mounted at 3 points.
The hardware needed was two 8mm x 60mm bolts to replace the oil cooler's OEM mounting bolts. Two spacers: 1/2" inside diameter x 3/4" in length for the top spacer mounts in between the L-bracket and the frame. And four nuts & bolts: 6mm x 25mm (I think, or 20mm), with washers to mount the fans to the brackets.
These materials I bought at Ace Hardware since they have a greater collection of metric stuff than what Orchard Super Harware does.
Now that the mounting brackets are done, next is the electrical.
I went to Pep Boys to buy Pilot Automotive's pre-wired harness with relay and switch. It's designed for driving lights etc. I mounted the relay on the lower nose cowling.
Then I used a DIY GM electrical connectors, that I bought at Pep Boys, to make two male/female plugs to power the fans via the relay.
The main power for the the fans came from my Blue Sea fuse box. The power for the relay switch came from taping into the the parking/third eye light. And the switch was installed at the handlebars to manually turn on and off the fans.
I also wired in a LED so I can tell when the fans are on. With that Kawasaki fan I could not hear if the fan was on or not.
All electrical connections were spliced, soldered then protected with heat shrink tubing.
I connected my multimeter to determine what the amps it was drawing so I could use the correct fuse. It spiked at 20-21 amps then settled down to around 8 +- amps. I put in a 20 amp fuse and cycled the fans a couple times to see if it would blow. Nothing so far. Mind you, this was with the engine off. If someone has a way off improving the spiking, post it.
I finished everything this evening so I have not been able to test the cooling effect. This week it's supposed to be just under 100F (38C) so I should be able to post the actual results at the end of the week.
If you have any questions post them and I'll try to answer them in a timely fashion.
Materials Needed:
2 - Spal fans, pull type (part #30100402) ($55.00 x 2)
2 - Sets (8 total) of 0.75" raised mounting tabs. (Part #30130017) ($3.00 x 2)
Miscelanous aluminum harware
JB Weld (your option)
Pilot wiring harness (part #PL-HARN3) ($20.00)
All of nuts/bolts/washers & spacers below cost no more than $20.00. I ended up buying more than what I needed.
2 - 8mm x 60mm x 1.5 (I believe the pitch is 1.5)
4 - 6mm x 25mm (20mm?) x 1.0 (again, I did not pay much attention to the pitch)
4 - 6mm washers
4 - 6mm nylon lock nuts
2 - male electrical connectors (your choice here)
2 - female electrical connectors (ditto)
2 - 3/4"L x 1/2"I.D. spacers (plastic or metal, I used metal)
20 amp fuse
I believe that's everything. If I miss something I'll add it later.


 ?
?


Comment