
 Tweet
Tweet
So here she is before my creative juices started flowing:


And here she is as she sits today:
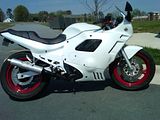
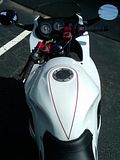
And here is a little back story. I am not a very good DIY kind of a guy. You add in the fact that I am a perfectionist and it usually means that I go all out on research, practice and then carry a project through to completion...then I usually hand it over to a professional to fix it as it drives me NUTS to know that there are imperfections. Such is the case with my bike. I read the forum posts about painting, plastic repair and the like. They are GREAT posts with lots of useful information that really helped. But, alas, it was my first attempt and after spending countless hours and $$ trying to do it myself, most of the work you see was done by a professional painter. I still have some decal work to do, but that will come after one of my DIY plastic repair jobs went south just as soon as I bolted on my fairings. I eventually came across a post from Krey I believe that stated the front fender is not made of the same ABS plastic as the rest of the fairings and you are suppose to use the same materials to bond correctly. So guess what I was using as filler for my plastic repairs...YEP...an old front fender. The only area that this has been an issue is here as it is a stress point when bolted on:

Anyways, I learned a lot and did more than I thought I could, even if I had somebody else re-do it in the end. Thanks to ALL of you that add so many helpful and instructional posts! I am very pleased with how she has turned out.

 GSX600F '97
 Ride like it's your last ride


Comment