
 Tweet
Tweet
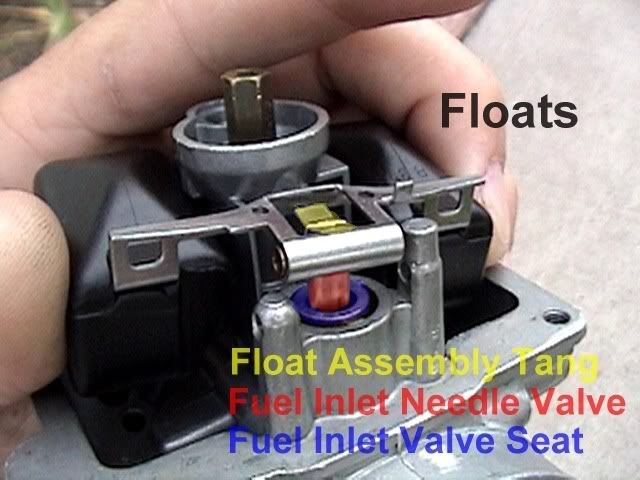
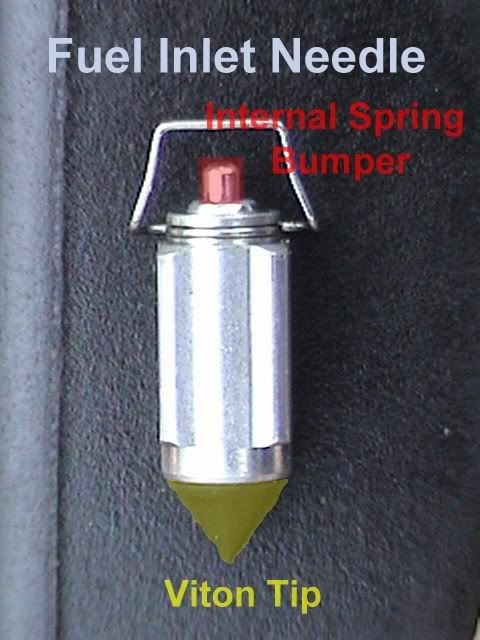
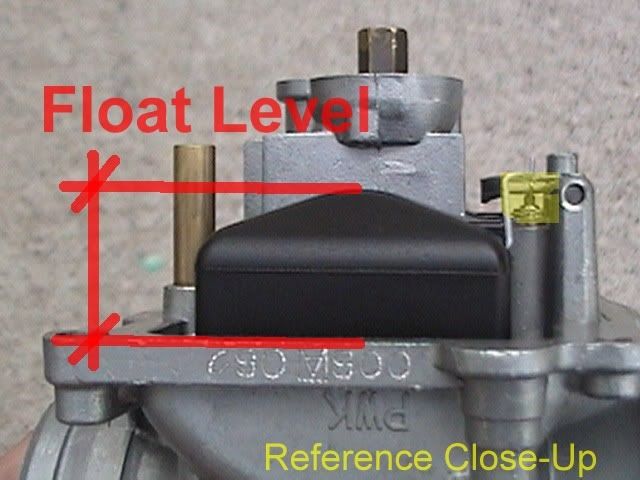
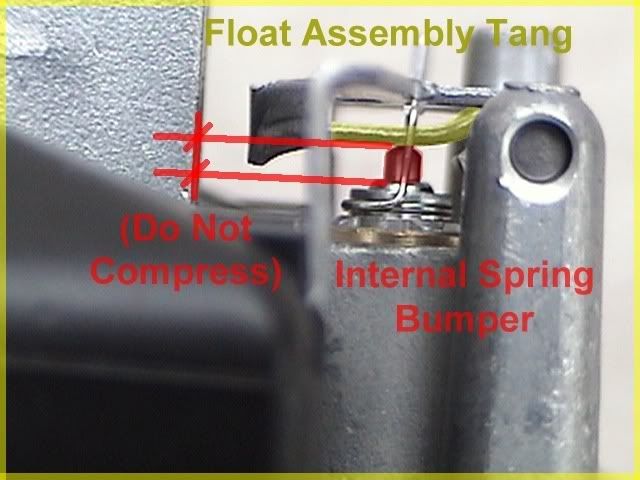
Looking to see if anyone has some pics of a correctly adjusted float height. Setup on a post cat (99) 600. I can't seem to find my tool set and would like a reference pic to see if mine are even close before I close up the carbs.
--Dan
P.s. The pic in carbs 102 is not clear enough for me to use.
--Dan
P.s. The pic in carbs 102 is not clear enough for me to use.


Comment