Ad Widget

Collapse

Announcement

Collapse
No announcement yet.
X

Y2KTJ's $50 1990 gsx600f build

Collapse
  • Filter
  • Time
  • Show
Clear All
new posts

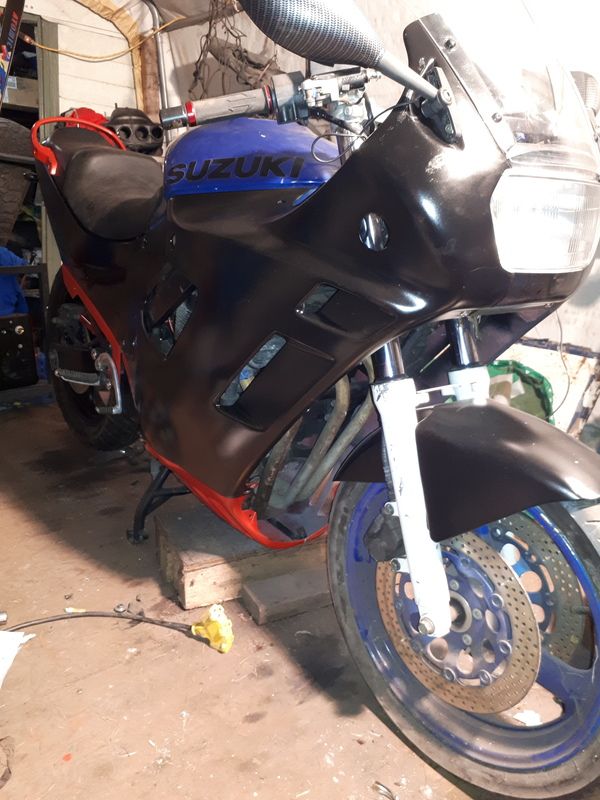
  • Lol Your bike is way nicer than mine will ever be! Definitely used it as inspiration for sure. Now that headlight I might copy .Original plan was to split the front fairing with red on top but figured it would be to hard to do right with rattle can.

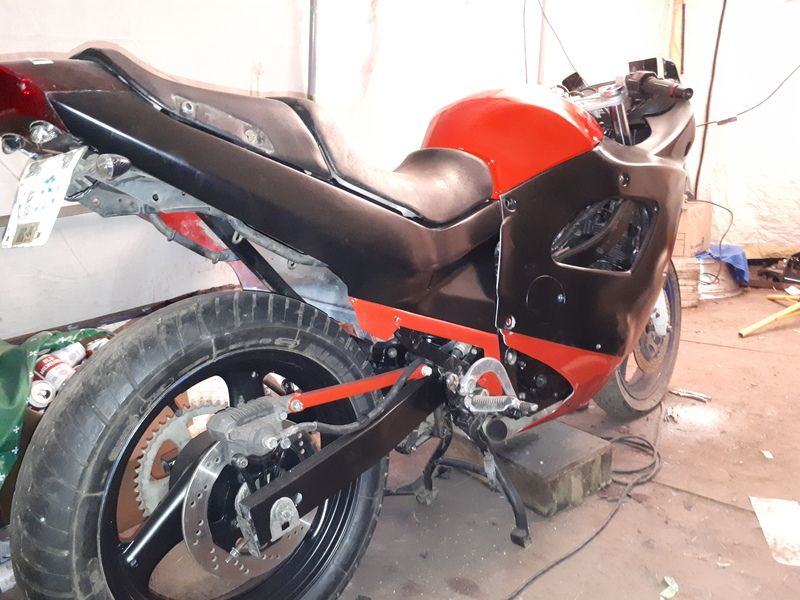
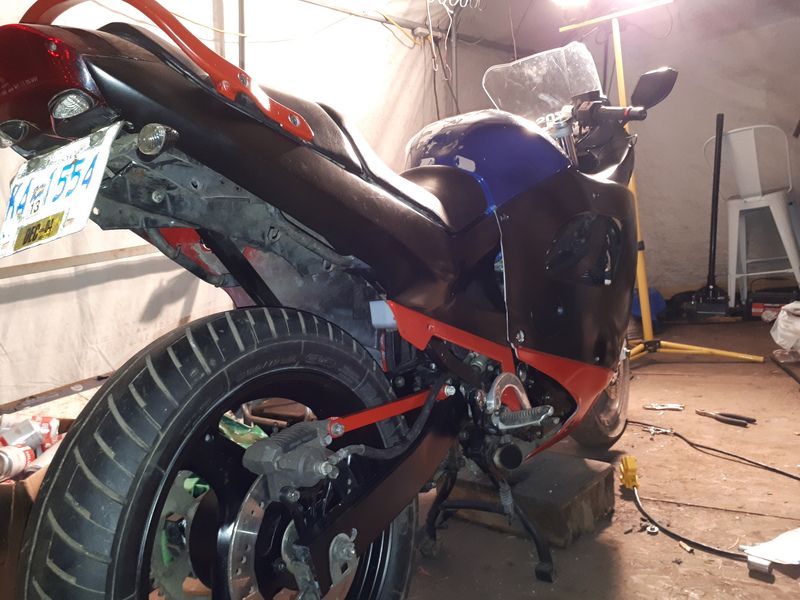
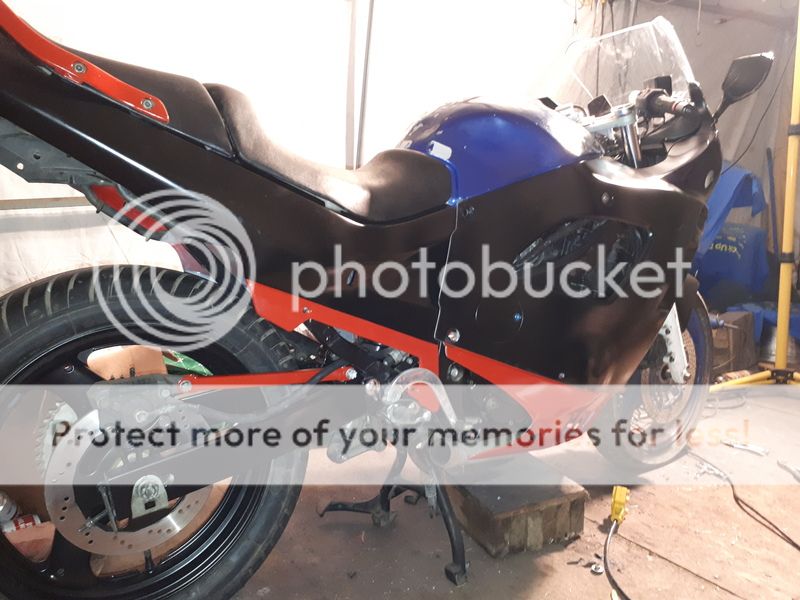
    Couple pics of the swing arm and rear wheel painted


    Comment


    • Ehh, at least you've made some progress now.
      Going to go... Got other things beside my drunken internet spasiums that need taken care of this month.
      My Katana-1100 17" wheel swap
      http://katriders.com/vb/showthread.php?t=136894

      Comment


      • I really dislike that headlight, but..... it works and will never cost what mine did.....lol
        I'll try to rehash that thread..................wait.................. KR has time warped to 2010........lets check if it still exist.....
        "I'm sorry, I didn't mean to upset you when I called you stupid. I thought you already knew..."
        spammer police
        USAF veteran
        If your a veteran, join the KR veterans group

        Comment


        • I've accepted it for now. I'd like to see some more pics of your bike in general.

          Got the screen painted.


          Just a simple tape job. Didnt look at pics before hand but maybe I should have rounded it a bit but the bikes lines are pretty straight anyway.
          And yeah my shop is a mess!!lol

          Spent some time today working on fitting the gsxr mirrors. If you remember I picked up a cheap set with led blinkers off ebay, I ordered black and they sent carbon fiber so they gave a full refund. Not having any on road riding experience I'm having trouble figuring where the mirror should be.

          Heres a pic of the mirror on the bike so you can see what they look like.


          With the lower bolt in the stock kat mount for a rough idea and the mirrors bolted on the way they were shipped all I see is the tank and my side. If I turn the mirror around so the arm is angled the opposite way they work and I can see what I think I should but they look odd kinda pointing forward. Going to mess with them some more to see if I can get more angle from the mirror swivel.

          Sanded off the ridge on the bottom and the back edges to fit in the kat mount. Once I'm happy with it I'll drill a new hole in the fairing and weld on a nut. Might have to add a little metal to the support but no biggie. Everyone loves pics so a couple of the change


          Comment


          • Also got the rear turn signals wired up and mounted. The PO had a couple small ones GLUED to the under side of the brake light housing but weren't very bright.

            So took the ones from the front and mounted on the rear. (Carbon fiber to match the mirrors!!lol) The PO chopped the rear shovel already but next time I'm out there I'll trim alittle more off. You can see the line where I'll cut for starters. See how it looks and maybe trim more.


            Recouping funds after Christmas so haven't ordered the chain yet. Been looking at exhaust options and think before spending 300 on some stock stuff I'm going to see what I can weld up. Searched and couldn't find an answer on pipe diameter. Won't lie I'm horrible with a tape. Wait don't answer...good excuse to buy a caliper!

            And I have a leak at the petcock. Read through Krey's petcock rebuild already. So drained the tank today( mostly, I'll pull the petcock to get the rest out) which I needed to do anyway to repaint the tank. I'll probably just clean it out and replace the orings for now. Anyone know what sizes are needed?

            And the tank has a large dent in it from the POs knee.

            Don't really want to replace it right now so Ill probably take the cheap route and just fill it. Not sure on the gauge of steel but doubt it could be pulled out anyway. Considering just welding a patch over it. Redneck Fix!!

            Comment


            • Got the petcock out and cleaned up thanks to Kreys write up. Leak was definitely coming from the oring at the knob that had completely disintegrated. And a pic of the seal at the diaphragm.


              Cleaned it up for now and replaced the orings but guess I'm going to need a rebuild kit.

              Did some reading on tank dent repair. I guess the tank isn't as thick as I thought it was. Surprised to read some have had success with a suction cup, I figured it would be thicker than it is. Watched a few vids of people using some kind of glue on dent puller that's basically just a bolt and a piece of metal. I've got tons of scrap steel so I'll make my own cross piece and just weld a bolt to the tank.

              Better pics of the dent.


              Couple questions before I do. Fell in a fire as a kid and it is definitely my biggest fear. Not fire itself just me being burned. I am always over cautious when the chance is there. Done some reading on how to get rid of the fumes but looking for more advice.

              Second question is about the thickness of the steel. Don't want to burn a hole through it. Anyone know off hand? Guess another reason to buy a caliper.

              And finally recouped after Christmas so can start ordering parts again!

              Comment


              • Thinking I'll try JB weld first!

                Comment


                • The tank metal is thin, and while it can be welded, it's not going to be easy.

                  To remove the chance of boom, I full cleaning on the tank, and then fill with water will push any fumes out. I've done a in tank only electrolysis cleaning before, and it works really well. I've then had a tank welded after as well in an attempt to repair/replace some damaged section on the bottom of the tank. Ultimately realized welding was not the optimal option.

                  For dent pulling, you can use the spot weld dent puller tool. I found the metal was actually thin enough that you could pull a hole in the metal by yanking the tab completely off due to the metal being that thin.

                  A better option on a tank repair would be to finish with a brazing. If you did have to remove and weld a section back on the tank for example due to a rusted out spot, weld it in, then go back and braze over the repair, You will get a much better seal. Welds if not done extremely well, are still porous and will allow for seap from fuel to cause issues or problems with paint.

                  My suggestion for your specific tank, if i'm understanding correctly in that you just want to repair the dent... look at acquiring or making a tool that is designed just for that. There are specially shaped tools that you can insert into the tank, and then manually push the dent out. You can skip almost all the aspect of worrying about heat, blow through, or keeping the tank sealed by manually working the dent out that way too. I've seen results where if there wasn't a kink in the metal, you literally could not see a dent had been there after doing it this way.

                  There are also stories told of filling with water then freezing a container would cause the dent to push out. The most common thing... has been to just fill the dent and paint over.

                  My preference on any fix, would the putting heat to the tank being the last options I would use/try. This is speaking from experience and finding it was really easy to have more issues after than before, LOL.

                  Krey
                  93 750 Kat


                  Modified Swingarm, 5.5 GSXR Rear with 180/55 and 520 Chain, 750 to 600 Tail conversion, more to come. Long Term Project build thread http://katriders.com/vb/showthread.php?t=96736

                  "I've done this a thousand times before. What could possibly go wron.... Ooops!"

                  Comment


                  • So I tried JB weld first twice, I was able to pull the dent out a bit but then the jb weld failed. I had already cleaned the tank out using clr twice, blew tons of air in it and let it air out for a few days. There was still a slight gas smell. I then filled it completely with a clr mixture and welded the bolt on. I had some scrap steel I cut off the jeep that was the same thickness so I did a few practice welds to make sure I wouldn't blow through the tank. Then standing behind a piece of 3/16 steel I welded the bolt on.

                    Pic of the jb welded bolt


                    And the setup to pull the dent


                    And the dent mostly pulled out


                    and after a little bondo


                    The pics don't do it justice. There is still a small indent that looks way bigger in the pic but the rest of the dent pulled out nice.
                    First time using bondo or doing any body work. After the first coat it's not to bad. Obviously better than it was but had trouble matching the curves. Put another coat on and see if I cant get it closer.

                    Comment


                    • Well I've definitely gained some respect for body shops over the last week! Not as easy as it seems that's for sure. Learned a lot so far and look forward to doing more. Sort of! lol Jack of all trades, Master of none!! The right tools would be nice but made due with what I have and some elbow grease. Finally thought every thing was blended and smooth enough for some primer.


                      And as always with a little paint down all the imperfections show up! Few small holes in the primer that I was sure were gone showed up and there was some old fill that I left after talking to the PO who said it was there when he painted the bike before that I didn't blend well enough. I might regret not removing it now but time will tell. Really looking forward to getting some color on the tank.

                      Comment


                      • Originally posted by y2ktj View Post
                        .Lmao!! Its not purple its actually a metallic blue, and a decent color if that's your thing. Po painted the bike, was red at one time based on the inside of the fairings.

                        Katrider tell me you don't really take your fairings off!! That would be like swapping to 30" street tires on the jeep to save the tread on the muds! Im all for having a nice looking ride but they were meant for the road.

                        Black and purple like this?


                        lol
                        It's snowing here right now so better wait for a visit!!

                        ​​​​​​Junker you have any more pics of your bike so I can get it exact! Only one I've seen is kinda out of focus!


                        Thanks for the advice. Never thought about the chain grease. Something to consider in the future. Not concerned with the paint since its just a rattle can job for now anyway. $50 bike remember!!! Ok not true...I'm up to about $350cdn(that's $270 us) plus $30 in paint!!lol

                        Serious question now regarding the chain tensioners. Took the swingarm off tonight and one of them is alittle concaved. Red a post on the book of faces of a guy whose rear tire came loose after a chain swap. Chain did all kinds of damage around the small sprocket (forget the name of the cover on that side) I gather he was lucky it didn't do more damage to the motor. Obviously his axle wasn't tight which caused his issues but he blamed the tensioner. Made me wonder how important they are. I get that they don't hold the axle in place, but comman sense says that they play a part. I've read of swapping to a beefier version. If the guy had beefier tensioners than the axle wouldn't have moved as much causing less damage right? Not a reason to not torque the axle properly but added insurance if it does lossen.

                        Loose wheel is why the PO dropped the bike in the first place and the tensioner is evidence of that. I'm guessing the bent tensioner should be replaced so should I replace with something better? Going to search the swap now but advice is always appreciated.
                        Replace the chain adjusters with the Bandit adjusters. Way stronger and they don't look like an afterthought.
                        "I'm sorry, I didn't mean to upset you when I called you stupid. I thought you already knew..."
                        spammer police
                        USAF veteran
                        If your a veteran, join the KR veterans group

                        Comment


                        • They are on the list thanks 92.

                          Snows gone now and the blue skies have me wishing I was farther along. Been studying for the test the last couple days.

                          Couldn't resist snapping a pic with some color on the tank.


                          They say imitation is the sincerest form of flattery! lol When I first joined the site I was going go naked or "fighter" style with the bike. After seeing all the info on the site I decided against it. I started looking at black and red bikes and I definitely saved a pic of yours 92 as inspiration. Seeing the above 2 pics at the same time gotta say its alot more similar than I thought! lol Black forks for mine though.


                          Funny how a pic with the flash shows everything compared to the poor lighting I have out there! Like the dirty under tail and the unpainted inner fairings and I missed a few spots on the rim. Only a rough coat on the fairings to change the coulor and I just taped off the rim and shot a quick coat on it for now. Tires are old and will need replacing so I'll do the job right when the tires need to come off. I promise that is not the quality I aim for!lol

                          Comment


                          • Don't think I've ever been more frustrated!! Laid 2 coats of color on the tank. Got some dust in it and paint was real rough. I know not to now but did a little wet sanding. Shot a final coat of color and the paint did some weird shit! Not bubbles but looked more like a dry lake bed all cracked in a few spots. I was super careful to not contaminate the surface and wore new gloves after cleaning it to not get oil from my fingers on it. The cracks look so deep I think I might have to remove it all!! No pics cuase I was so angry!!

                            Comment


                            • Thats what happens when you mix lacquer and enamel. Always use enamel if your ever going to put another coat or repaint at any point...EVER !
                              Another reason I don't like Chevrolet....during the 80s-90s GM used lacquer paint. My moms two month old Monte Carlo SS paint flaked off at the car wash. Lucky for her the Chevy dealer repainted the whole car. Plus, my aunts Buick Regal (same car basically) had those cracks all over. She never repainted it though.
                              I'm sure there are other factors that cause those cracks, but the lacquer is one of the main reasons. FYI, Duplicolors factory "Color Match" products and all Eastwoods spray paint (unless stated otherwise) are lacquer. Had to call Eastwood to discover that because its not written on the spray can.
                              My Katana-1100 17" wheel swap
                              http://katriders.com/vb/showthread.php?t=136894

                              Comment


                              • I’ve also had that during too cold or too hot temp while painting. Follow the cans requirements.
                                "I'm sorry, I didn't mean to upset you when I called you stupid. I thought you already knew..."
                                spammer police
                                USAF veteran
                                If your a veteran, join the KR veterans group

                                Comment

                                Working...
                                X