Ad Widget

Collapse

Announcement

Collapse
No announcement yet.
X

Suzuki GSX 750 F very long term build....

Collapse
  • Filter
  • Time
  • Show
Clear All
new posts

  • #16
    That is messed up!
    You can always buy a new ignition switch and have it rejected by a locksmith. (Or rekey the tank/helmet lock). I'm sure that'd be cheaper than your deductible, might be cheaper than getting a whole matched set. New ignition switches are ~$30-40 here
    1998 Katana 750
    1992 Katana 1100
    2006 Ninja 250

    2006 Katana 600 RIP - 130k miles

    Comment


    • #17
      Originally posted by IhmeJanneFIN View Post
      PS. Does a post lock set fit pre, I can find a used post lock set quite cheap and quite locally, if not, I have to order used pre ones from abroad.

      Unfortunately, no... The key sets are not swappable. Just tried this with Zukifred's bike and had to make major mods to get the post ignition switch mounted to the pre frame. The hole on the neck and the bar lock pin in the ignition do not line up, is just one of the issues. Additionally, the cylinders in the locks are not the same either, so you can't swap internals.

      Instead though, I would suggest you just buy a used ignition. Don't even need the key. You can take the parts from the new for the damaged parts. Use the key ways inside from the old (they won't be damaged) and put them in the new lock. That = same key you use now to match up with the rest of your locks.

      I commonly see people selling upper triple plates with the ignitions still attached cheaper than ignitions separately fyi... so maybe you can include that in your search.

      Example... http://www.ebay.ie/itm/1993-Suzuki-K...item1c35bb90ae

      Search some more and you might find a better priced option even. You do NOT need a key for the parts... you can take it apart with out the key to get what you need.

      Krey
      93 750 Kat


      Modified Swingarm, 5.5 GSXR Rear with 180/55 and 520 Chain, 750 to 600 Tail conversion, more to come. Long Term Project build thread http://katriders.com/vb/showthread.php?t=96736

      "I've done this a thousand times before. What could possibly go wron.... Ooops!"

      Comment


      • #18
        Very clean bike. Sorry to hear about the vandalism

        Built up Black 94 5.0 Mustang - Champagne Pearl 2001 Chrysler LHS - Canary Yellow 2001 Katana 600 - 94 F350 7.3 IDI turbo crew cab dually

        Comment


        • #19
          Wow man... I'm sorry to see that. Is that an apartment complex? Is there any camera surveilance? I tell you what buddy, I'd like to get MY hands on the asshole that did that, i can only imagine how you feel. =(

          I checked back on this post to ask you a question before i saw the tragedy, I hope this isnt an inapropriate time, but I also want to tape off my headlight. What width 3m tape did you use? All i can find is 7/8 (22MM) tape. Obviously your tape was measured in MM. I dont really want to have to make two passes across the top of the light and make a seem. Did you get your tape at a local auto parts store or off the internet?
          My build thread (Black Betty) '97 600 (Dearly Departed)
          http://katriders.com/vb/showthread.php?t=133286
          2007 GSXR 750

          Comment


          • #20
            Any local sign shop should have some scrap sign vinyl that they would sell you cheap. If its 3m vinyl then its the same stuff as the 3M tape, but there are many different brands that work just as well. Just stop by and ask if they have any premium vinyl scraps you could have of buy.

            Comment


            • #21
              Originally posted by Shield2009 View Post
              Quick question why the tail swap did u just like the 600 more
              750's tail looks too bulky to my eye, I like the look of the 600 more.

              Originally posted by maniac1886 View Post
              Wow man... I'm sorry to see that. Is that an apartment complex? Is there any camera surveilance? I tell you what buddy, I'd like to get MY hands on the asshole that did that, i can only imagine how you feel. =(

              I checked back on this post to ask you a question before i saw the tragedy, I hope this isnt an inapropriate time, but I also want to tape off my headlight. What width 3m tape did you use? All i can find is 7/8 (22MM) tape. Obviously your tape was measured in MM. I dont really want to have to make two passes across the top of the light and make a seem. Did you get your tape at a local auto parts store or off the internet?
              Yes, it's apartment complex, but we don't have any surveillance, this is thought to be very quiet and nice neighborhood, apparently not. I would also like to get my hands to that brick.
              Nah, it's not an inappropriate time, happy to help. Any shop that do decals or car wrapping in your area is fine. They have huge rolls of that stuff. If I remember correctly, widest roll was about 2 meters (~6½ feet). Atleast here where I live, I got them very cheaply, because it was leftover from them, otherwise it would have gone to waist. Cost only few bucks (Euros to be correct).

              Originally posted by Kreylyn View Post
              Instead though, I would suggest you just buy a used ignition. Don't even need the key. You can take the parts from the new for the damaged parts. Use the key ways inside from the old (they won't be damaged) and put them in the new lock. That = same key you use now to match up with the rest of your locks.

              I commonly see people selling upper triple plates with the ignitions still attached cheaper than ignitions separately fyi... so maybe you can include that in your search.

              Example... http://www.ebay.ie/itm/1993-Suzuki-K...item1c35bb90ae

              Search some more and you might find a better priced option even. You do NOT need a key for the parts... you can take it apart with out the key to get what you need.

              Krey
              Have anybody done this and took pictures of it? This is something really worth looking up. Thanks Krey
              Suzuki GSX 750 F -94
              - Custom turbo build
              - On going forever project...
              +Suzuki SV1000S -03 for road
              +Suzuki GSX-R 600 k6 for track

              Comment


              • #22
                Originally posted by IhmeJanneFIN View Post
                Have anybody done this and took pictures of it? This is something really worth looking up. Thanks Krey


                Pictures?... No, don't believe I took those. Probably at the time because it was so simple I didn't think to document the process.
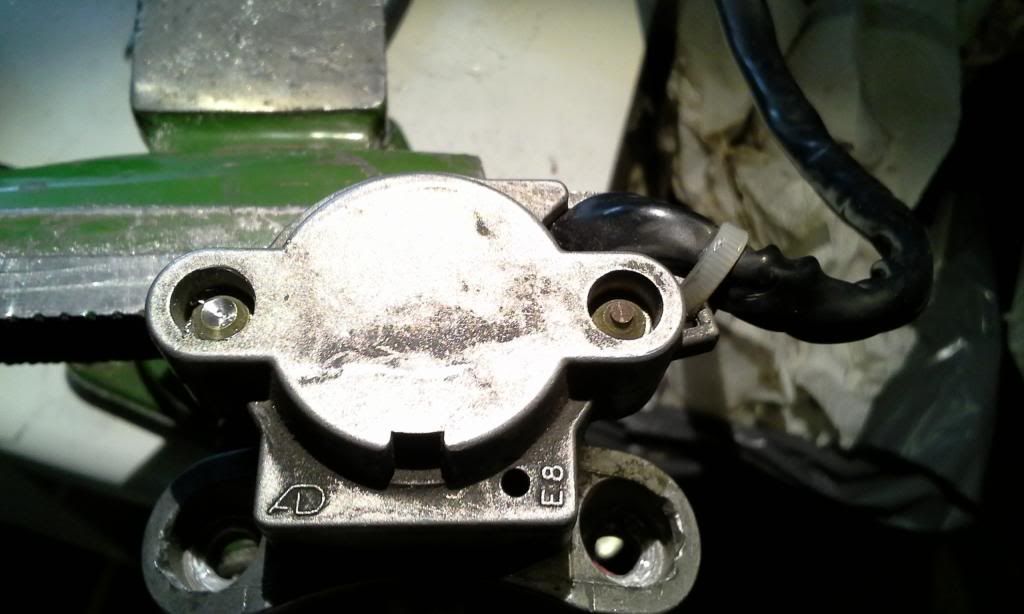

                I have had a lock apart. It's really simple to do. All you need to remember is keep track of the order for the slides in the tumbler. Swap your slides from the old tumler into the new one, and that makes the new switch = to your old with the key. Just bolt it back up instead at that point.


                Ah, here is a thread that is related on disassembly of the lock.


                Krey
                93 750 Kat


                Modified Swingarm, 5.5 GSXR Rear with 180/55 and 520 Chain, 750 to 600 Tail conversion, more to come. Long Term Project build thread http://katriders.com/vb/showthread.php?t=96736

                "I've done this a thousand times before. What could possibly go wron.... Ooops!"

                Comment


                • #23
                  Took the lock apart, and it is useless...

                  So took the lock apart to look inside it, to look if I could use the internals of it as Krey suggested, but it turns out they are gone, the screw is so stuck in there and it has damaged the plates in there, and I damaged those even more, because when moving the lock cylinder the plates were sticking out and they bended. If the lock would have been in the 0 position, it would have been just a walk in the park to tare it apart, I think, but I had it stuck on lock position.
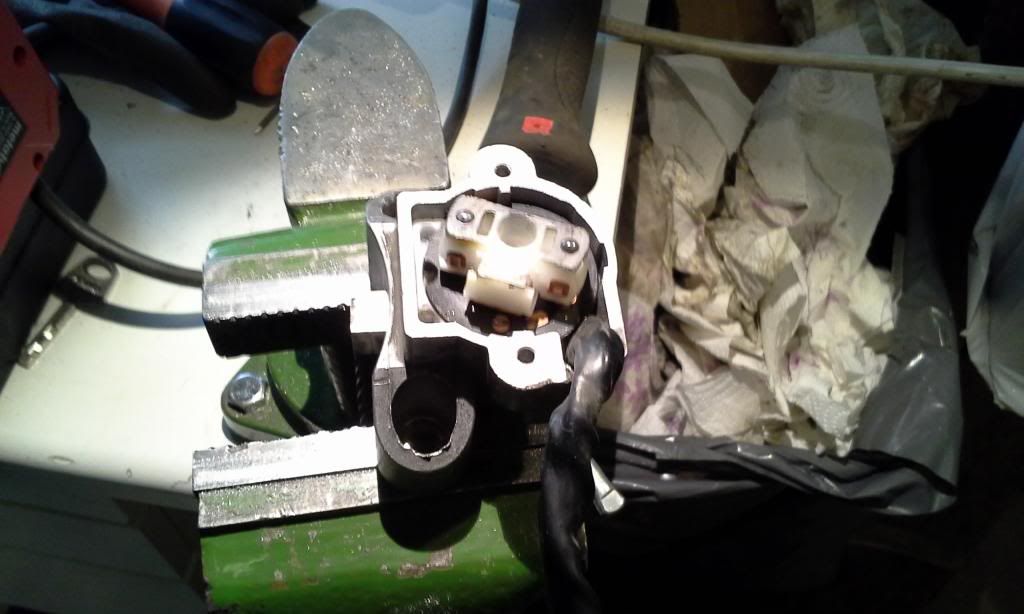
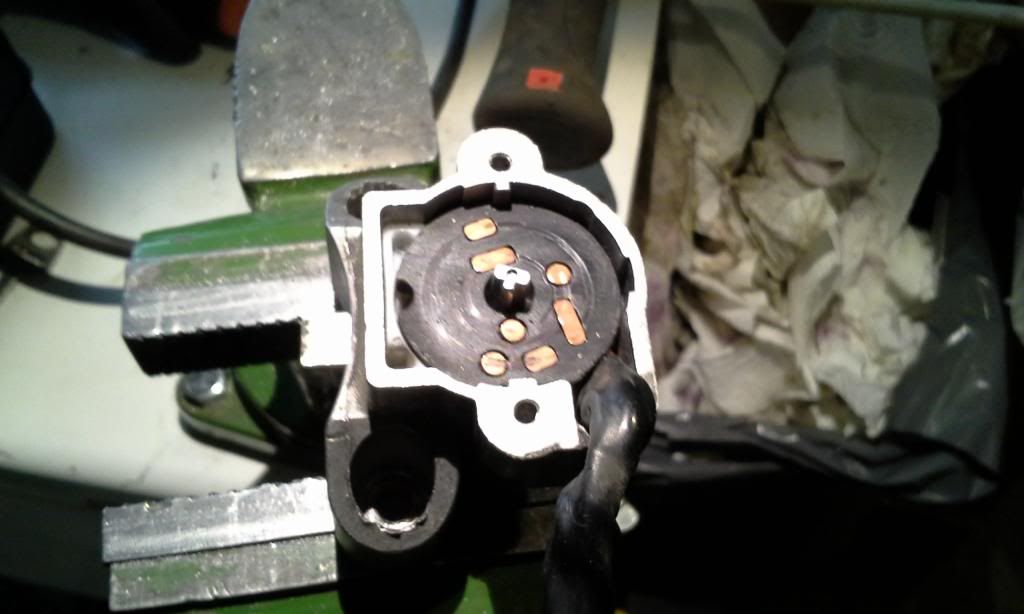
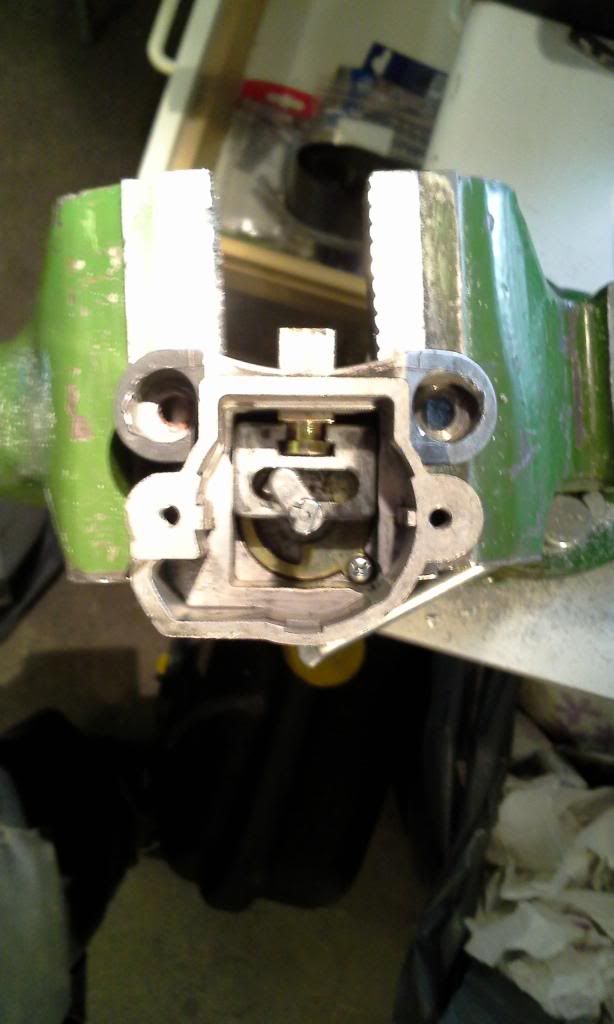
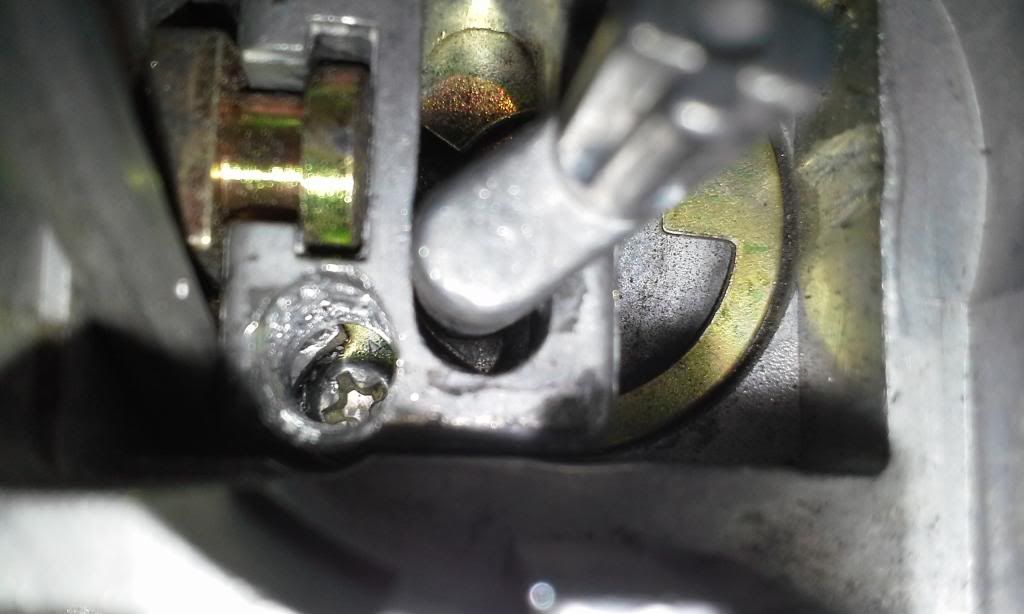
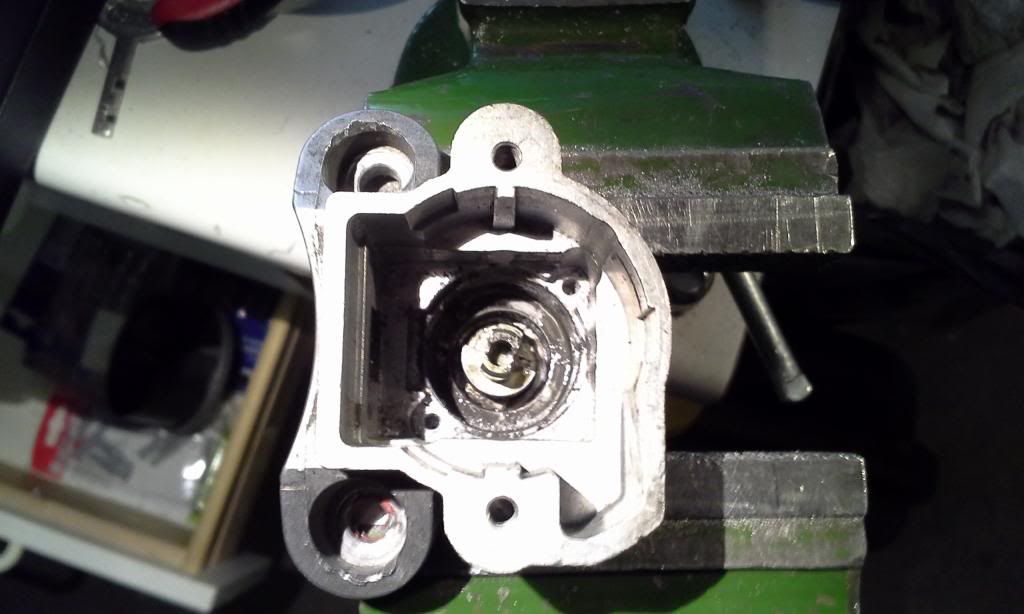
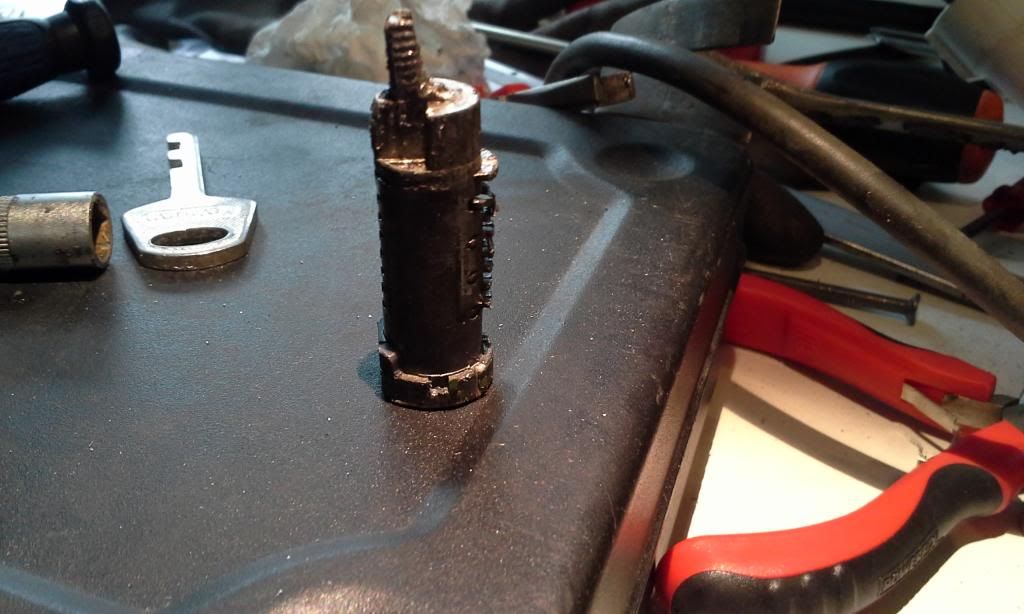
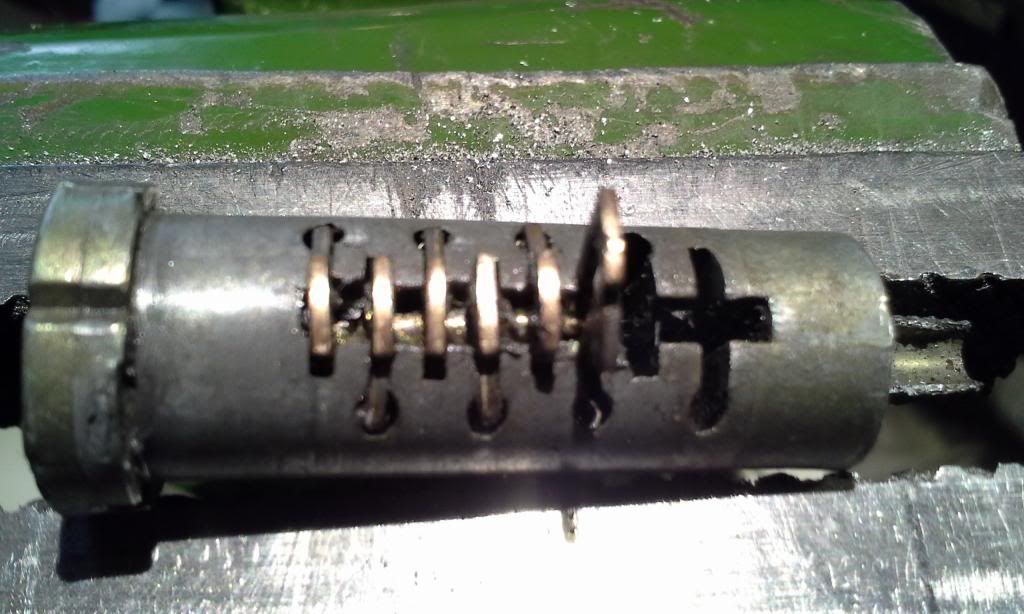
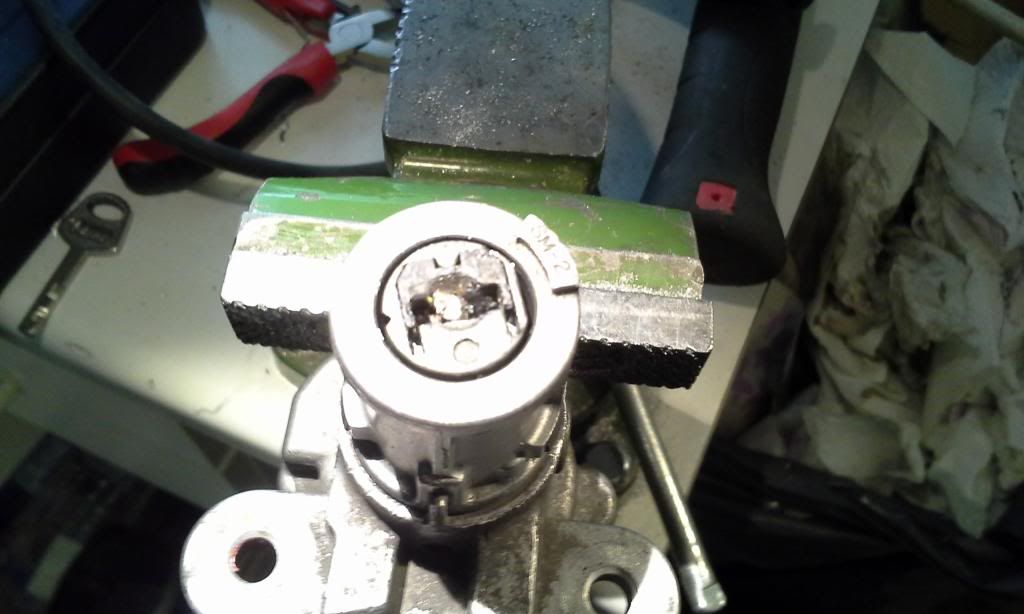
                  Here is some pictures of the lock dismantle, hope some can have some help from these photos, if they have to dismantle ignition lock. I apologize for the very bad pictures, only had my phone with me at the garage. And if you manage to mess something up, I take no responsibility, just want to give some guiding info.

                  On the left side I already started drilling, right side is untouched. Basically you just need to drill a small pit to it, big enough to fit a philips or torx screwdriver and hit it with a hammer and turn ne screw open.


                  Here is how it looks under the cap. White plastic part can only go one way. But from now on place all pieces in right order and right side up so they go in the same way.


                  White plastic removed, this backplate where the wires attach can also go only one way, there are slots where it fits only one way.


                  After this I started to have problems, well, you can see from the picture, probably when in 0 position the lever is in that way that you just lift the square aluminum block out and then slide the steeringlock pin out, but mine was stuck in this position.


                  Then you have 2x philips screws to to take out, other you can see in previous picture, but mine other was under the aluminum block , so what I had to was to drill hole to block the get the screw out. Plan was to fill the hole before reassembly with chemical metal.


                  The middle will then lift of, watch out, it is spring loaded, so don't lose the spring. I don't know if the lock cylinder will now drop out some way, but mine was still firmly stuck, so had to use a socket and a hammer to hammer it out, but before that managed to destroy to cylinder itself .


                  Finally got the cylinder out but it was toast, even before I destroyed it. In this picture there is only one half to pin still on the cylinder, managed to break the other half of it (douh!)


                  When there is no screw or key or anything holding the plates, they will easily fall out, so be careful. Here you can see the screw on the cylinder, so managed to only remove two plates, which other one was damaged, others are stuck because of the screw. Only way to remove plates intact is to slice the cylinder. Cant get the screw out, none of my pliers will hold from the screw.


                  Here is from the top of the switch, you can barely see the screw, and after I removed the plastic piece from the top, screw is only visible about 3mm, no chance to get grip of it, because the other screw which was also in the lock was also very difficult to remove, it was stuck there very good. I also removed the thin metal protector from the top of the switch, can be easily pried off. You don't need to remove the black plastic shell if don't want to. I wanted to see if there was anything interesting under it, well there wasn't.


                  Now I don't have ignition lock on my bike, my "lock & key" is some wires and electrical switch to turn electrics on and off. It is plugged to the green connector, so I can remove it when I don't use the bike to prevent any thief turning the bike on, plus I have a main electrical switch on the bike, so bike is totally electroless after that. Will order a new ignition switch next week, still trying to find an used OEM lock first, preferable a whole three lock system cheaply.
                  Suzuki GSX 750 F -94
                  - Custom turbo build
                  - On going forever project...
                  +Suzuki SV1000S -03 for road
                  +Suzuki GSX-R 600 k6 for track

                  Comment


                  • #24
                    If only you could get that screw out, you could use the plates to confirm what you need to set up the new plates in the next lock you get so the key matches. If they won't come out though, that's ... problematic but still not lost.


                    You can use your key to do the same thing with the new lock switch. Simply use a file to adjust the key plates to match your old key.


                    Krey
                    93 750 Kat


                    Modified Swingarm, 5.5 GSXR Rear with 180/55 and 520 Chain, 750 to 600 Tail conversion, more to come. Long Term Project build thread http://katriders.com/vb/showthread.php?t=96736

                    "I've done this a thousand times before. What could possibly go wron.... Ooops!"

                    Comment


                    • #25
                      Thanks for the info/pics! The ignition switch on the 1100 project I picked up is toast. I think I'll give this a try so I can swap the cylinder to a new switch though.
                      1998 Katana 750
                      1992 Katana 1100
                      2006 Ninja 250

                      2006 Katana 600 RIP - 130k miles

                      Comment


                      • #26
                        Just ordered used set of locks...

                        Ordered today a used set of locks (ignition, tank and seat, with two keys) from Germany for 82€ (~114$). They are for pre 600, and it comes with the upper triple. Btw, that should go to 750 front end, right? Only idea behind changing the upper to 600 is that it would look cleaner with that upper, than my current where I have a aluminum plate to cover the holes after fatbar install. Need no measure thou can I use the current bolt holes to attach the fatbar mounts. Well, they should be here next week, so will see then.
                        Suzuki GSX 750 F -94
                        - Custom turbo build
                        - On going forever project...
                        +Suzuki SV1000S -03 for road
                        +Suzuki GSX-R 600 k6 for track

                        Comment


                        • #27
                          Originally posted by IhmeJanneFIN View Post
                          Ordered today a used set of locks (ignition, tank and seat, with two keys) from Germany for 82€ (~114$). They are for pre 600, and it comes with the upper triple. Btw, that should go to 750 front end, right? Only idea behind changing the upper to 600 is that it would look cleaner with that upper, than my current where I have a aluminum plate to cover the holes after fatbar install. Need no measure thou can I use the current bolt holes to attach the fatbar mounts. Well, they should be here next week, so will see then.


                          Should fit fine.


                          Krey
                          93 750 Kat


                          Modified Swingarm, 5.5 GSXR Rear with 180/55 and 520 Chain, 750 to 600 Tail conversion, more to come. Long Term Project build thread http://katriders.com/vb/showthread.php?t=96736

                          "I've done this a thousand times before. What could possibly go wron.... Ooops!"

                          Comment


                          • #28
                            Little update..

                            Been a long time since I wrote anything here, but the new locks came and were good (the only key was slightly bent but easily straightened). Didn't want to drill any new holes to the 600 upper triple so used the existing threads to attach the risers, only problem was that the holes in the risers were not completely round and as they were designed just to hold a bolt in place. So had to file stainless steel internal hex bolts little smaller in outer diameter (had no power tools in hand at that time) to make them fit and be able to tighten them to he upper triple using it's own threads. After I managed with that step, I mounted the handlebar, and as it moved forward it started to hit my new mirrors and my windshiel. Had to move mirrors a bit forward also, but now they wobble quite much. I also heated and bend the windshiel and now the wind directs much better over my shoulders.

                            Some things I have noticed this summer:
                            My right mirror's ball joint is little loose so it doesn't stay where it is supposed to, damn ~20$ china quality .
                            I have also noticed that handlebar vibrates much more, because there is no more rubber cushions to soften it. But after all I am pleased. The upper triple looks more stylish now as it has no more the aluminum plate to cover the holes that there is on the 750 upper triple.
                            It is a bit of trouble to put key into ignition because the bar is a bit in the way.
                            Changed the front tyre to a new one last week as the old one was unevenly worn and when I say old, I really mean old, as it was 9½ years old tyre Btw, I use Bridgestone Battlax 45 tyres. Last autumn changed the rear tyre and it was about 8 years old at the time, so those are quite long lasting tyres.
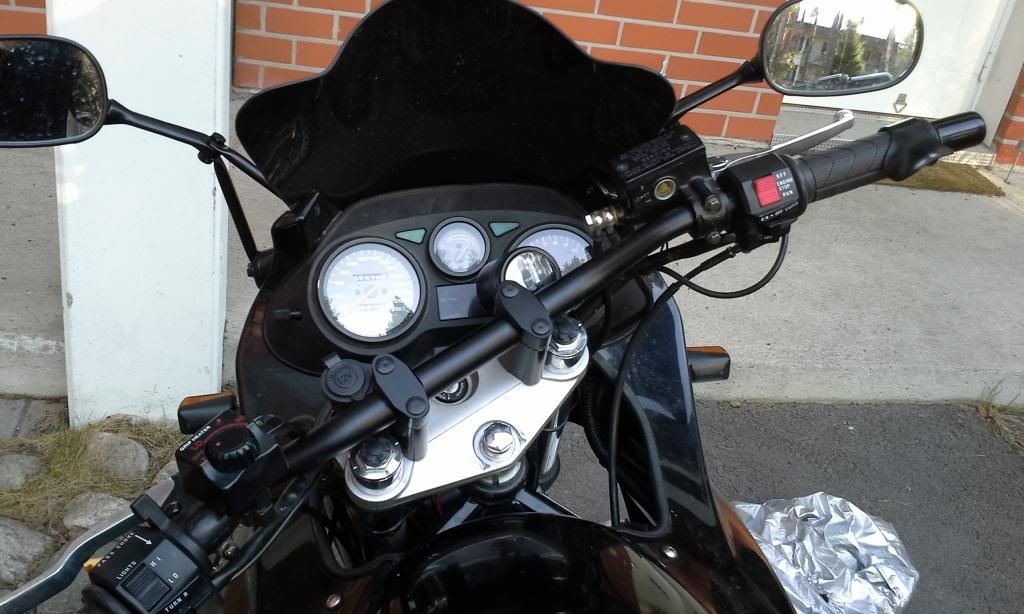
                            The new upper triple


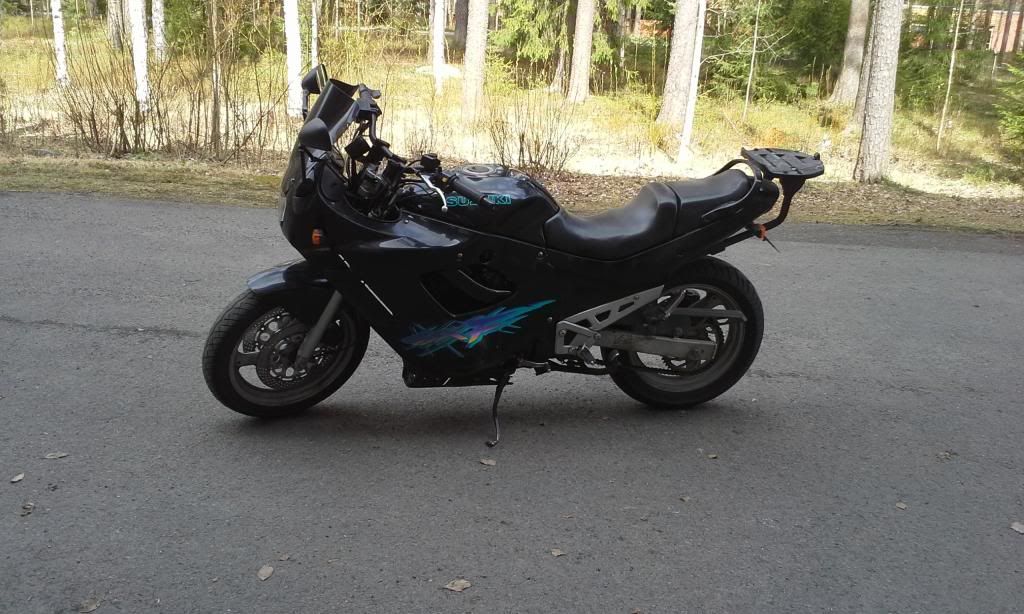
                            Just a to show the side profile (it almost looks handsome )
                            Suzuki GSX 750 F -94
                            - Custom turbo build
                            - On going forever project...
                            +Suzuki SV1000S -03 for road
                            +Suzuki GSX-R 600 k6 for track

                            Comment


                            • #29
                              nice update and pics

                              Comment


                              • #30
                                Very nice bike and pics.

                                Comment

                                Working...
                                X