
 Tweet
Tweet
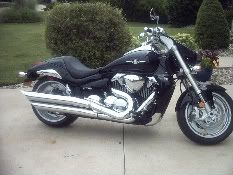
I just spent the last two weekends working on the exhausts that Mojoe brought me.
A tiny bit of sanding and painted them (3 coats) last weekend, and just installed them today (with a bit of swearing as this is my first time).
Tried a few ways, and figures the best way was to get the central pipes in first (attached to the engine). Then get the mufflers on. Then attache the two side pipes.
I did put everything together first to make sure that all the parts would fit easily.
Overall, for a novice I fell all proud to have gotten it done (with the help from the neighbor, my daughter and my wife).
The worse part; 2 bolts were completely seized - ended up stripped (from the old pipes). Had to saw the pipes out of the way so we could get some vise-grips and finally get them out.
The second bad part was that I got this finished, the rain began, so haven't had a chance to "cook" the paint on yet. (and I covered her up) That's going to be tomorrow's plan I hope.
So thanks Mojoe, they look great, and once painted, they looked new.
I started the bike for a moment and it just felt great to have decent "noise/sound" coming from her. And the gaskets were like new (as for as I know)
So I'm going to run her a little bit then recheck all bolts to make sure that everything is nice and thight.


 :
:


Comment