Ad Widget

Collapse

Announcement

Collapse
No announcement yet.
X

Removing Headers

Collapse
  • Filter
  • Time
  • Show
Clear All
new posts

  • Removing Headers

    After the work I've done on the bike this off season (and some of riding season) I can't justify putting it all back together with the slightly rusted/faded headers. I have some questions before I start into it:

    1 - My first plan was to use my impact driver in an attempt to get the flange bolts out. Problem is, I don't have the right size piece that fits into the flange bolt. Are additional sizes for these drivers available at Sears, napa??
    2 - Is it a bad idea to try an impact wrench?
    3 - How often do the exhaust gaskets need replaced?
    4 - The Ivan's jet kit is already installed. If I open up the welds, is it likely that I will have to adjust the carbs? (Hindle 2.25" slip on)
    5 - How much is the low end torque reduced? Has anyone become disappointed with the loss of low end torque after doing this and wish that they wouldn't have?
    -2000 "750"


  • #2
    Hey Cheriff. I'm about to do this in a couple of weeks. From what I've searched....

    1 & 2 - reach CP's how-to on http://www.motorcycleanchor.com/katana/header.html

    Remove belly pan if installed on motorcycle, as if you were doing an oil change. Collect all the bolts in a zip-lock bag so they can't get misplaced.
    Unbolt header flange bolts where the header meets the block. Collect them up in a zip-lock bag so you don't misplace them. If the bolts provide any serious resistance to turning, don't strip out the allen head -- instead you can try these tricks in order:
    (A) Using a pair of vice grips, grasp the outside of the bolt head and try turning using a bit more force. If this doesn't work, stop and use the next trick instead (don't shear the bolt off!);
    (B) Take an impact driver ($9 - $30 at any auto parts store & through
    HarborFreight), every Katana rider who does their own work should have one), set it to "tighten" (clockwise) and smack it lightly with a hammer a couple times (this should break the bolt's threads free of any corrosion). Then set it to "loosen" (counter-clockwise) and smack it as hard as you can. This should start the bolt backing out. If it just starts to eat up the allen head on the bolt, go to the next step instead.
    (C) Remove any fairings that might be affected by the hot air rising off the flame. Take the torch and light it. Place the hot spot of the torch onto the bolt or directly next to it and heat for approximately 15 - 20 seconds, then remove the heat. Allow to cool some (5 minutes?) then douse with WD-40 or other penetrating oil. The heat should expand the bolt, then contract it when doused, pulling the penetrating oil into the threads. Doesn't always work, can be done repeatedly. Use trick A or B again after doing this a couple times.
    (D) If you do snap or shear off the bolt, you're going to need to use a bolt extractor after the heads are out of the way. It's a PIA and the reason I recommend everyone coat their header bolts with high-temp anti-seize when they first acquire their bike, as well as any time you drop the headers.

    3 - Only when you remove the headers?? So only once probably.

    4 - No, it won't make that much difference.

    5 - No, it won't make that much difference.

    This is what I was planning on doing anyway, so if anyone else has other ideas pls share.

    Comment


    • #3
      I have an impact driver, but not the right bit. I'm guessing that a breaker bar, allen bit, and rubber hammer would also probably do the trick.
      -2000 "750"

      Comment


      • #4
        Go buy the right bit. Period. Actually, go get a metric allen-key socket set from Sears -- there are other things on the bike you need them for anyway, such as any time you need to set an allen-head bolt with a torque wrench. Sears item# 00934448000 is what I'd basically recommend (unless you have tons of $$, in which case grab their item #00935050000).

        Carbs - no rejetting, but you ought to resync after grinding out the header welds.

        Penetrating oil - Kroil rules supreme, PB Blaster is a decent second. If you see any rust or get major resistance, use one of the two and let it sit a while (spray, go away, spray, go away).

        DO NOT TRY A BREAKER BAR or you'll almost assuredly snap off the bolts -- the force really needs to be rotating around the center. An impact driver or impact wrench is fine. If necessary, ride over to the local automotive mechanic and pay him to get them started, then ride home and finish the job.

        ALWAYS COAT THE BOLTS WITH HIGH-TEMP ANTI-SEIZE BEFORE REINSTALLING!

        ----

        Oh, and based on the original question (unasked) -- don't use paint on the headers. It's a formula for frustration unless you have a sand blasting/bead blasting booth. Every last bit of rust and oil and grime must be off the headers before paint will stick properly and I've yet to see someone without a blasting booth get it right. Give 'em to a powdercoater who does high-temp coatings or ceramic coatings instead...

        Cheers
        =-= The CyberPoet
        Last edited by The CyberPoet; 04-30-2009, 01:29 AM. Reason: typo, clarity
        Remember The CyberPoet

        Comment


        • #5
          when ya got the tool....ya got the talent!!! The moment you start trying to make do....you make WORK!
          Joker
          The newest addition to the Family!
          sigpic
          stop by the garage for a better look!

          Comment


          • #6
            Originally posted by The CyberPoet View Post
            Go buy the right bit. Period. Actually, go get a metric allen-key socket set from Sears -- there are other things on the bike you need them for anyway, such as any time you need to set an allen-head bolt with a torque wrench. Sears item# 00934448000 is what I'd basically recommend (unless you have tons of $$, in which case grab their item #00935050000).


            Cheers
            =-= The CyberPoet
            Ok now I feel kind of stupid. I have the Sears item #00934448000 but don't see how to get it to attach to my impact driver. I know I have an adapter that on one end you can attach a socket but the other side is too small to fit the driver. I'm guessing I will be able to find a larger hex size one of those adapters at Sears.?.

            CP,
            Regarding the paint vs. coat, I would to get them coated in something (ceramic, chrome, ect) but simply dont have the cash to do it. I have been able to acquire a heroic amount of Kat stuff since November and simply can't justify spending anymore this offseason (maybe next winter, but not now). I've spent ~$650 just on products that you sell, not to mention the Hindle, paint work, galfer rotor, tail swap, ect... I suppose if I waited longer I could do it, but I want to ride this thing already. The picture below shows the condition of my headers. There is no flaking, and I need to see how much of this discoloration will just clean off.


            Maybe the best thing to do is leave it alone until next winter and then do it right. 
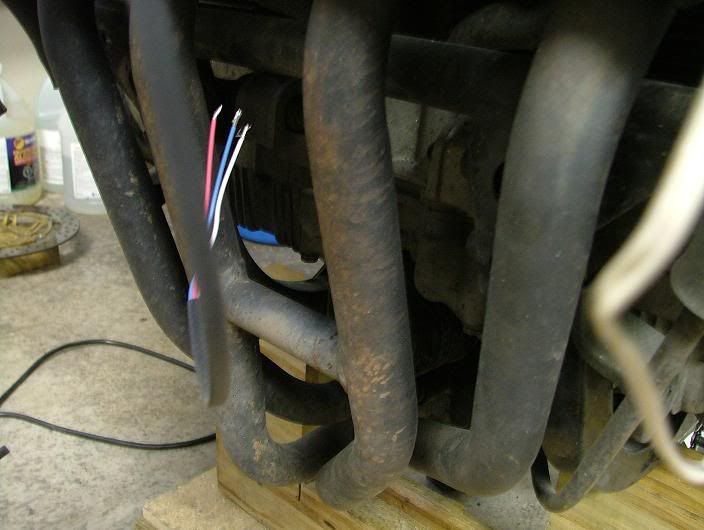
I would still need to remove the headers so I can take them to Midas so they can shape up the end to better fit the new midpipe.
            -2000 "750"

            Comment


            • #7
              I think that Marc was assuming when you said impact driver, you meant air impact driver... but I could be wrong.

              What I did for the stuck allen heads on the Kat... was to use my drill in reverse with the clicker setting at like "1." Provides a similar effect to using an impact gun without the extra scary chance of overpowering and rounding out the allen head.

              I slowly moved the setting higher and higher until it started to move.

              One did end up rounding a but, but I was able to get it with a screw out kit.

              And yes, +10000 on the anti-seize. There's a very good chance that at the end of the season I'll undress the new trumpet and put anti-seize on it's header bolts.
              -Steve


              sigpic
              Welcome to KatRiders.com! Click here to register
              Don't forget to check the Wiki! http://katriders.com/wiki

              Comment


              • #8
                I'm confused....

                The exhaust bolts aren't THAT tight to need an impact.

                I rounded one off on my 91 because I didn't soak the bolts.

                1. Soak the bolts in Aerokroil

                The Industry Leader in Professional-Grade Penetrating Oils, Lubricants and Grease. Our family of brands includes Kroil and Super Lube®.


                It BEATS anything else by a mile.

                But since your bike isn't 20 years old, try any other penetrating oil if you already have something.

                Soak the bolts several times and let sit.

                2. Use the correct torx bit, an extension and a ratchet. Remove the bolts and the header.


                Your header doesn't look to be in bad shape at all. I bet if you ask around you can find someone who will sandblast it for cheap...

                Then paint it with a high heat coating and call it done...and ride.

                Comment


                • #9
                  I am putting together a bikebandit order and am thinking I should include a couple replacement bolts, just in case.

                  Thanks for the help guys. Any other input on needing to replace the gaskets? I THOUGHT I read that they usually don't need replaced, but Rob's post suggests otherwise. They are ~$4 each, so I don't want to spend $16 for something I won't need.
                  -2000 "750"

                  Comment


                  • #10
                    You should be able to re-use them.... worst case scenario is that you put it back together, one leaks, and you order some. Just don't go for inspection that day.
                    -Steve


                    sigpic
                    Welcome to KatRiders.com! Click here to register
                    Don't forget to check the Wiki! http://katriders.com/wiki

                    Comment


                    • #11
                      Originally posted by Cheriff View Post
                      Ok now I feel kind of stupid. I have the Sears item #00934448000 but don't see how to get it to attach to my impact driver. I know I have an adapter that on one end you can attach a socket but the other side is too small to fit the driver. I'm guessing I will be able to find a larger hex size one of those adapters at Sears.?.
                      It depends on the impact driver... typically all come with a square drive of some sort -- some come with a 3/8" square drive, some come with a 1/2" square drive (I always check before I buy and get the 3/8"). If yours has a 1/2" square drive, use a 1/2"-to-3/8" step-down adaptor (see sears item #00904259000 for what I mean).

                      Originally posted by Cheriff View Post
                      CP,
                      Regarding the paint vs. coat, I would to get them coated in something (ceramic, chrome, ect) but simply dont have the cash to do it.
                      Header ceramic or powder-coating with sand-blasting is $150 (high temp powder) - $175 (ceramic) in my area; sand-blasting by itself runs about $25 - $40 depending on who I use (normally my powder-coater). Even if you insist on painting them, pay to have them blasted, and wear cotton gloves when you pick-up the piece before painting, then wipe it down with alcohol or ketone before actually spraying to remove any additional oils that may have settled or gotten on it during the hand-off. Make sure you primer or seal them as soon as you get 'em home.

                      One of the other "reasonably good" options is much simpler: use a tannic-acid based rust converter on the pipes right where they sit. These converters change rusted iron to iron tannate, aka magnetite and hematite, which won't rust any further. Since they'll only penetrate where the paint or coating is already gone, and they leave the metal black, you're not likely to notice a major difference except the rust will be gone...

                      Meanwhile, an old wives tale says that you can simply rub the rusted areas with crumpled-up aluminum foil diligently to remove the rust; aluminum has a much higher affinity for oxygen atoms than steel (pulling it off the mild steel), while aluminum is also softer than mild steel (thus not scratching the steel). Rub, refold/recrumple, rub more. How much effort it will require to work and how well it will work is beyond me...

                      Cheers
                      =-= The CyberPoet
                      Last edited by The CyberPoet; 04-30-2009, 11:24 AM.
                      Remember The CyberPoet

                      Comment


                      • #12
                        I used a wire wheel on a air cut off tool to clean the rust off mine, and rattle canned high temp paint on it. It's still holding good all over atm. If your looking for something temporary, I figure I'll get about a year of them before looking at redoing them. I'm not expecting to be using them that long though.

                        Krey
                        93 750 Kat


                        Modified Swingarm, 5.5 GSXR Rear with 180/55 and 520 Chain, 750 to 600 Tail conversion, more to come. Long Term Project build thread http://katriders.com/vb/showthread.php?t=96736

                        "I've done this a thousand times before. What could possibly go wron.... Ooops!"

                        Comment


                        • #13
                          Cheriff, look up Item# 00947641000

                          From the picture, it looks like the screw driver "bit holder" should just pop off.
                          -Steve


                          sigpic
                          Welcome to KatRiders.com! Click here to register
                          Don't forget to check the Wiki! http://katriders.com/wiki

                          Comment


                          • #14
                            I just removed my header bolts last weekend on a 2000 750. This is what I did.

                            1) "Don't spoil it Kroil it". What's that mean? I put ~10-20 cc of Kroil penetrating oil on each bolt a day before removing. It really seems to work.
                            2) For the 6 middle bolts I "hammered" in the hex driver into the bolt head. Put the hex driver into the bolt and gave it a couple of good hits. This makes sure the driver is all the way in and may loosen the bolts.
                            3) Switch to an impact driver (not an air impact driver) and a couple of swings.
                            4) Try racheting them out. If no luck back to the impact driver

                            I had a short hex driver so I could not use it on the outside bolts, the oil cooler bracket is in the way. I should have gone and bought a longer set but I used a cut L wrench.

                            8 for 8 came out!

                            If it was my car I'd be 6 for 8 and still swearing at it.

                            TD

                            Comment


                            • #15
                              Originally posted by steves View Post
                              Cheriff, look up Item# 00947641000

                              From the picture, it looks like the screw driver "bit holder" should just pop off.

                              Remember I said I felt stupid because I couldn't understand what I was missing?? Thanks Steves for showing me a picture of my exact tool so I could see that the top piece comes off and exposes a 1/2" socket base. That is what I wasn't understanding. I thought it only accepted those hex inserts. Man... I think its time for a nap.

                              ______________
                              So it looks like on the 750 the oil cooler needs removed.?. Not a big deal.. been there before - just throw in a couple of new rubber washers to the BB order.


                              Right now I am thinking I will just take the header off to shape up the end the mid-pipe slips into and maybe clean up the welds. Just wait 7 more months and do the header up right. One more season isn't going to do much damage to it.
                              Last edited by Cheriff; 04-30-2009, 12:10 PM. Reason: Automerged Doublepost
                              -2000 "750"

                              Comment

                              Working...
                              X