
 Tweet
Tweet
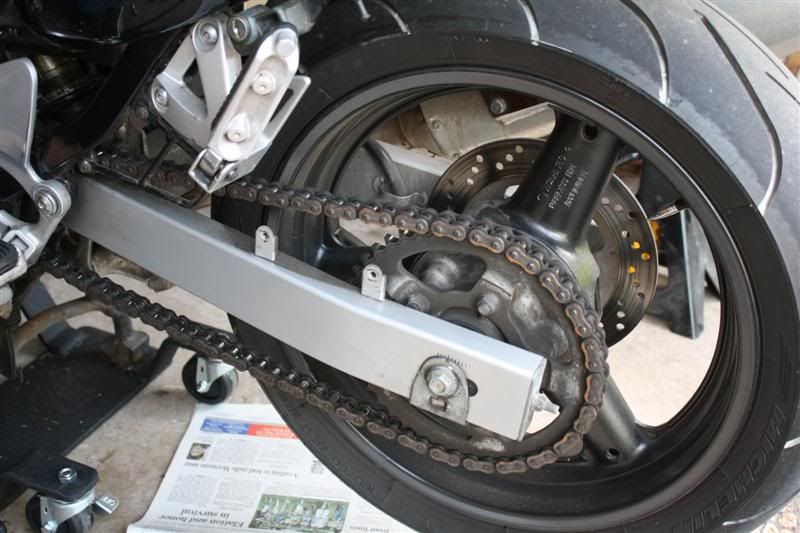
Chain starting to look a little beat, stretched, or ugly?
I've revisited this write up, originally completed by SKLN2 with new pictures.
First off, you want to make sure you have the right parts (assuming you want to keep things stock):
118 links of 530 size chain plus a master link -- either rivet-style or clip-style. See other posts about the finer points of using either.
Parts listings list the 600 as a 15/47, and the 750 as a 15/45. make sure to do your math, and understand which chain and sprocket set you want for your application.
Now that you have parts ordered, you need to gather your tools.
A set of metric box wrenches from 8-17mm.
A 3/8" or 1/2" drive metric ratchet set with common sizes up to 22mm.
A torque wrench with a drive compatable to your sockets and capable of 9.5 - 87 foot/pounds. I have a 1/2" drive one, for instance.
A pair of snap-ring pliers.
A 32mm socket with appropriate drive to match your socket or an adapter.
A set of metric allen wrenches with at least sizes 3-6mm
A 6mm metric allen socket to match your ratchet.
Phillips head screwdriver.
A chain riveting tool (if you opted for the rivet-type master link)
Some engine degreaser.
Some quality grease.
Some thread lock. "Loc-tite." "BLUE"
If you are using a chain tool, like the motion pro, head over to their website and get their how to
Before you start, remember to remove the factory preservative grease from the new chain by soaking it in kerosene or mineral spirits and brushing off the grease with a small paint/scrub brush, its not intended for lubrication, and will create a mess on the bike if not removed and replaced with proper chain lube after installation
So put your bike up on its stand(or a pitstand) and let's get started!
For the purposes of this article, we will assume that you ALREADY know how to get your plastics off!
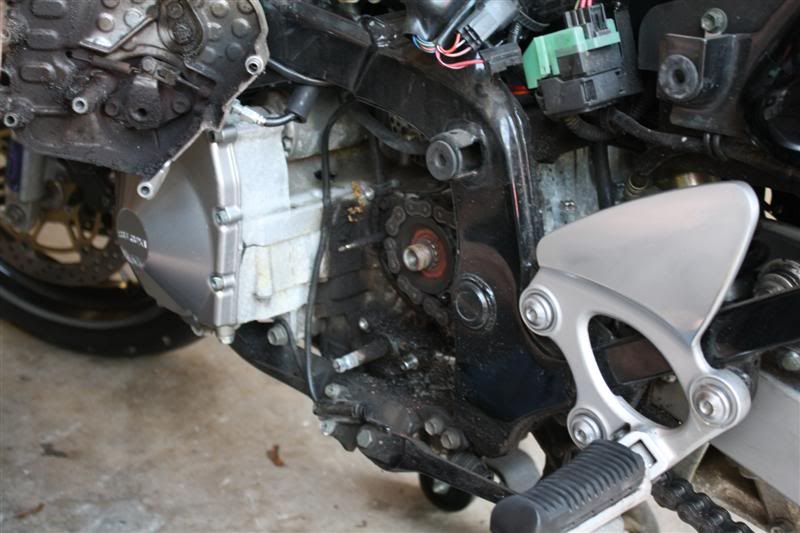
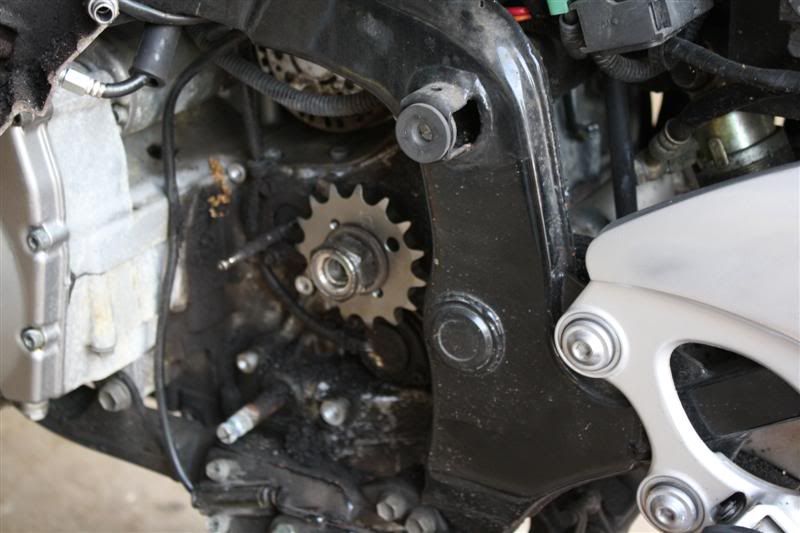
Now things should look like this. To remove the sprocket cover, first the shift lever must come off. Use either a 10mm socket or 10mm box wrench to remove the bolt that holds the front half of the gear shift linkage. Now, use your snapring pliers to remove the snapring that holds the shift lever on. Remove these parts together. No need to disconnect the linkage from each other. You can use a marker to mark the position of the shifter to make it easier to line back up during reassembly.

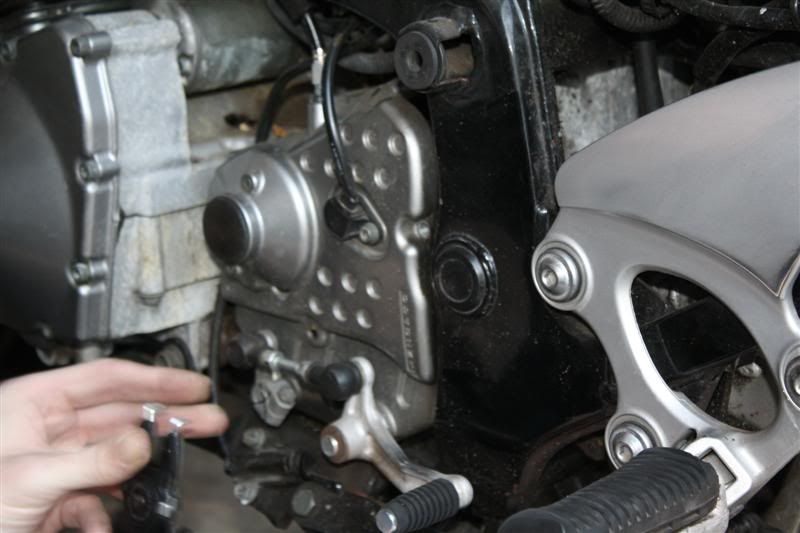
Now use your 5mm allen key to remove the bolts from the sprocket cover. They have threadlock on them so they will be snug. Keep in mind what length bolt corresponds to what position on the sprocket cover. They are different lengths. Use a piece of cardboard with holes in it to remember what goes where.
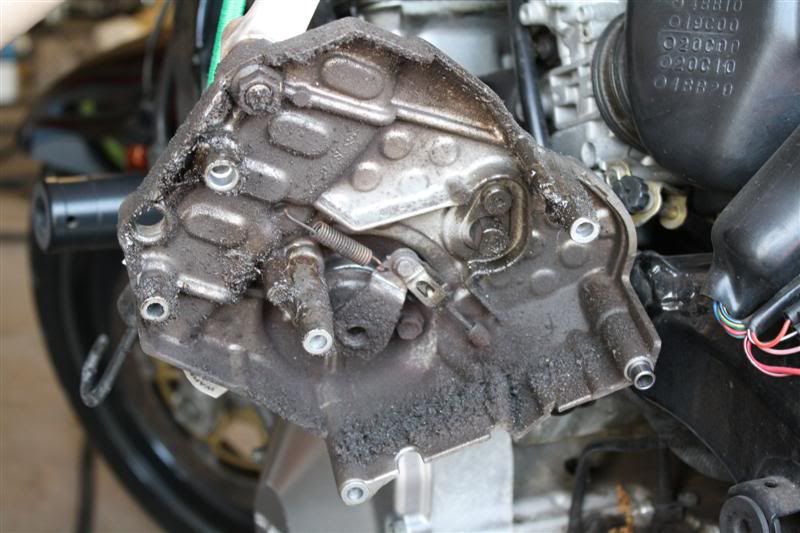
We Hung the sprocket cover off the handlebars with a bungee strap. If you were so inclined, now would be the time to CLEAN it.
Remove the small locking screw that retains the sprocket nut.
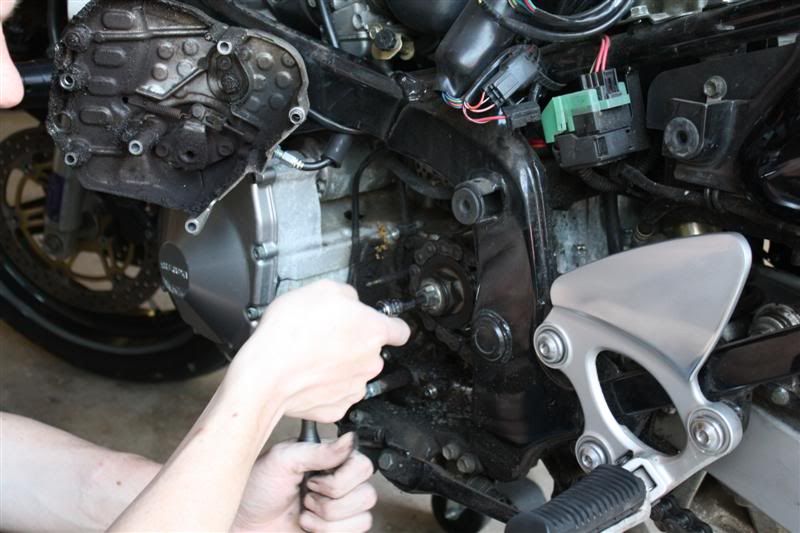
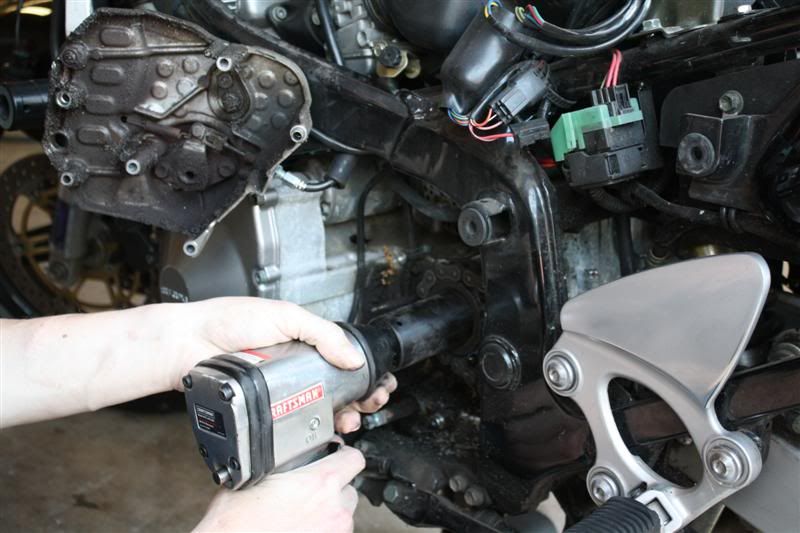
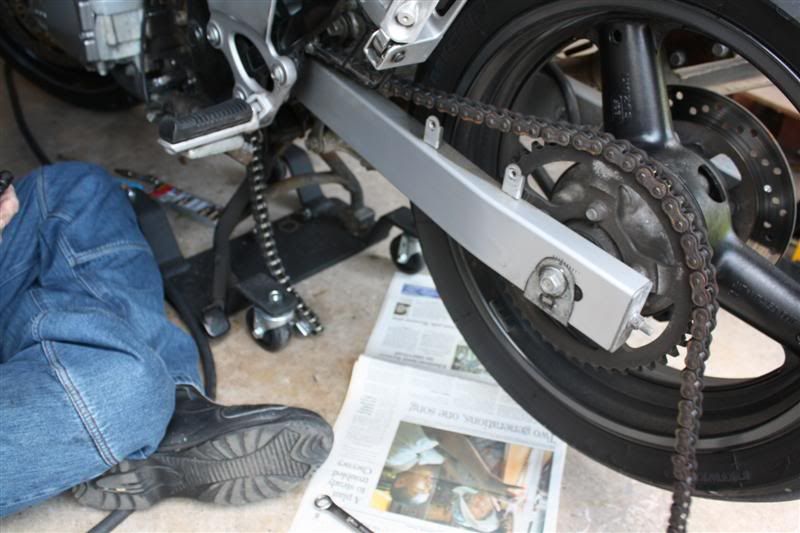
Using your 32mm socket on either a breaker bar or impact wrench loosen the front sprocket nut while appling the rear brake to hold the wheel from moving (engine compression alone won't hold it -- this is why we do the front sprocket before removing the chain), and loosen the sprocket nut by turning it counter clockwise (standard right-hand thread). Leave the nut and front sprocket on for the time being.
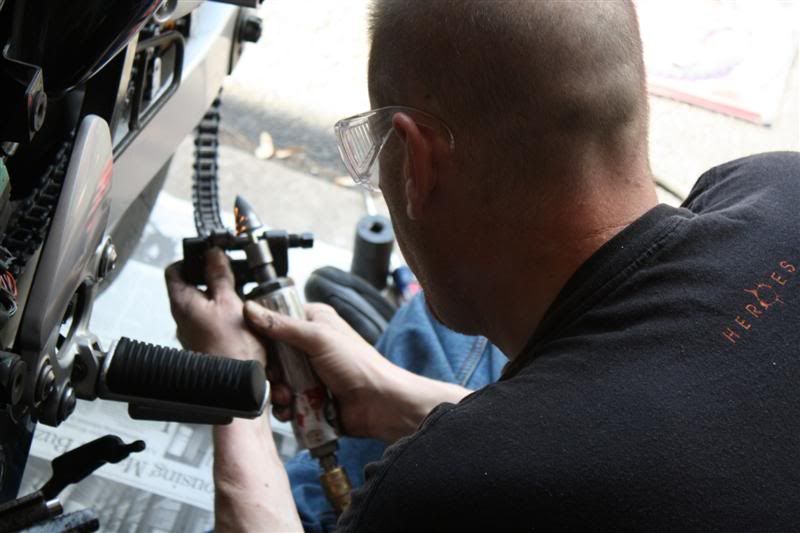
Now we will cut, and break the chain.
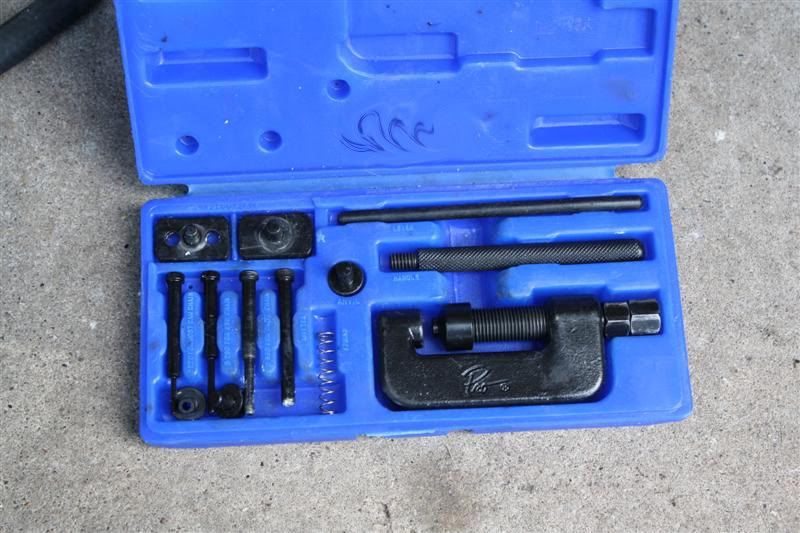
We are using a Motion Pro chain tool
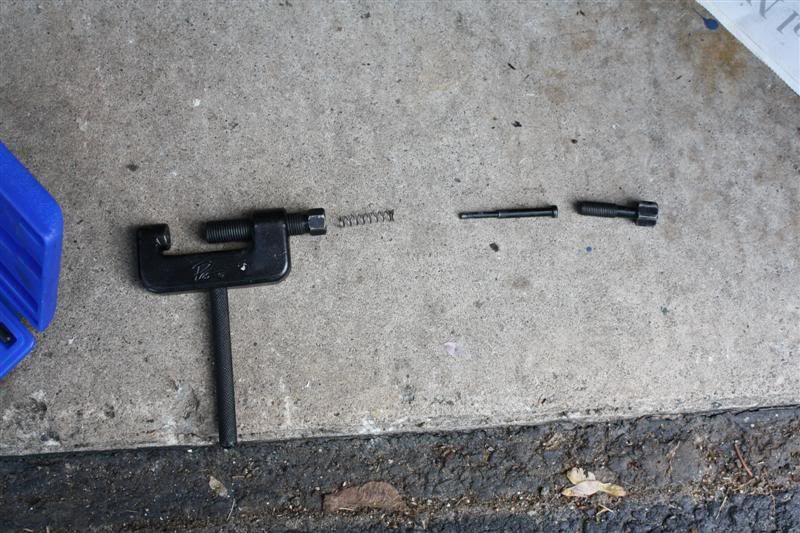
Configure the tool to break the chain with the breaker pin inserted.
If you are going to break the chain, first grind the head off the first pin that catches your fancy.
Grind it down, nice and smooth

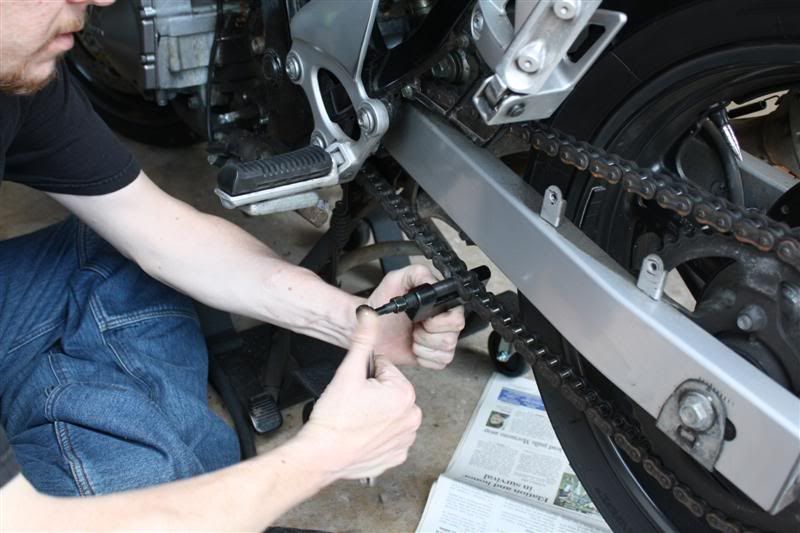
Then place the breaker over the rivet, using the back side of the chain breaker to center it. In this case we WANT the rivet to go straight through... so DON'T use the anvil!
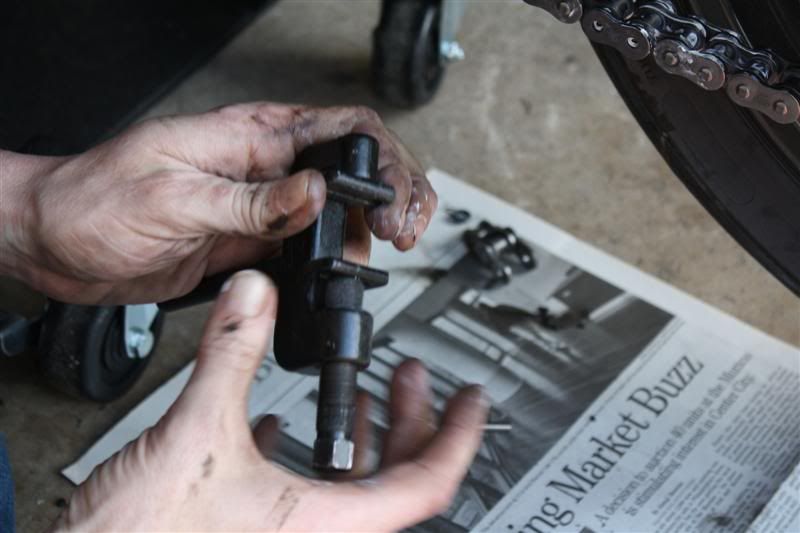
Once you've popped the rivet out, the chain should easily fall apart
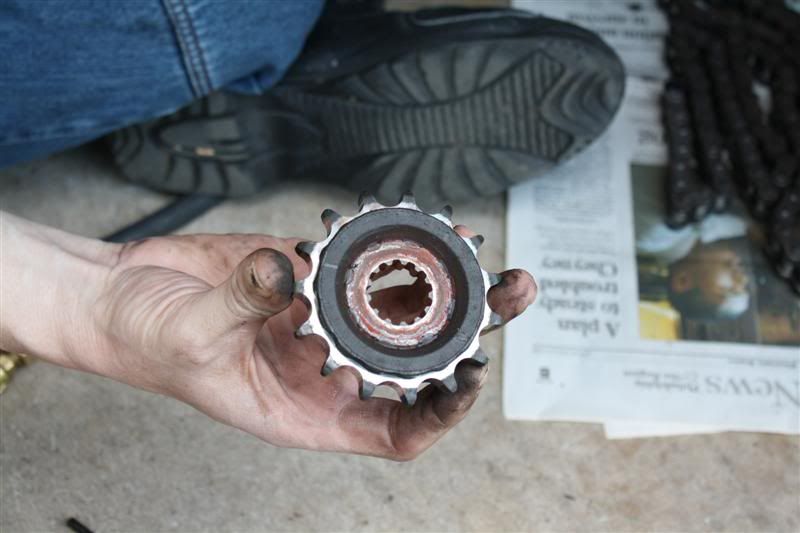
Then finish taking the front sprocket off, and inspect
Now, pull your rear wheel. Remove the cotter pin or in this case lynch pin from the rear castle nut, and take the bolt all the way off. You may need to tap the axle with a hammer. Watch out for the spacers! And carefully lift the wheel up, and out of the rear brake caliper.
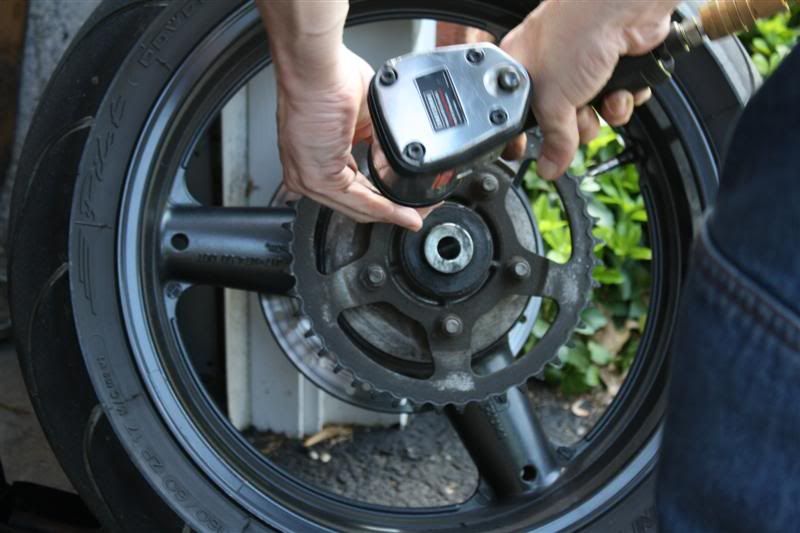
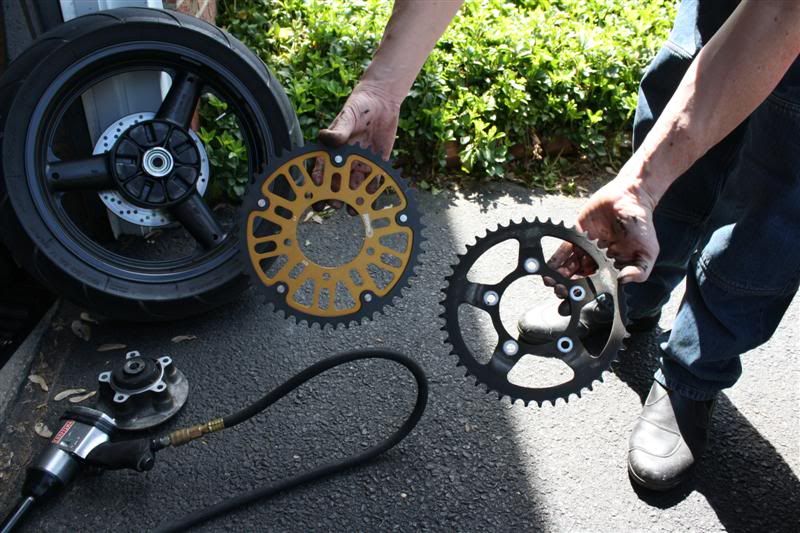
Now take that old rear sprocket off. Again our friend the air impact helps ease things along
Now is an EXCELLENT time to inspect the bearings on the rear wheel. Pull the sprocket carrier off the cush drive, and let the sprocket studs loose. The grease on the back side should be clean (and present). Watch out, there's a spacer in there too.
Old on the right, new on the left!
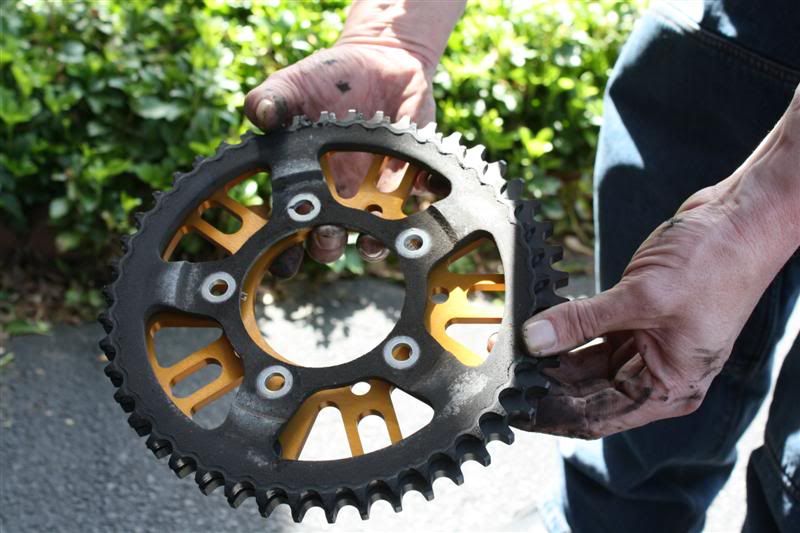
Some sprocket on sprocket action!
Now basically do the reverse but with your new sprocket. The sprocket bolts have lands that fit in grooves that are on the carrier. Make sure these line up before you start snugging anything down. Tighten them to 36 ft/pds in a star pattern.
Place the sprocket carrier back onto the wheel making sure the tabs line up with the cush drive rubbers.
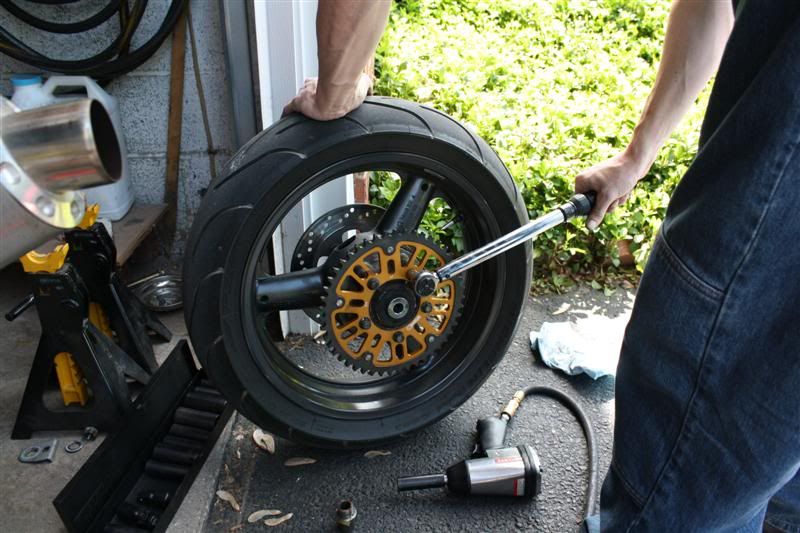
Now reinstall your wheel in the reverse order you took it off.
Now we can return to the front sprocket. Put the new front sprocket on, and loosely thread the nut.
Using your new chain, place it around your rear sprocket and run it on the underside up to the front sprocket. Wrap it around the front sprocket in a manner so that it won't fall off and that there are as many teeth engaged by the chain as possible.
Now, if your new chain wasn't pre-cut... now is the time to cut it to size. If you didn't change gearing it should be 116 links for a 750, and 118 links for a 600. Check out http://www.gearingcommander.com if you aren't sure what lengthe chain you need.
After test fitting the chain, we cut it down, again following the same process as above
Now, to install a rivet link, we swap out the breaker pin and put the press plates on.
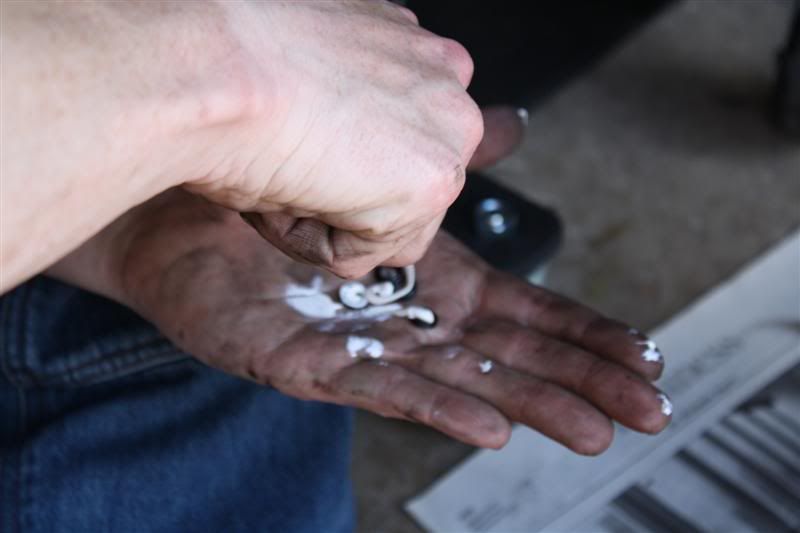
Then carefully lubricate the 4 new o-rings in the master link kit with the grease in the package that came with it
insert two o-rings on to the master link, then connect the chain with the links.
Put the two remaining o-rings on, and then the front plate.
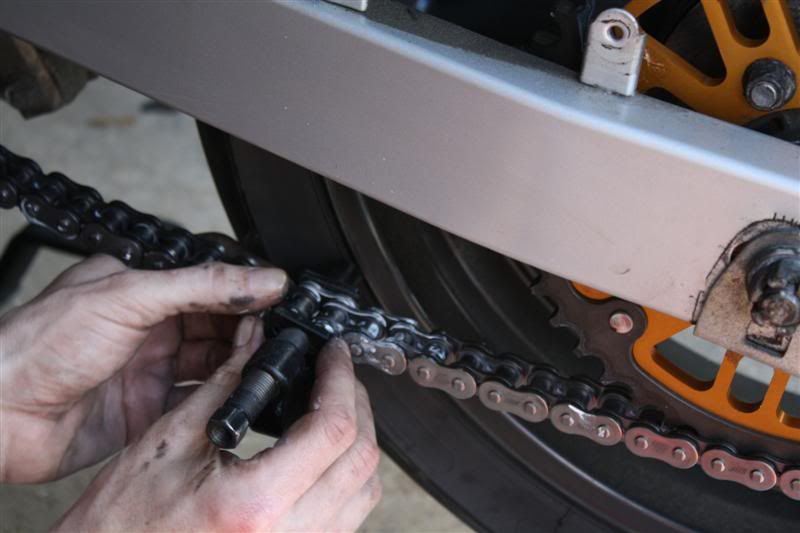
Then slowly and carefully tighten the press plates until the rivets come through the plate.
Once the pins are through the plate, change the chain tool from press plates to rivet head.
Make sure you have an anvil on the back side rivet, or it will push the rivet through just like when we broke the chain!
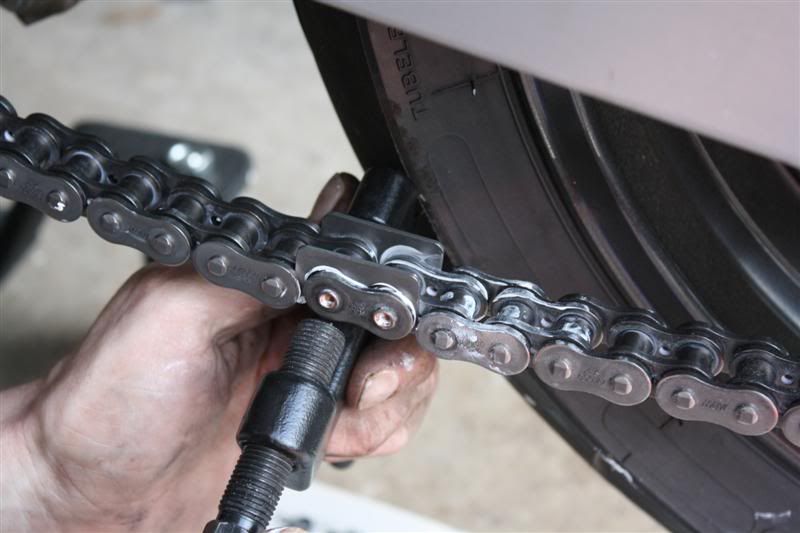
After you are done riveting the chain, use a screw driver and vice grips to CAREFULLY remove the spacer plates from insude the chain.
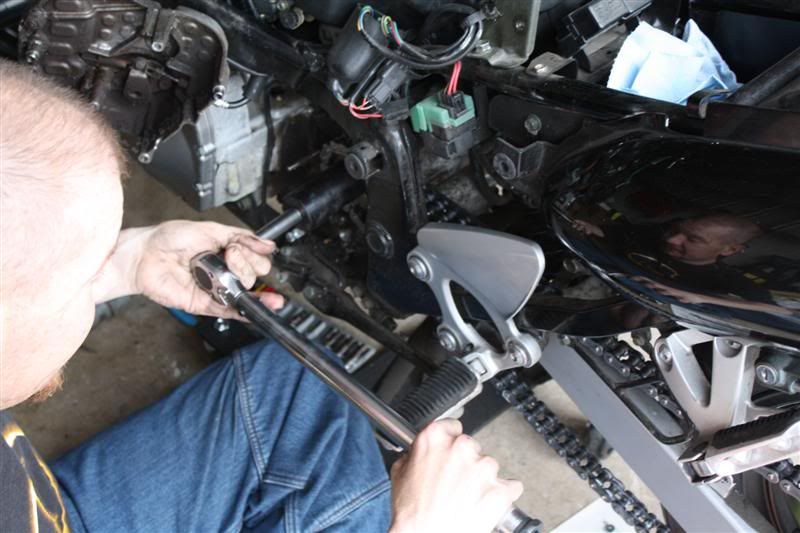
Using your torque wrench and 32mm socket, hold the rear brake to keep the wheel from moving and tighten the front sprocket nut to 83 ft/pd.
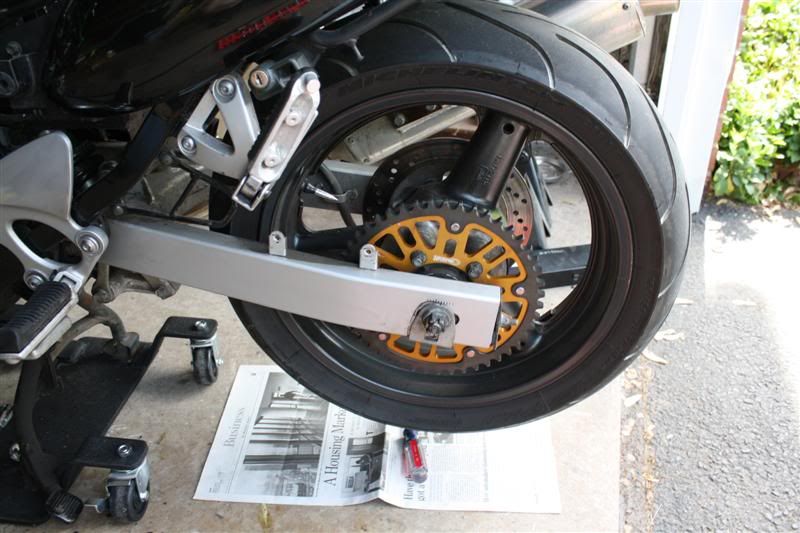
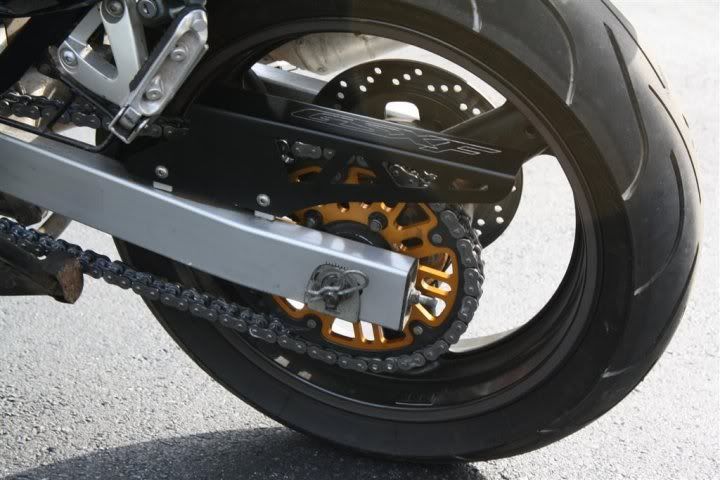
Now, button everything back up... and go for a ride... then home to enjoy a frothy adult beverage.
Don't forget to lube your chain!!!
I've revisited this write up, originally completed by SKLN2 with new pictures.
First off, you want to make sure you have the right parts (assuming you want to keep things stock):
118 links of 530 size chain plus a master link -- either rivet-style or clip-style. See other posts about the finer points of using either.
Parts listings list the 600 as a 15/47, and the 750 as a 15/45. make sure to do your math, and understand which chain and sprocket set you want for your application.
Now that you have parts ordered, you need to gather your tools.
A set of metric box wrenches from 8-17mm.
A 3/8" or 1/2" drive metric ratchet set with common sizes up to 22mm.
A torque wrench with a drive compatable to your sockets and capable of 9.5 - 87 foot/pounds. I have a 1/2" drive one, for instance.
A pair of snap-ring pliers.
A 32mm socket with appropriate drive to match your socket or an adapter.
A set of metric allen wrenches with at least sizes 3-6mm
A 6mm metric allen socket to match your ratchet.
Phillips head screwdriver.
A chain riveting tool (if you opted for the rivet-type master link)
Some engine degreaser.
Some quality grease.
Some thread lock. "Loc-tite." "BLUE"
If you are using a chain tool, like the motion pro, head over to their website and get their how to
Before you start, remember to remove the factory preservative grease from the new chain by soaking it in kerosene or mineral spirits and brushing off the grease with a small paint/scrub brush, its not intended for lubrication, and will create a mess on the bike if not removed and replaced with proper chain lube after installation
So put your bike up on its stand(or a pitstand) and let's get started!
For the purposes of this article, we will assume that you ALREADY know how to get your plastics off!
Now things should look like this. To remove the sprocket cover, first the shift lever must come off. Use either a 10mm socket or 10mm box wrench to remove the bolt that holds the front half of the gear shift linkage. Now, use your snapring pliers to remove the snapring that holds the shift lever on. Remove these parts together. No need to disconnect the linkage from each other. You can use a marker to mark the position of the shifter to make it easier to line back up during reassembly.
Now use your 5mm allen key to remove the bolts from the sprocket cover. They have threadlock on them so they will be snug. Keep in mind what length bolt corresponds to what position on the sprocket cover. They are different lengths. Use a piece of cardboard with holes in it to remember what goes where.
We Hung the sprocket cover off the handlebars with a bungee strap. If you were so inclined, now would be the time to CLEAN it.
Remove the small locking screw that retains the sprocket nut.
Using your 32mm socket on either a breaker bar or impact wrench loosen the front sprocket nut while appling the rear brake to hold the wheel from moving (engine compression alone won't hold it -- this is why we do the front sprocket before removing the chain), and loosen the sprocket nut by turning it counter clockwise (standard right-hand thread). Leave the nut and front sprocket on for the time being.
Now we will cut, and break the chain.
We are using a Motion Pro chain tool
Configure the tool to break the chain with the breaker pin inserted.
If you are going to break the chain, first grind the head off the first pin that catches your fancy.
Grind it down, nice and smooth
Then place the breaker over the rivet, using the back side of the chain breaker to center it. In this case we WANT the rivet to go straight through... so DON'T use the anvil!
Once you've popped the rivet out, the chain should easily fall apart
Then finish taking the front sprocket off, and inspect
Now, pull your rear wheel. Remove the cotter pin or in this case lynch pin from the rear castle nut, and take the bolt all the way off. You may need to tap the axle with a hammer. Watch out for the spacers! And carefully lift the wheel up, and out of the rear brake caliper.
Now take that old rear sprocket off. Again our friend the air impact helps ease things along
Now is an EXCELLENT time to inspect the bearings on the rear wheel. Pull the sprocket carrier off the cush drive, and let the sprocket studs loose. The grease on the back side should be clean (and present). Watch out, there's a spacer in there too.
Old on the right, new on the left!
Some sprocket on sprocket action!
Now basically do the reverse but with your new sprocket. The sprocket bolts have lands that fit in grooves that are on the carrier. Make sure these line up before you start snugging anything down. Tighten them to 36 ft/pds in a star pattern.
Place the sprocket carrier back onto the wheel making sure the tabs line up with the cush drive rubbers.
Now reinstall your wheel in the reverse order you took it off.
Now we can return to the front sprocket. Put the new front sprocket on, and loosely thread the nut.
Using your new chain, place it around your rear sprocket and run it on the underside up to the front sprocket. Wrap it around the front sprocket in a manner so that it won't fall off and that there are as many teeth engaged by the chain as possible.
Now, if your new chain wasn't pre-cut... now is the time to cut it to size. If you didn't change gearing it should be 116 links for a 750, and 118 links for a 600. Check out http://www.gearingcommander.com if you aren't sure what lengthe chain you need.
After test fitting the chain, we cut it down, again following the same process as above
Now, to install a rivet link, we swap out the breaker pin and put the press plates on.
Then carefully lubricate the 4 new o-rings in the master link kit with the grease in the package that came with it
insert two o-rings on to the master link, then connect the chain with the links.
Put the two remaining o-rings on, and then the front plate.
Then slowly and carefully tighten the press plates until the rivets come through the plate.
Once the pins are through the plate, change the chain tool from press plates to rivet head.
Make sure you have an anvil on the back side rivet, or it will push the rivet through just like when we broke the chain!
After you are done riveting the chain, use a screw driver and vice grips to CAREFULLY remove the spacer plates from insude the chain.
Using your torque wrench and 32mm socket, hold the rear brake to keep the wheel from moving and tighten the front sprocket nut to 83 ft/pd.
Now, button everything back up... and go for a ride... then home to enjoy a frothy adult beverage.
Don't forget to lube your chain!!!
