
 Tweet
Tweet
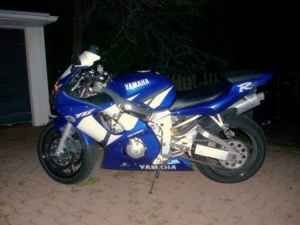
One of my least favorite parts of the 98+ Katana for the last 10 years has been the windscreen. I've always wanted something that looked a bit racier. So after a decade of staring at the short stubby screen I decided to do something about it. For those of you who have seen my build thread or might be interested, here's the write up on the mod.
Materials:
1994-2008 Stock or Aftermarket Kawasaki EX500/Ninja 500R Windscreen
Machine Screw/Bolt and matching Nut
2 zip ties
Tools:
Sharpie Marker
Dremel with some sort of grinding bit
Drill and Bits
The ones you need to disassemble your front end
Ok, to start with, take apart your front faring around the headlight assembly. You don't need to take the cowlings completely off. Just take loose enough of the fasteners to get clear access to the windscreen. Pop the body fasteners that hold your stock screen in place and take it completely out. Resist the temptation to burn it at this point, we still need it for a bit.
Now, we need to create a hole in the new screen to fasten it down to the bike. This is what the machine screw/bolt and nut are for.
First find the center of the screen along the bottom edge and mark it with the sharpie.
Hold the screen on the bike and line the edges of the highest mount holes with the dash shroud. You'll have to flatten the screen slightly to get it to line up. From this position look at where the bottom mount hole needs to be drilled. It should be about 1 3/8 inches from the bottom edge of the screen. As close as possible, mark where your hole needs to go with the sharpie, referencing your center mark to make sure you're centered.
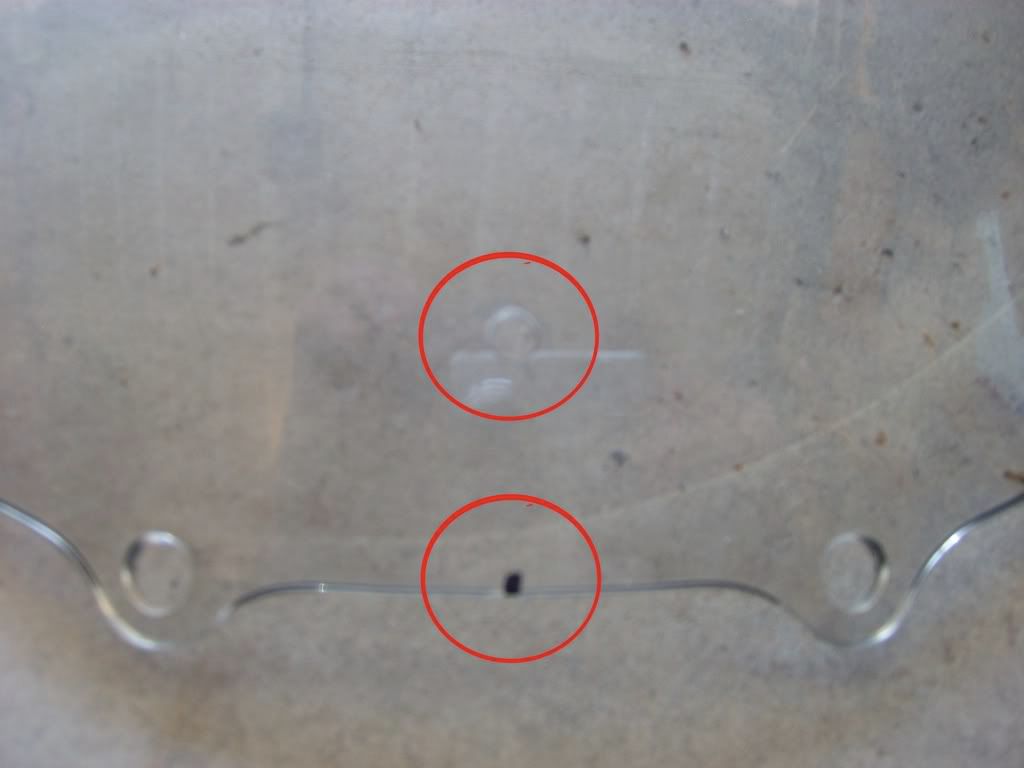
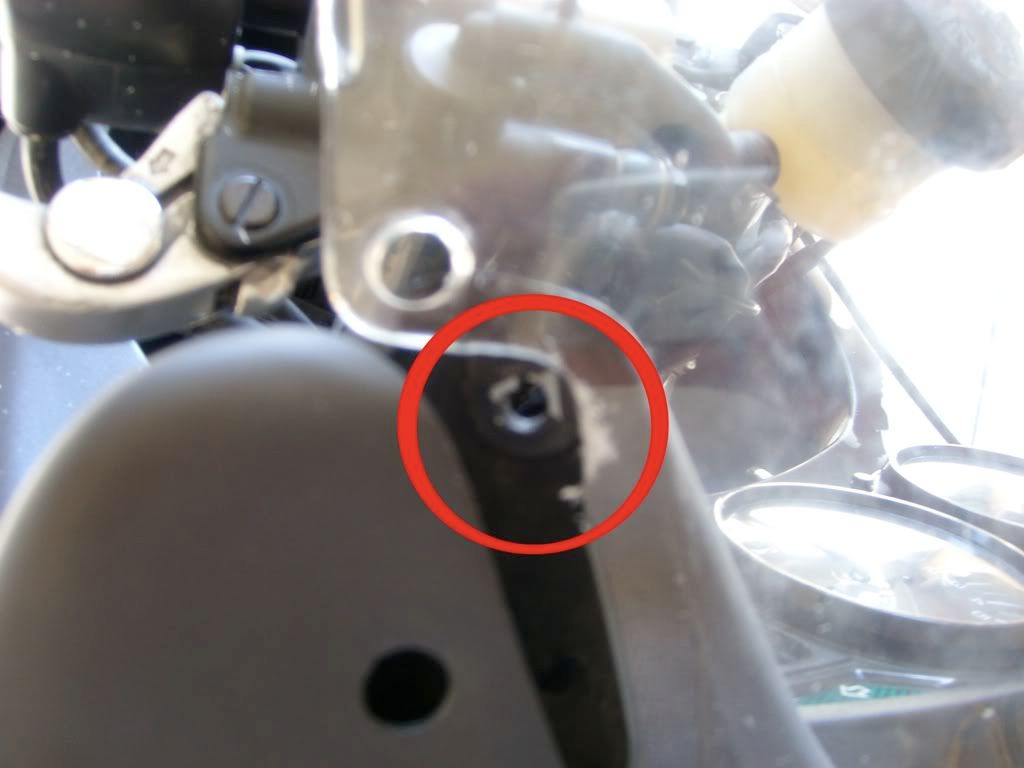
Take the screen back to the bench and drill a hole through it where your mark is large enough for the machine screw/bolt. I don't remember the size of the machine screw I used. Frankly it was something I had laying around the shop. The size doesn't matter much so long as its big enough to hold to the body.
Here's the pic again. You can see the center mark and the hole drilled through inside the red circles.
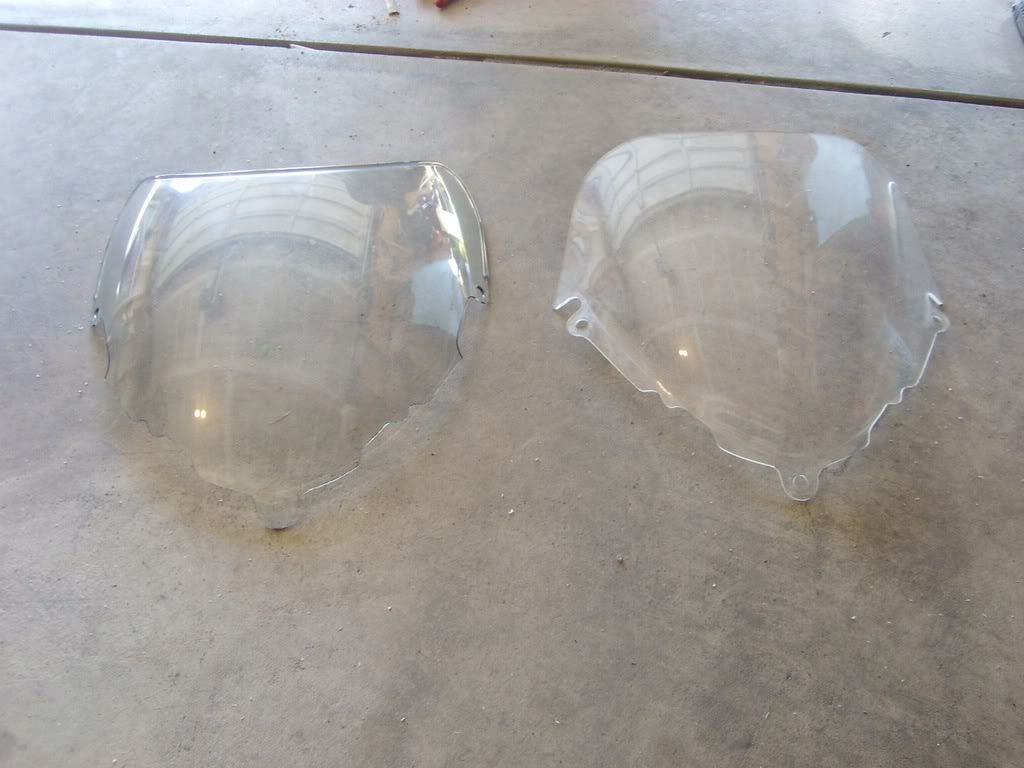
Now the bottom edge of the screen needs to be reshaped to fit the Katana. This is where your old screen comes in. Place your old screen on top of the EX500 screen and line up the bottom mount hole in the Katana screen with the one you just drilled. The more anal retentive you are with this the happier you'll be with the finished product. Use the sharpie to trace the bottom edge of the Katana screen onto the EX screen. Do your best to keep everything symmetrical from left to right. When you're done it'll look like this.
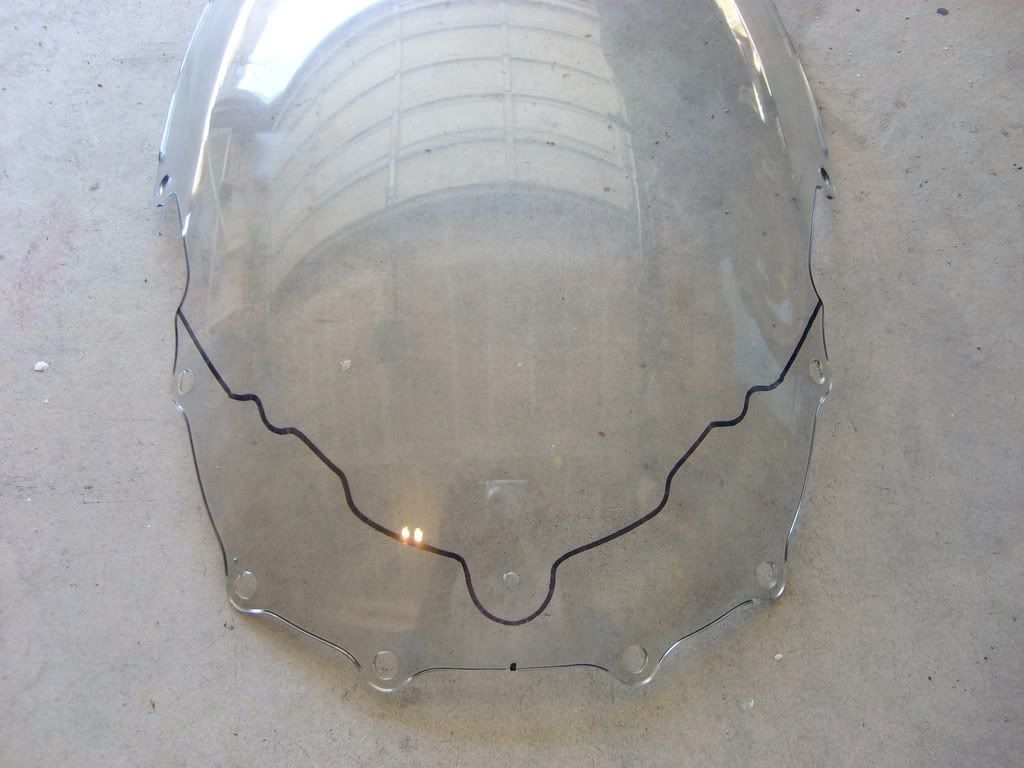
Now fire up your Dremel with a grinder bit and chop off everything below the black line.
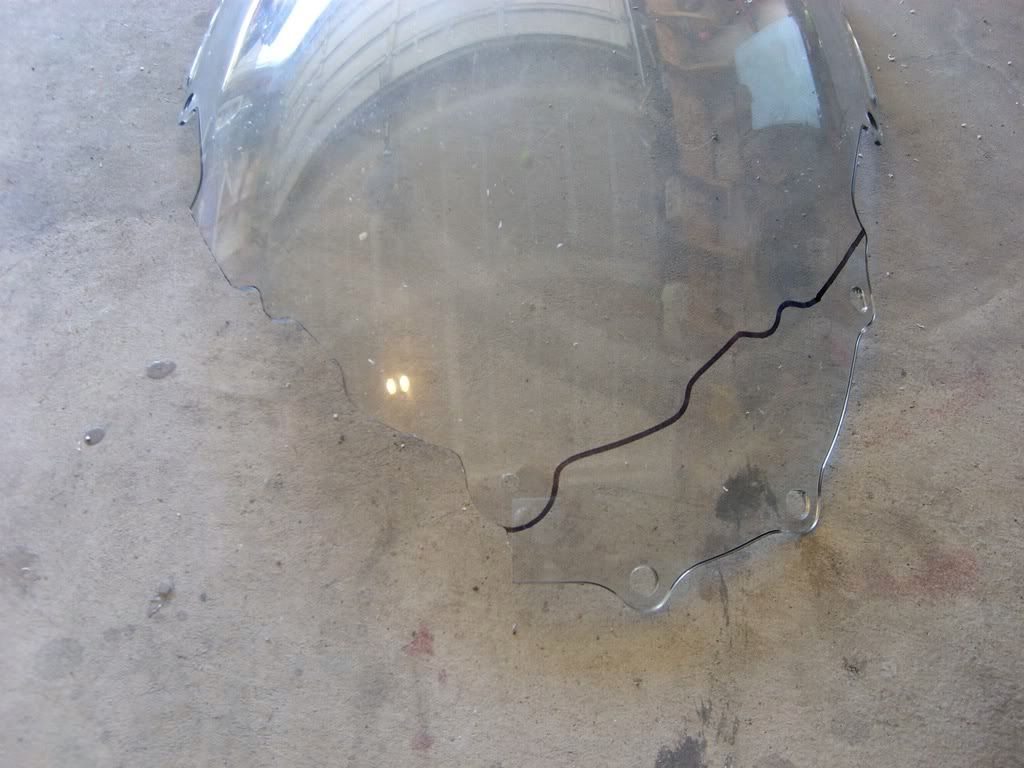
Here we are half way done.
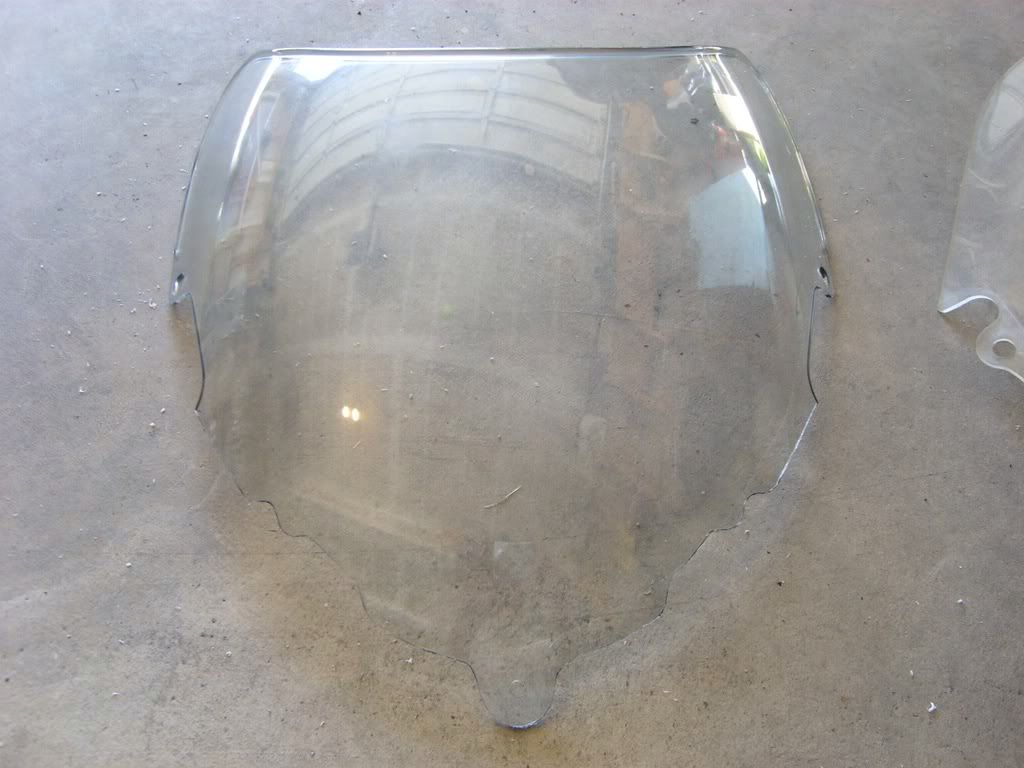
And now completely finished. In the second pic you can see my old screen next to the modified EX screen.
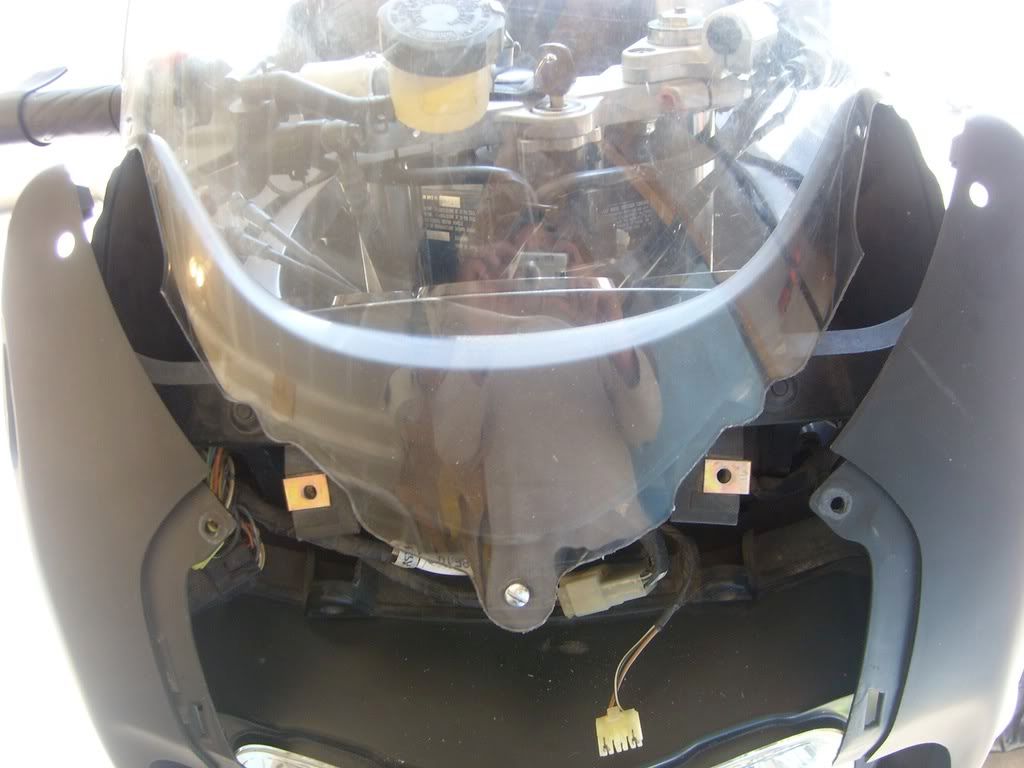
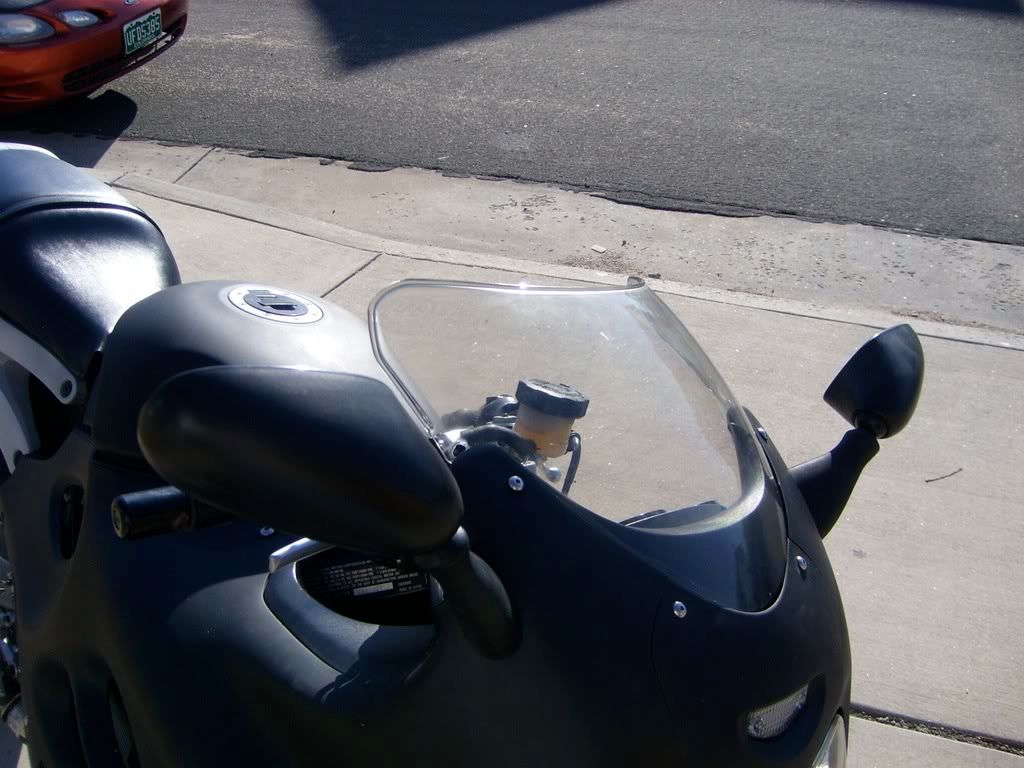
OK time to put it on the bike. Take your new screen to the bike, run the screw/bolt through the screen and the lower mount and nut the back side.
You should be looking like this now. Notice the cut out you did allows the cowls to fit back where they should.
Now we've got it on but we need some lateral support. This is where we're going to have to resort to zip ties since Kawasaki didn't leave us enough material to work with.
Press down to flatten the screen so that the edges fill out the slot between the dash shroud and front cowls where your old windscreen would've gone. While in place, mark the screen just above the crossmember of the support bracket. You need to thread a zip tie through the screen and around the crossmember on either side of the screen to hold it at the desired curve.
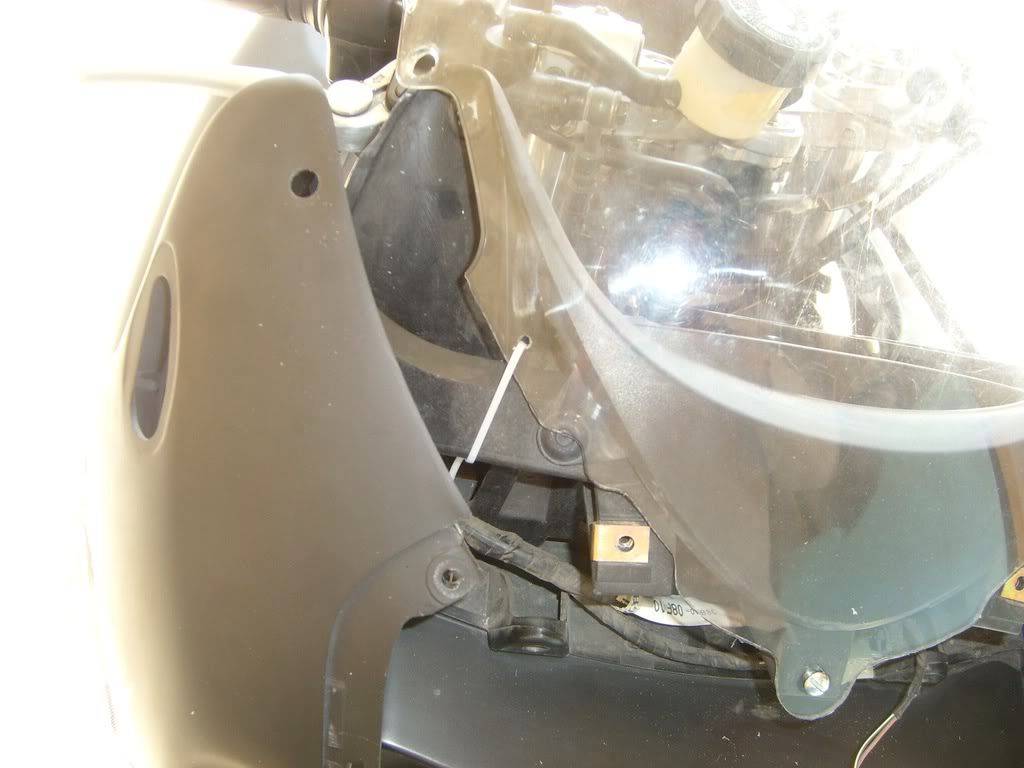
Don't worry about the zip tie. You're never going to see it. Here's a close up.
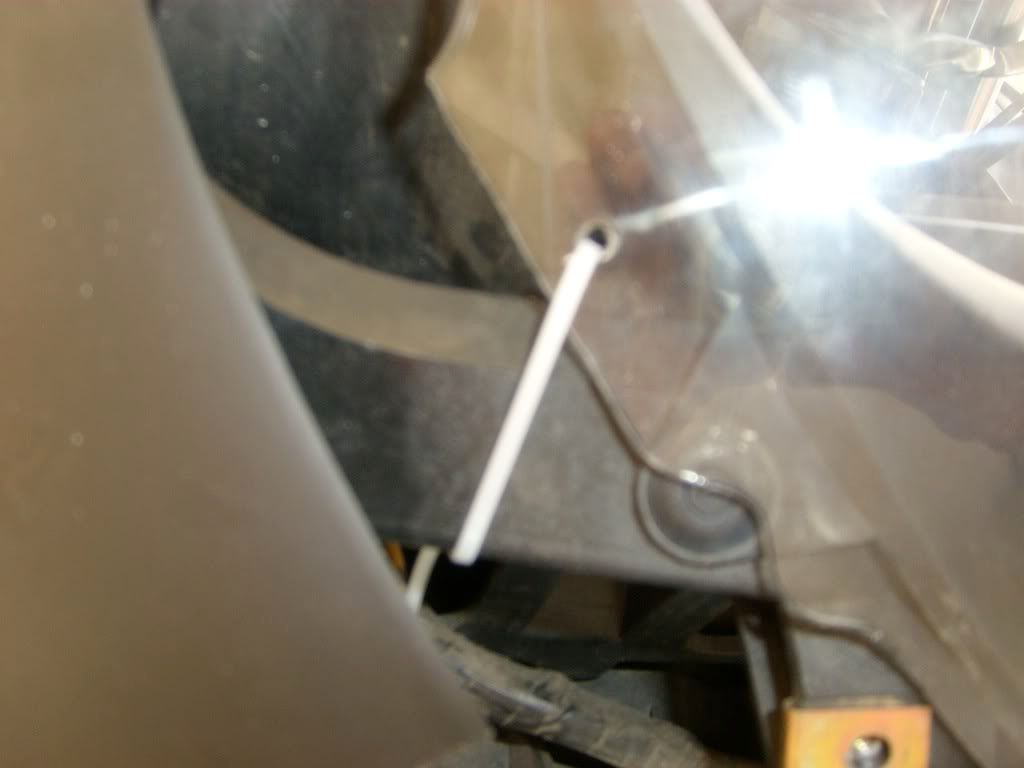
Tighten down your zip ties to get the screen to stay at the desired curve. Tighten evenly on both sides until you get it where you need it. If you get it too tight, don't worry just cut the ties and try again.
We're almost done. We need to grind out a bit more of the screen to allow the screw that runs through the dash shroud and into the cowl at the top to get through. Grab your grinder and carve out a notch at the top where the screw needs to go through. Not so much mind you that you get outside the dash shroud but just enough to allow the cowl to seat properly. Some trial and error may be in order here as you're really close to the edge and you don't to see the cuts.
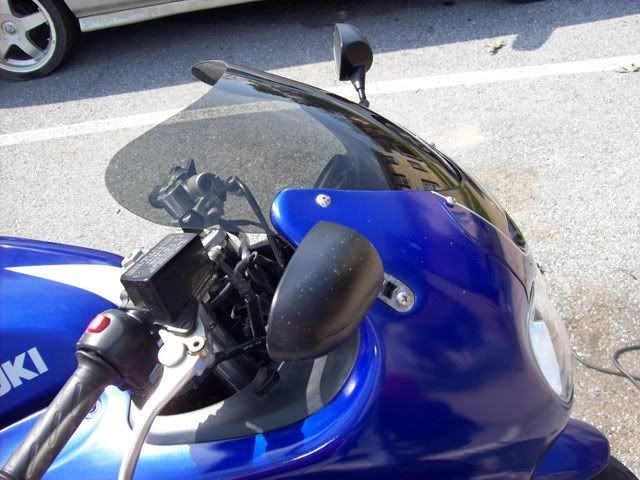
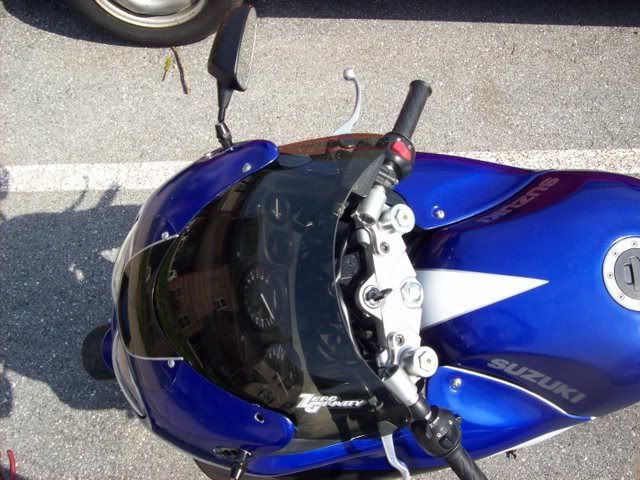
Now we're ready to bolt everything back together. If you got it all right it should all go back together just like before. You're not going to be using the top two windscreen mount holes in the cowl. What I did to plug them is use windscreen mount nuts (the ones that are black rubber that a hex head body screw goes into) and the original screw. This makes it look like the hole is in use, even though its effectively doing nothing.
Here's the finished screen.
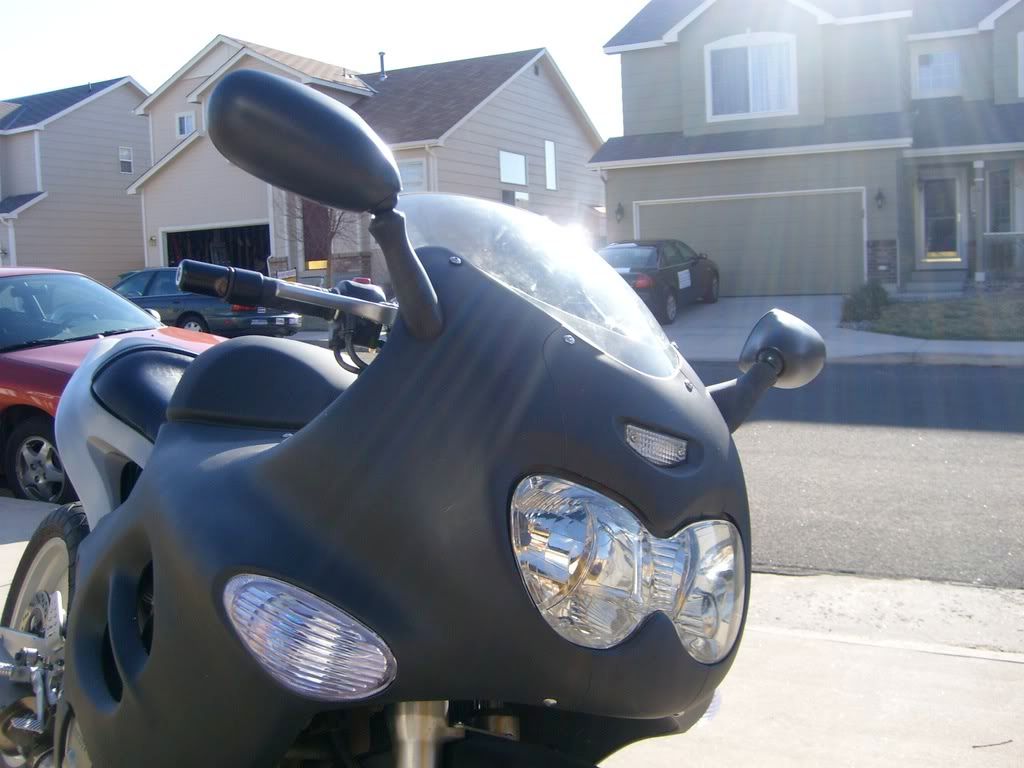
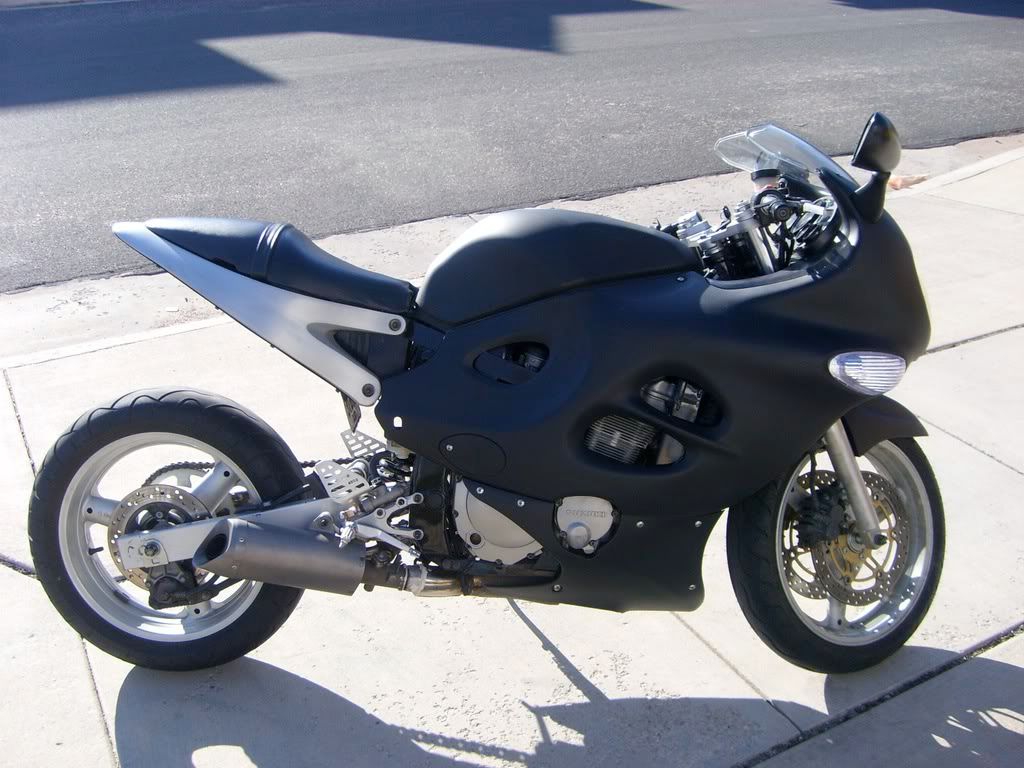
Its not a perfect fit by any means. You can see in the pics that the top mount hole in the screen is visible outside the cowl. Also there is a smallish gap between the screen and the centerpiece of the faring. Minor things that I can live with but worth mentioning for those that can't.
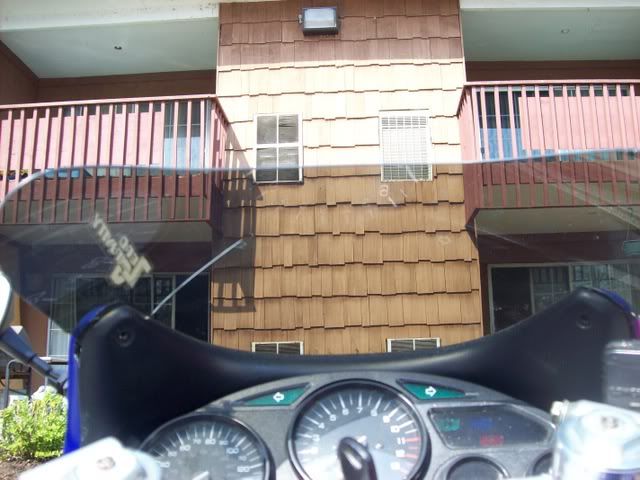
Performance wise, I'd say its an improvement. The modified screen redirects air flow lower and into the chest, reducing buffeting around the helmet and shoulders. It does increase the noise level inside the helmet somewhat because your head is fully in the unbroken airstream. Don't suppose the noise bothers me terribly as I wear earplugs on rides of any length anyway.
This is the second time I've done this mod. The first was with a very old screen I had laying around and involved a lot of experimentation. The second time I followed this method exactly with a newer screen and you can see the results.
All in all I've got about $25 into this mod. Found someone on an EX500 forum that had an old stock screen that they sent to me for $25 shipped. I had a couple of windscreen fasteners in the shop from another project.
The whole process took me about an hour, longer to write up than to actually do.
Anyway, that's the long and short of it. Hope this proves helpful to some of you who'd like a sportier look for their Kat. My relationship with my Katana has been a love-hate relationship. This little mod pushes things a little more into the love category for me.
Joe
Materials:
1994-2008 Stock or Aftermarket Kawasaki EX500/Ninja 500R Windscreen
Machine Screw/Bolt and matching Nut
2 zip ties
Tools:
Sharpie Marker
Dremel with some sort of grinding bit
Drill and Bits
The ones you need to disassemble your front end
Ok, to start with, take apart your front faring around the headlight assembly. You don't need to take the cowlings completely off. Just take loose enough of the fasteners to get clear access to the windscreen. Pop the body fasteners that hold your stock screen in place and take it completely out. Resist the temptation to burn it at this point, we still need it for a bit.
Now, we need to create a hole in the new screen to fasten it down to the bike. This is what the machine screw/bolt and nut are for.
First find the center of the screen along the bottom edge and mark it with the sharpie.
Hold the screen on the bike and line the edges of the highest mount holes with the dash shroud. You'll have to flatten the screen slightly to get it to line up. From this position look at where the bottom mount hole needs to be drilled. It should be about 1 3/8 inches from the bottom edge of the screen. As close as possible, mark where your hole needs to go with the sharpie, referencing your center mark to make sure you're centered.
Take the screen back to the bench and drill a hole through it where your mark is large enough for the machine screw/bolt. I don't remember the size of the machine screw I used. Frankly it was something I had laying around the shop. The size doesn't matter much so long as its big enough to hold to the body.
Here's the pic again. You can see the center mark and the hole drilled through inside the red circles.
Now the bottom edge of the screen needs to be reshaped to fit the Katana. This is where your old screen comes in. Place your old screen on top of the EX500 screen and line up the bottom mount hole in the Katana screen with the one you just drilled. The more anal retentive you are with this the happier you'll be with the finished product. Use the sharpie to trace the bottom edge of the Katana screen onto the EX screen. Do your best to keep everything symmetrical from left to right. When you're done it'll look like this.
Now fire up your Dremel with a grinder bit and chop off everything below the black line.
Here we are half way done.
And now completely finished. In the second pic you can see my old screen next to the modified EX screen.
OK time to put it on the bike. Take your new screen to the bike, run the screw/bolt through the screen and the lower mount and nut the back side.
You should be looking like this now. Notice the cut out you did allows the cowls to fit back where they should.
Now we've got it on but we need some lateral support. This is where we're going to have to resort to zip ties since Kawasaki didn't leave us enough material to work with.
Press down to flatten the screen so that the edges fill out the slot between the dash shroud and front cowls where your old windscreen would've gone. While in place, mark the screen just above the crossmember of the support bracket. You need to thread a zip tie through the screen and around the crossmember on either side of the screen to hold it at the desired curve.
Don't worry about the zip tie. You're never going to see it. Here's a close up.
Tighten down your zip ties to get the screen to stay at the desired curve. Tighten evenly on both sides until you get it where you need it. If you get it too tight, don't worry just cut the ties and try again.
We're almost done. We need to grind out a bit more of the screen to allow the screw that runs through the dash shroud and into the cowl at the top to get through. Grab your grinder and carve out a notch at the top where the screw needs to go through. Not so much mind you that you get outside the dash shroud but just enough to allow the cowl to seat properly. Some trial and error may be in order here as you're really close to the edge and you don't to see the cuts.
Now we're ready to bolt everything back together. If you got it all right it should all go back together just like before. You're not going to be using the top two windscreen mount holes in the cowl. What I did to plug them is use windscreen mount nuts (the ones that are black rubber that a hex head body screw goes into) and the original screw. This makes it look like the hole is in use, even though its effectively doing nothing.
Here's the finished screen.
Its not a perfect fit by any means. You can see in the pics that the top mount hole in the screen is visible outside the cowl. Also there is a smallish gap between the screen and the centerpiece of the faring. Minor things that I can live with but worth mentioning for those that can't.
Performance wise, I'd say its an improvement. The modified screen redirects air flow lower and into the chest, reducing buffeting around the helmet and shoulders. It does increase the noise level inside the helmet somewhat because your head is fully in the unbroken airstream. Don't suppose the noise bothers me terribly as I wear earplugs on rides of any length anyway.
This is the second time I've done this mod. The first was with a very old screen I had laying around and involved a lot of experimentation. The second time I followed this method exactly with a newer screen and you can see the results.
All in all I've got about $25 into this mod. Found someone on an EX500 forum that had an old stock screen that they sent to me for $25 shipped. I had a couple of windscreen fasteners in the shop from another project.
The whole process took me about an hour, longer to write up than to actually do.
Anyway, that's the long and short of it. Hope this proves helpful to some of you who'd like a sportier look for their Kat. My relationship with my Katana has been a love-hate relationship. This little mod pushes things a little more into the love category for me.
Joe


Comment