Ad Widget

Collapse

Announcement

Collapse
No announcement yet.
X

Smokin's 82 Kat Resto project

Collapse
  • Filter
  • Time
  • Show
Clear All
new posts

  • #31
    Originally posted by mammut89 View Post
    awesome mate , you know what youre doing

    Not really, but I am learning as we go along. Helps that Tim and Matt are both accomplished wrenches.

    Tim crew chiefs for a pro-stock drag car and has had his hands in more than his fair share of engines; Matt is the shop foreman of our local Victory dealer, so I'm confident I'm in good hands.

    Hemi,

    There is some debate about the porosity of these cast mag wheels, and therefore their air holding ability. I assume powdercoating would seal them up pretty nice, and as far as the bead goes, if it holds a tire on with a tube I'd think it would hold one without a tube just as well. GS Resources is your friend (or worst enemy, depending) when it comes to massive amounts of information. RapidRay (SuzukiRay on KatRiders) is a fountain of knowledge who has his schit together.
    Last edited by Smokinapankake; 06-23-2010, 08:17 PM.

    Comment


    • #32
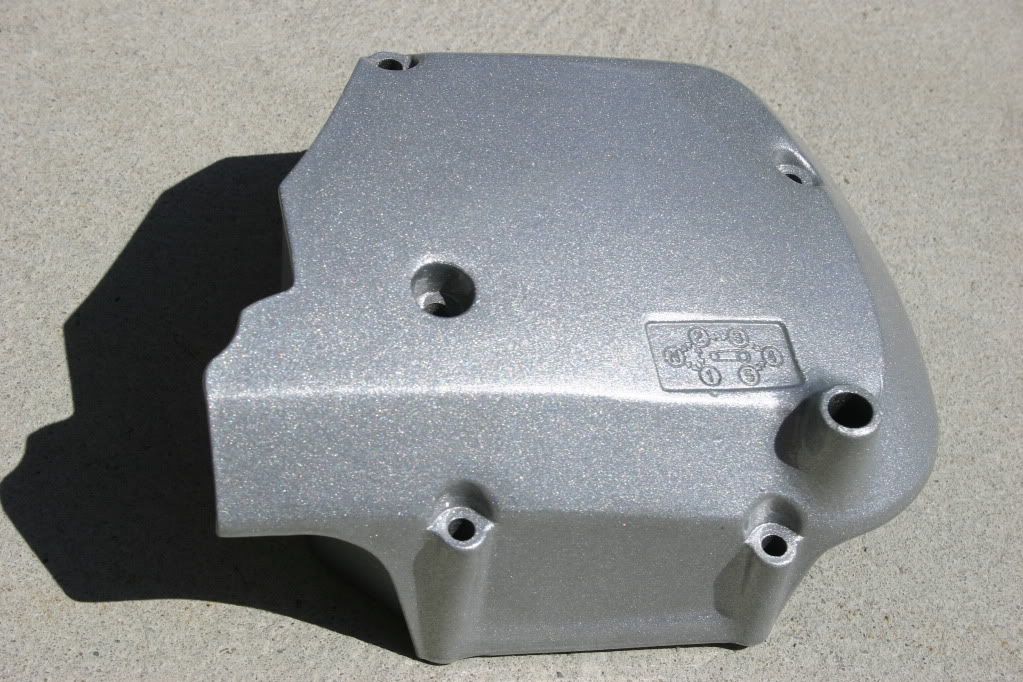
      So over the weekend my buddy Tim and I installed the engine into the chassis. Before that, I had the sprocket, stator, clutch, and signal generator covers to deal with. They were all oxidized and scratched so I thought to paint them myself. I took a wire wheel to them and after about a half an hour decided to powdercoat them instead. The color chosen was "Silver Sparkle". See for yourself:

      I installed a new oil level sight glass and also new clutch pinion shaft oil seal. This seal, incidentally, is the same as used for the shift shaft.

      The bike was prepared for the engine by standing it on jackstands as it doesn't have a centerstand (curse you PO!). The frame tubes were protected by bicycle inner tubes slit lenghtwise, wrapped around the frame, and secured with zip ties. Worked really well but left a white powder that you can see in the photos. It wiped off with a dry rag so no harm done.

      After lugging it up the stairs out of the basement, we decided that it would be better to install it with the head off. At this point the head was only snugged on 1/4 turn past finger tight, and the cams were not installed, so taking off the head was a 5 min jub at most.

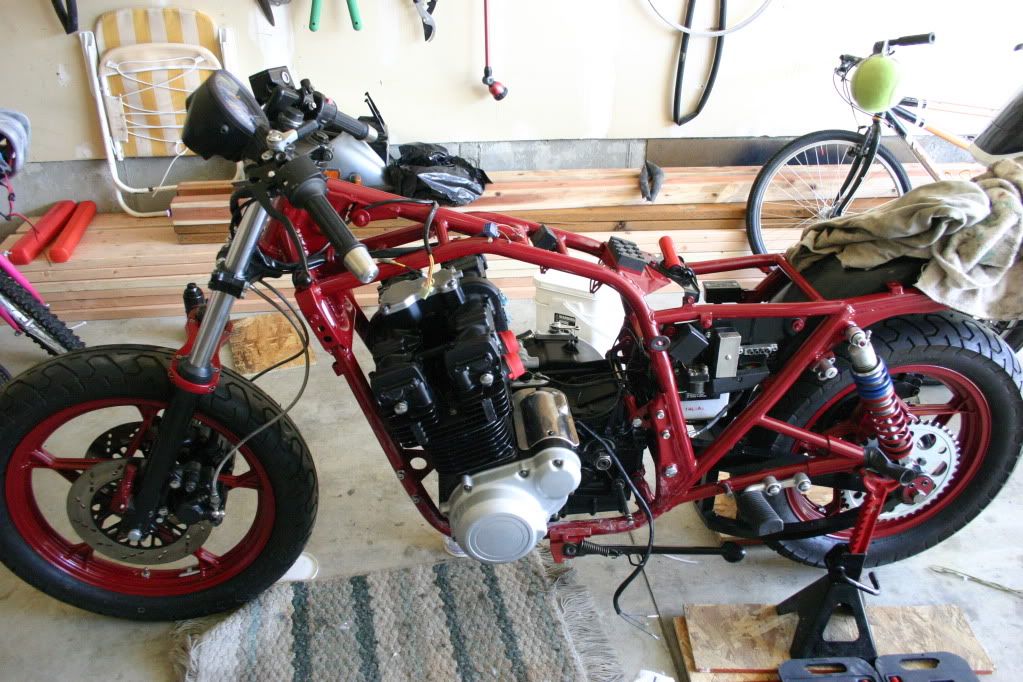
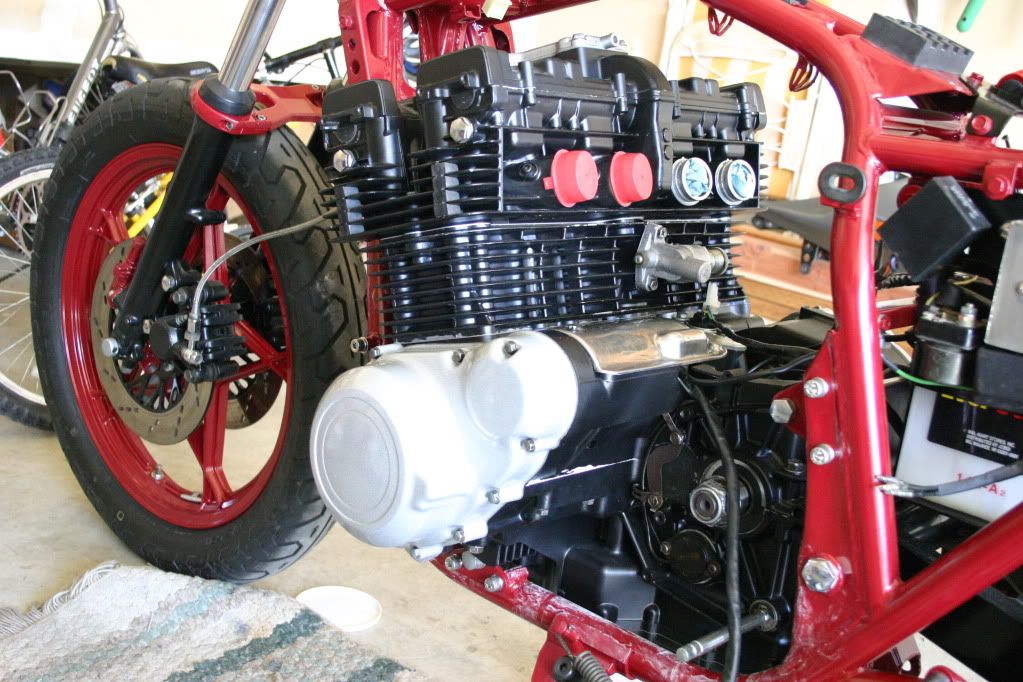
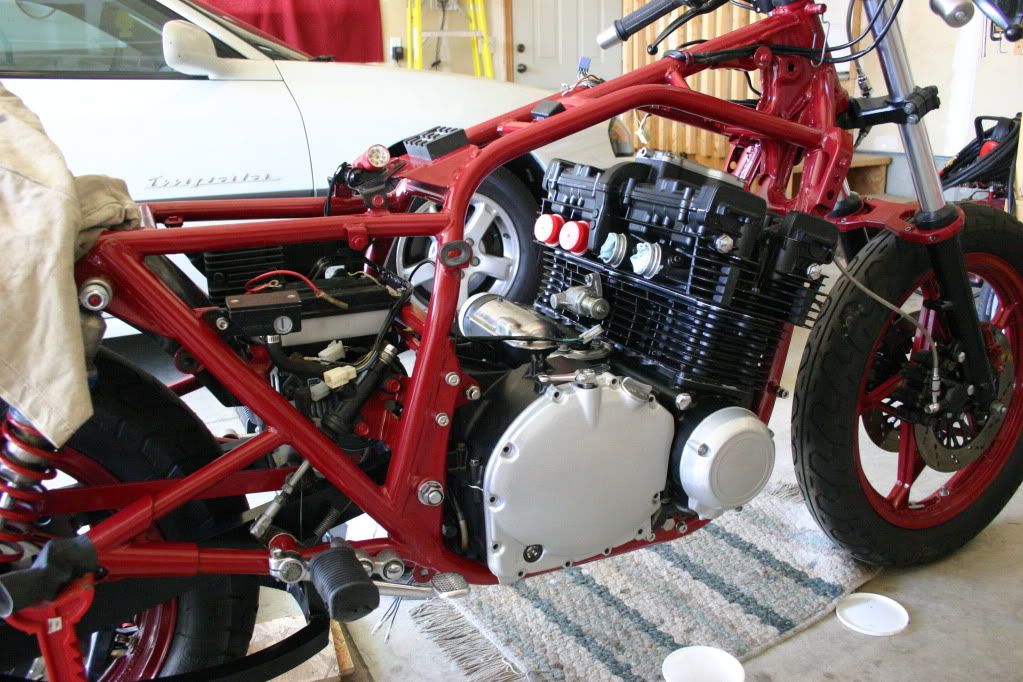
      The engine went in as a bottom half and cylinder assembly. We used my floor jack and a piece of plywood to support the sump and facilitate wiggling to aid in lining up bolts. The bottom rear, down near the centerstand mount, went in first; then top front under the cylinders. After that it was a matter of installing brackets and bolts. Once that was all done we installed the head, cams with plenty of assembly lube, and timed it in. It was a little tricky getting the exhaust cam lined up properly but in the end it all came together nicely. After installing the cam chain tensioner we rotated the crank by hand a few revolutions to be sure all was well with the world and then sat back to toast our achievement. All told it took about 3 hours of pleasant labour to get it buttoned up.

      There are still a few things to do (my valve cover gasket is wrong and the clutch hub nut needs torqueing) but I'm definitely on the downhill slide!

      And now on to the pictures!
      The morning after:


      The covers look really bright and have caused me to change my bodywork color back to silver rather than the dark metallic grey I had originally intended.

      Any thoughts?

      Comment


      • #33
        Is that the ORIGINAL motor for your Kat? I ask because that is an 81 valve cover & cylinder head on yours. I just finished (this morning) an 82 Kat 1000 engine build for a guy in northern California & his also had an 81 head on it. He was the original owner & I KNOW the motor had never been apart as I tore it down myself. His was #56 & I am wondering just how many 82 Kats got left over 81 heads & valve covers. Ray.
        85GS1150E 83GS1100SD 83GS1100ES 82GS1000SZ 96GSXR1500DRAGBIKE 96GSXR1400DRAGBIKE 90GSXR1166DRAGBIKE 05SDG110PITBIKE & 8 QUADS!!! "Life is tough! It's even tougher when you're stupid!" John Wayne

        Comment


        • #34
          Ray,

          I assume it is, but don't know for sure. Before I had the frame blasted &PC'd, the build label down by the left footpeg had a build date of Oct. 81 so I guess it could be a left over 81?

          Engine number is GS10X-101066 if that tells you anything.
          Last edited by Smokinapankake; 06-28-2010, 07:31 AM.

          Comment


          • #35
            What are the last 8 #s on the vin? Ray.
            85GS1150E 83GS1100SD 83GS1100ES 82GS1000SZ 96GSXR1500DRAGBIKE 96GSXR1400DRAGBIKE 90GSXR1166DRAGBIKE 05SDG110PITBIKE & 8 QUADS!!! "Life is tough! It's even tougher when you're stupid!" John Wayne

            Comment


            • #36
              Ray,
              The last 8 are: C2100681

              Any help appreciated.

              Comment


              • #37
                Yours @ 00681 isn't that early in the run. The one I just did was 00056. I'm kind of surprised yours has an 81 head on it. Ray.
                85GS1150E 83GS1100SD 83GS1100ES 82GS1000SZ 96GSXR1500DRAGBIKE 96GSXR1400DRAGBIKE 90GSXR1166DRAGBIKE 05SDG110PITBIKE & 8 QUADS!!! "Life is tough! It's even tougher when you're stupid!" John Wayne

                Comment


                • #38
                  It Works!!

                  Don't get excited, I'm just talking about the wiring. Got my new harness in (thanks again Russ!) and did a few preliminary checks.

                  Turn on the ignition, and the neutral light and oil pressure lights come on, binkers blink, brake light when I hit the brakes, headlight & horn all work as they should. Starter even responds when I hit the start button.

                  One more thing to mark off on my check off list!

                  Comment


                  • #39
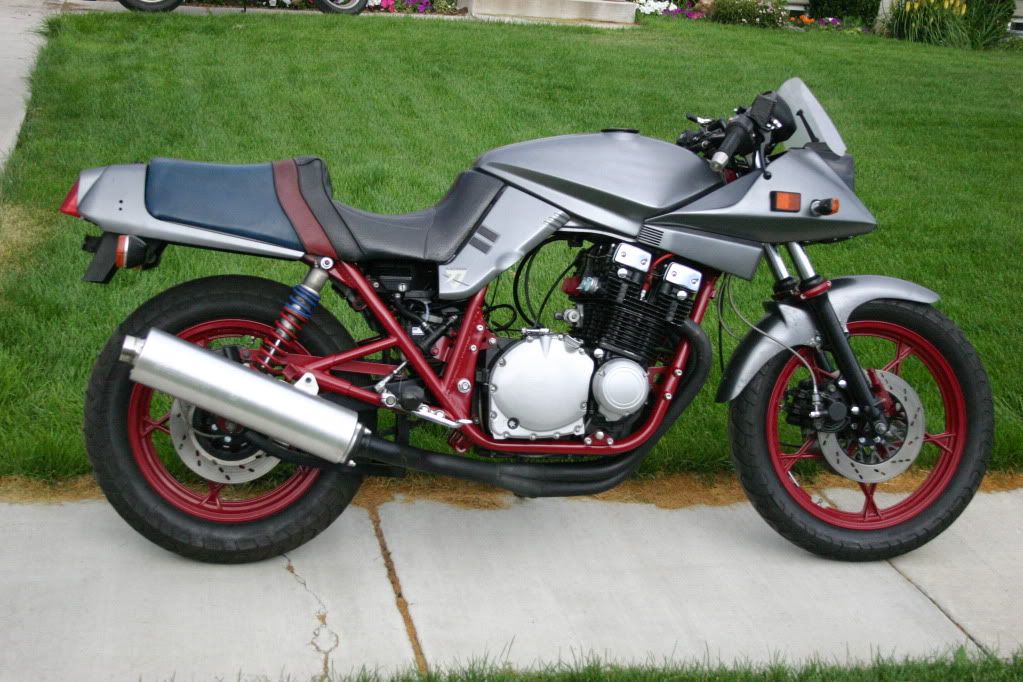
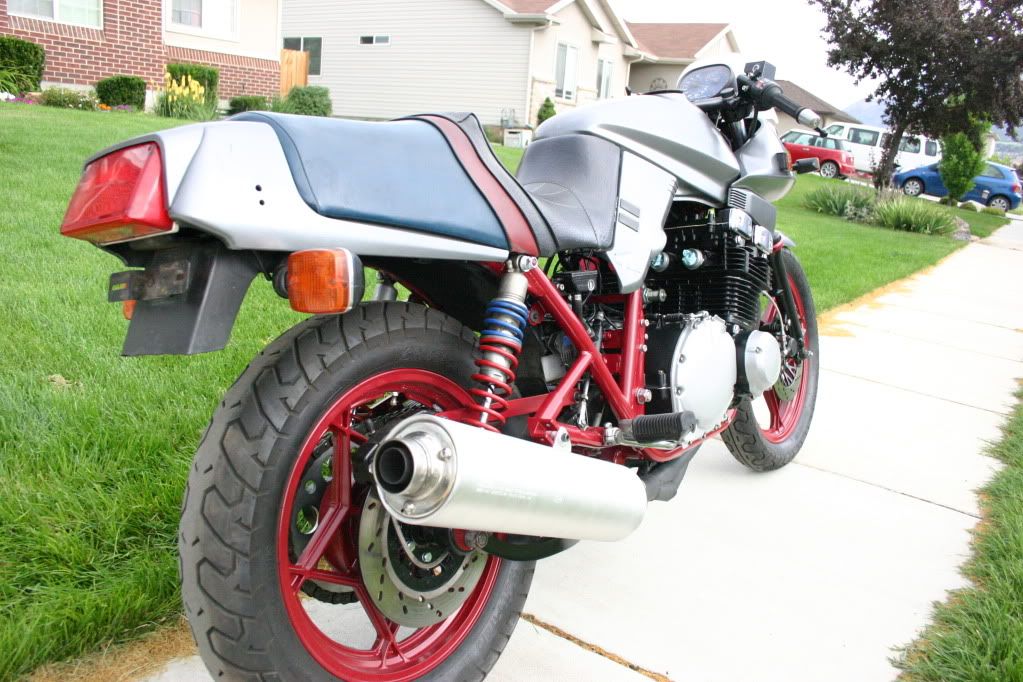
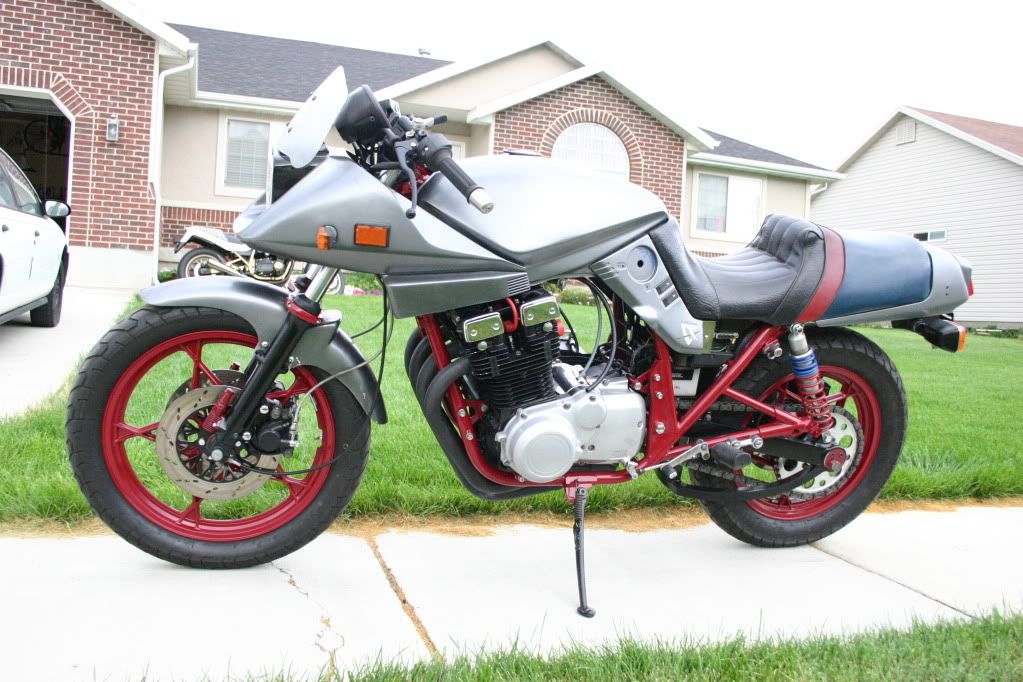
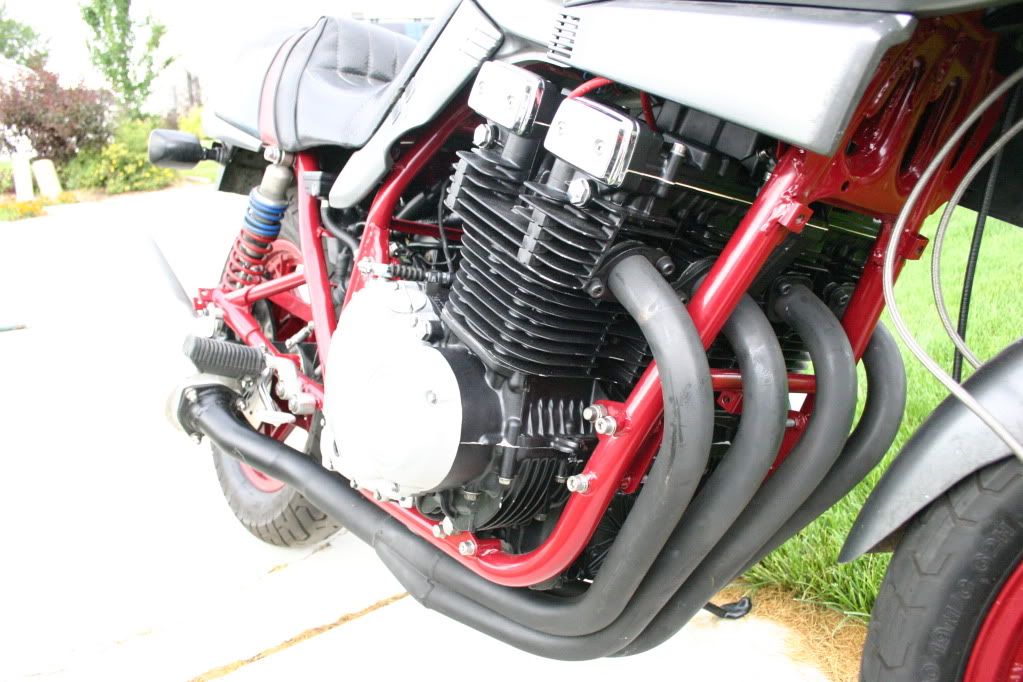
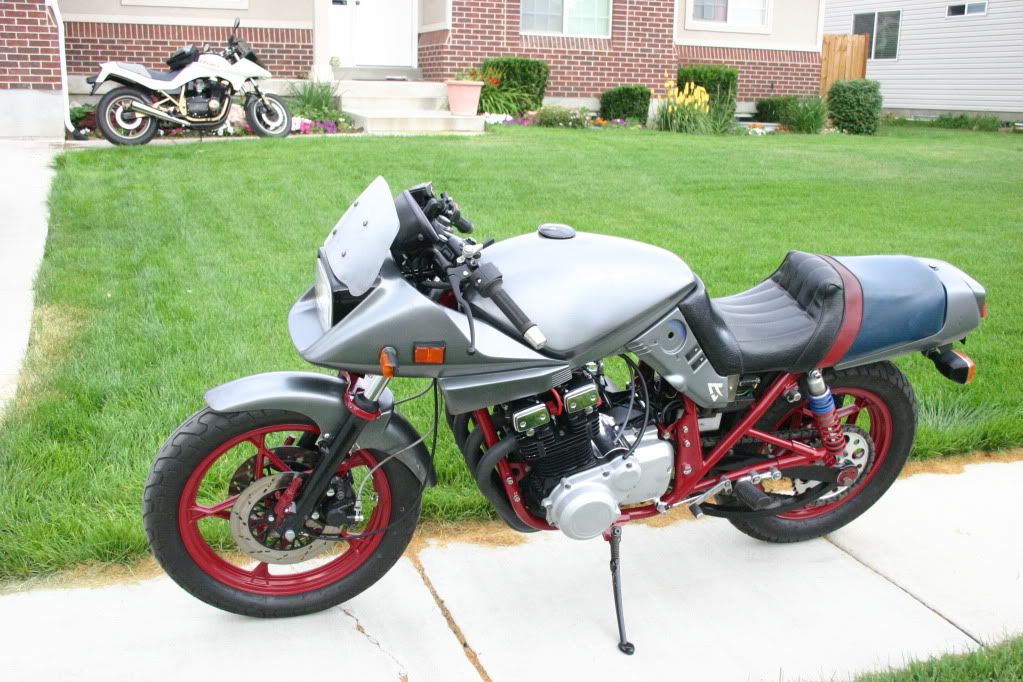
                    So Lotso progress lateley - Bled brakes, installed exhaust and bodywork just to see it all together.


                    Bodywork looks like crap but I may just leave it as is for now, and do it up nice over the winter so it'll be lookin good for next year.....
                    Seat needs recovered and the windshield needs to be buffed/polished out. I put a bicycle shift lever on the left side with the idea of a bar mounted choke, but decided it looks too hokey. Will be sticking with the factory side panel mounted choke.

                    Exhaust is an unknown 4-1 that came with the bike mated up to a Hayabusa right side stocker. Works well, was cheap, and looks pretty good too....
                    Carbs are done, just need installed and synched. Sorry no pics of these. Yet, anyway. Stay tuned...
                    Looks like my goal of firing this thing by my birthday (Aug 16) is very much attainable...

                    Whaddya think?
                    Last edited by Smokinapankake; 07-18-2010, 10:33 AM.

                    Comment


                    • #40
                      Progress is sure an AWESOME thing, isn't it?!!! Lookin good! Ray.
                      85GS1150E 83GS1100SD 83GS1100ES 82GS1000SZ 96GSXR1500DRAGBIKE 96GSXR1400DRAGBIKE 90GSXR1166DRAGBIKE 05SDG110PITBIKE & 8 QUADS!!! "Life is tough! It's even tougher when you're stupid!" John Wayne

                      Comment


                      • #41
                        I neeeed one of these. That thing is so sweet looking!

                        Side note: Got my wheels coated and tires mounted without tubes and they seem to be holding air just fine. Had the redrill the hole for the valve stem and grind out a little more material in the front wheel because it wasnt wife enough for the stem to seat properly.
                        Originally posted by arsenic
                        93 octane fuel and K&N pod filters rock.

                        Comment


                        • #42
                          Its Alive!

                          So yesterday was the big day - time to see if it runs after all that work.
                          Yeah, bodywork needs to be done, and seat recovered, and something needs to be done about that windscreen, but.

                          Engine is in, carbs are done, everything is buttoned up, checklists are checked off, so no reason not to see if she'll go.

                          So with some trepidation I gave it a go. Hit the starter button and she cranks 4-5 times, catches, then revs up to the moon. Choke was full on, but I forgot it was so I started backing off the idle screw. Revs come down, but it hunts around and is acting fishy so I figure well, carbs prolly need some tweaking. Shut it off, looked down to see the choke dial and the light comes on. Well Duh. Shut off the choke, start it again and she settles right in to a happy idle. Apply throttle and she revs up and settles back in with no untoward behavior, so I figure Sweet!
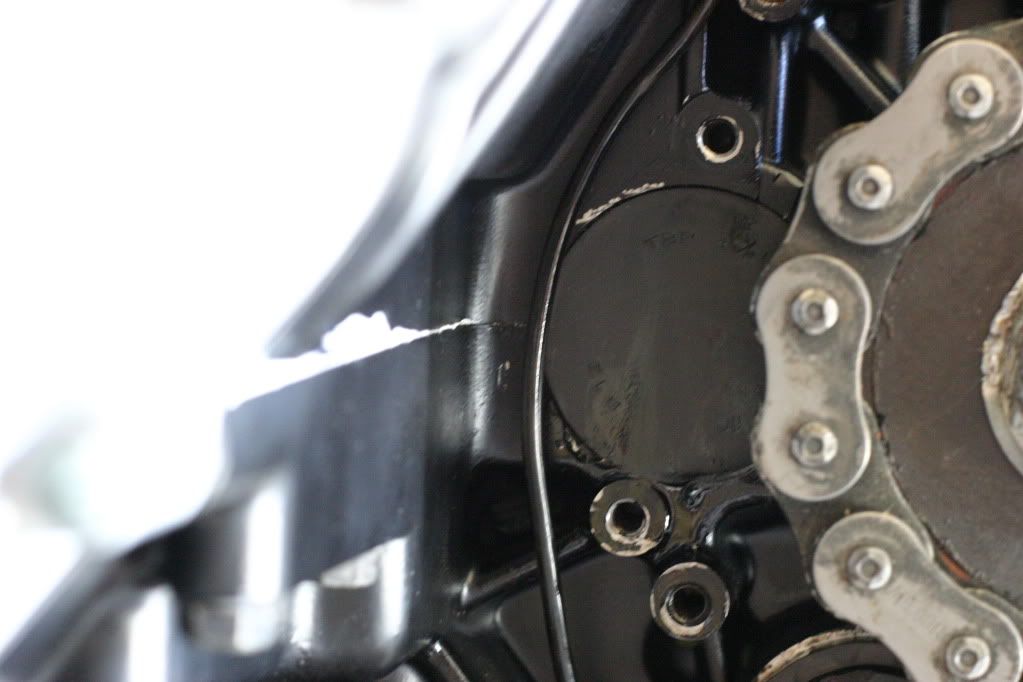
                          Got a big ol grin on my face, then look down to see a little puddle of oil forming. D'oh!

                          It's coming from this seal:


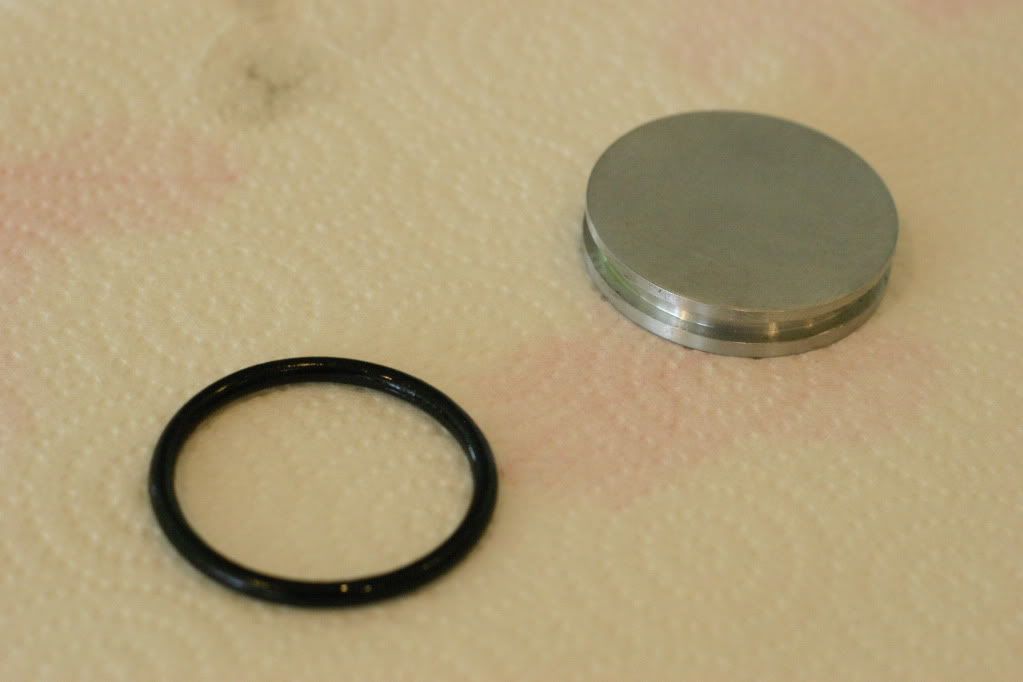
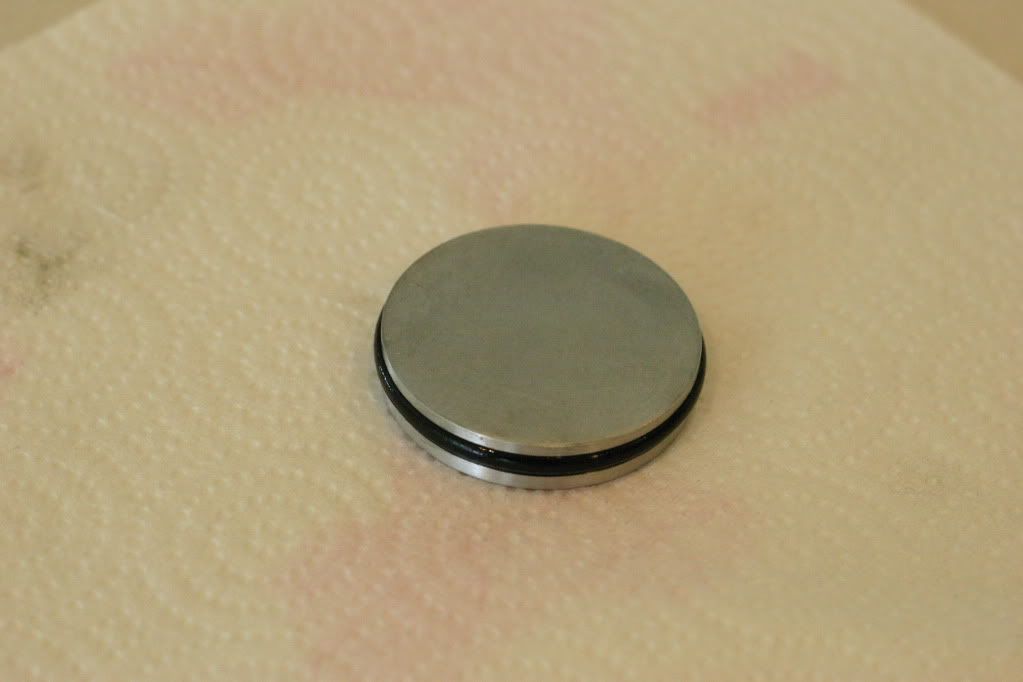
                          I think I may have my guy at work make an aluminum plug with a groove for an O-ring, rather than try to mash in a new seal. That's how this one came to leak; should have been in place when I put the cases together, I just happened to miss that one last piece so I pressed it in after the cases were together; in doing so some of the rubber sheared off, causing the leak.

                          At any rate, I'm very pleased with the whole thing.

                          Comment


                          • #43
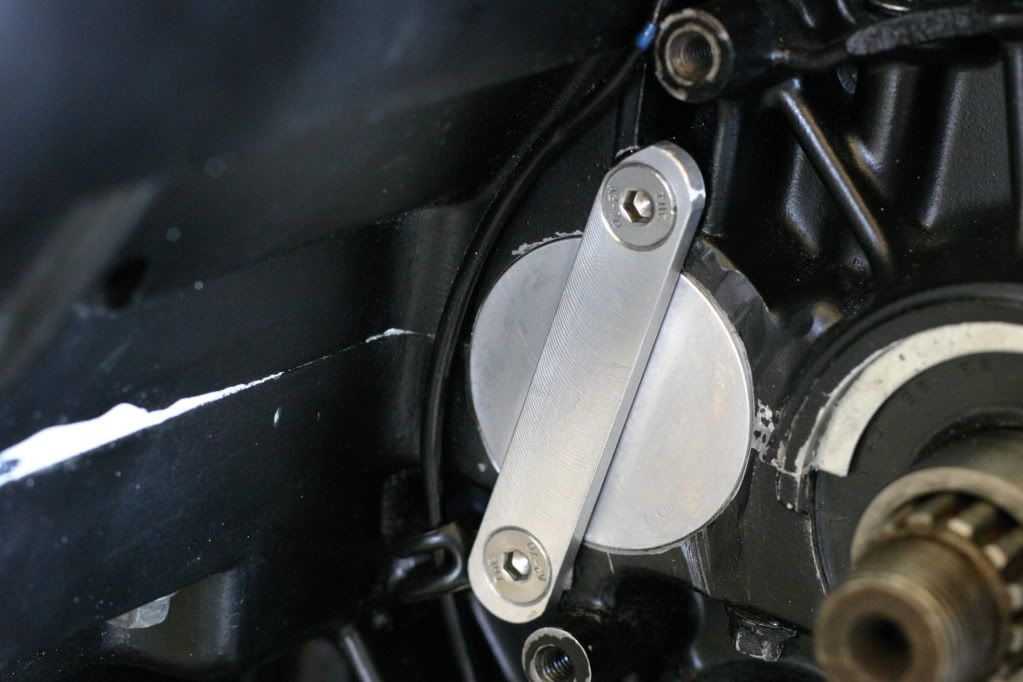
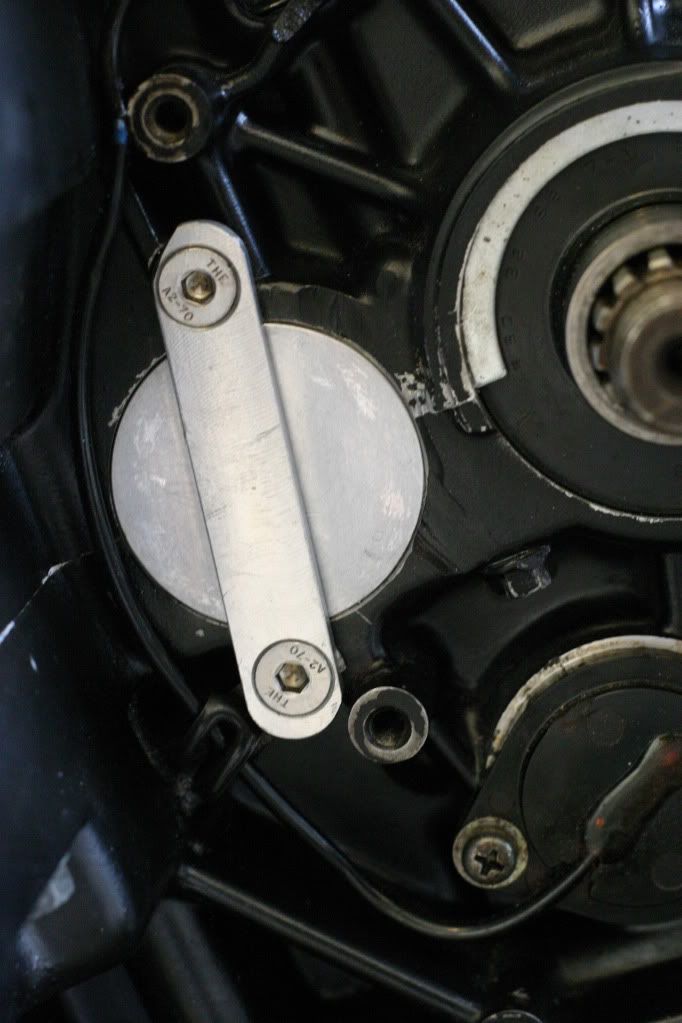
                            My man at work came through again. Without him I'da been screwed many times over. Thanks again, Dan!

                            Plug without o-ring:


                            O-ring installed:


                            Installed into engine:


                            Oil leak is solved, now just need to tweak carbs a little and we'll be in business!

                            Comment


                            • #44
                              Right on Smokin'!!! Ray.
                              85GS1150E 83GS1100SD 83GS1100ES 82GS1000SZ 96GSXR1500DRAGBIKE 96GSXR1400DRAGBIKE 90GSXR1166DRAGBIKE 05SDG110PITBIKE & 8 QUADS!!! "Life is tough! It's even tougher when you're stupid!" John Wayne

                              Comment


                              • #45
                                Well just read through and thought wow!. Engine done in the living room?
                                I like the grounding bar idea and the cycle innertube one. I note these, thanks for the tips. A good job , the bike looks well
                                if your not living on the edge
                                you take up too much room

                                Comment

                                Working...
                                X