
 Tweet
Tweet
I just love my Katana, I think we all do, but I hate the purple seat, I mean I really hate the purple seat. It’s the first thing people notice when I stop and they walk over to talk to me about the bike. I can live with the purple splashes on the sides and even the purple wheels but the seat, no way.

The first thing I tried to do was to find a black seat for the bike but they seemed to run around $150 on eBay in any color other than purple. That was just too much money for a used seat for me anyway. I did find a purple seat in perfect condition for $15 so I bought it thinking I would re-cover it, not that my current seat is bad I just didn’t want to stop riding while I worked on the new seat.
Then I got talking to a friend that owns a body shop and he suggested I just paint the seat. Seemed like a strange idea that would look good for the first ride and then look like well a painted seat, but he said they do it all the time on interior car parts and it holds up well and looks good. So I said what the heck I’ll give it a try. It should be cheaper than re-upholstering the old seat, which seems to run a couple of hundred dollars at best.
The things you'll need to do the job are: a nylon bristle brush, soapy water (I used Dawn dish detergent), a bath towel, SEM Professional Vinyl Prep, SEM Color Coat, Bulldog Adhesion Promoter, and something to keep the seat up in the air. I used a couple of tin cans and a piece of wood.
1. SEM and Bulldog products can be found at your local body shop supply store (not an auto parts store). You want a place that caters to professional auto body shops. I got mine on line at Hands On Tools.com because it was easier than calling the local suppliers or driving around and I wasn’t in a big hurry since I now have two seats.

2. Remove the seat from the bike (this is important) and clean it with a nylon brush and soapy water. I washed it three times with a heavy rinse with a garden hose between washings.

3. I used a garbage can turned upside down, a towel, and a can to support the seat. It must be in a well ventilated area so outside just made sense, apply SEM Vinyl Prep to the portions of the seat that you'll be painting, all the vinyl. Follow the directions on the can, but basically you just spray it on, rub it around and rinse it off. Don't worry, it's not rocket science. I prepped the seat three times to be sure all the wax was off and the water didn’t bead up when I rinsed. Remember to rinse well and let it dry well before you proceed
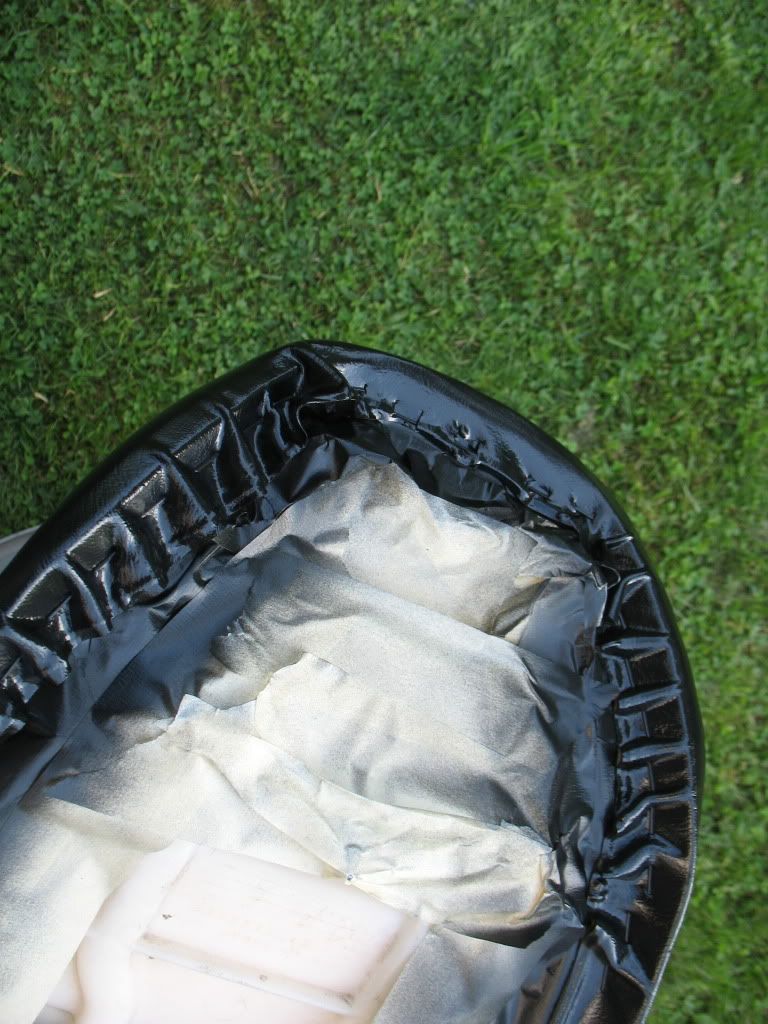
4. Then I tape the bottom of the seat so you can paint all the vinyl and keep the plastic frame sort of clean. I didn’t want any purple showing when I finished.
5. Prime all the vinyl with Bulldog Adhesion Promoter. Follow can directions--you want several light coats. Bulldog is extremely tacky and ready for recoat in 3-5 minutes. Ensure that all vinyl to be painted is covered with Bulldog
6. After waiting 10-15 minutes for the Bulldog to cure, you can now paint the seat. Use the same process as the Bulldog--several light coats. I used six coats to fully cover my seat, most of one can.

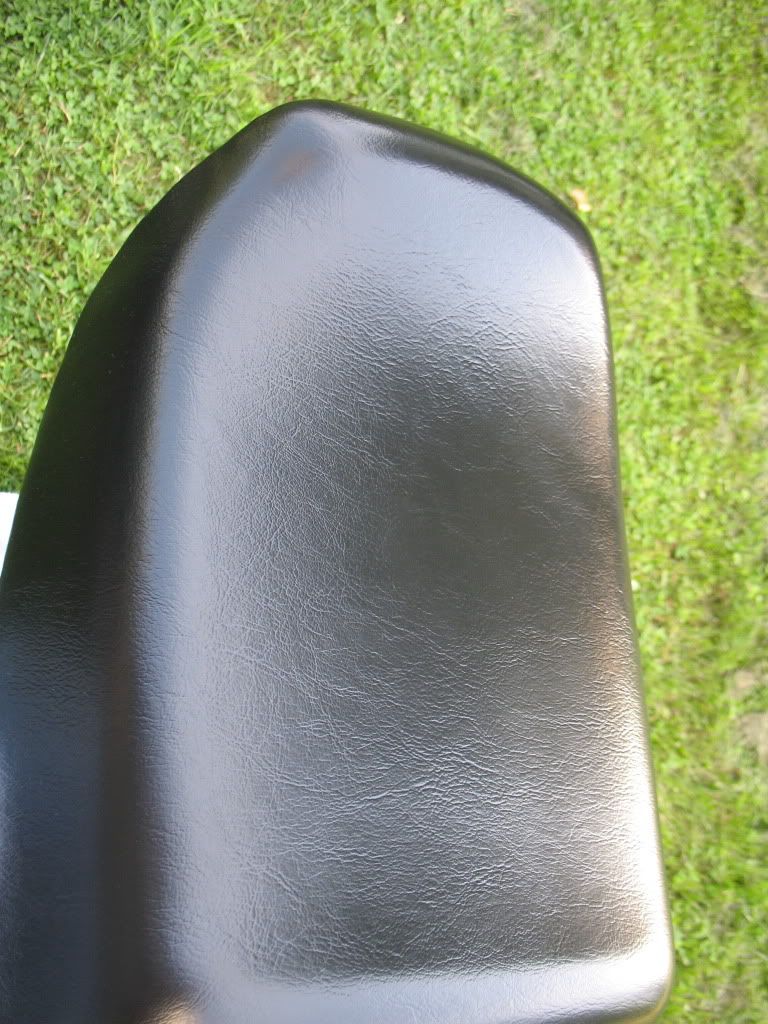
7. Now you're basically done! If any of you are concerned that it won't look "real", don’t worry. It will look exactly like a fresh piece of vinyl. Here is a close-up of the texture showing through the paint.

8. Let the paint cure for at least 24 hours before reinstalling. I'm paranoid so I let mine cure for 36 hours just to be sure! If it doesn't have time to cure, it will rub off. If left to cure long enough, it will become one with the vinyl and will never wear through.
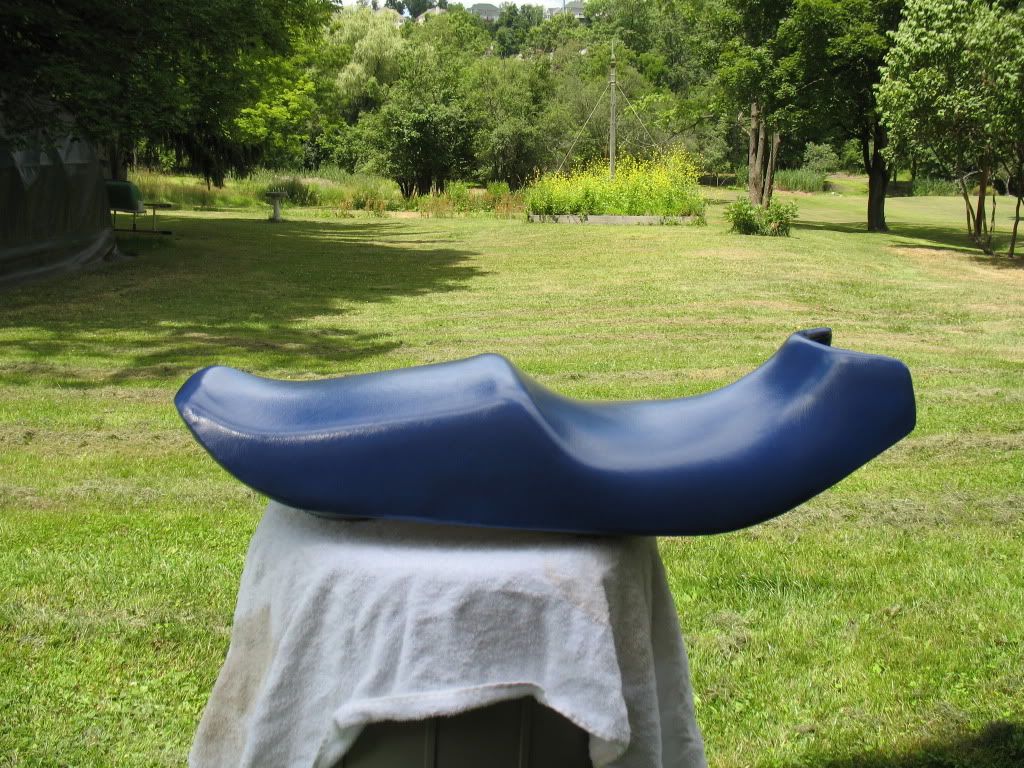
9. This is it! Not bad, looks like a brand new seat! It also looks like the fairings, swing arm, and exhaust need paint soon.

This is what the professionals do when they repair or refurbish vinyl upholstery. I believe it all ran around $30 plus $15 for the seat. One can of Bulldog is enough to prime a half a dozen seats, The SEM Vinyl Prep will do a three or four seats easily, and I bought two cans of SEM Flexible Coating but one can was more than enough for one seat.
I have a future project of turning the old seat into a solo seat with cowl, which is why I bought two cans of SEM Flexible Coating.
Stay tuned!
The first thing I tried to do was to find a black seat for the bike but they seemed to run around $150 on eBay in any color other than purple. That was just too much money for a used seat for me anyway. I did find a purple seat in perfect condition for $15 so I bought it thinking I would re-cover it, not that my current seat is bad I just didn’t want to stop riding while I worked on the new seat.
Then I got talking to a friend that owns a body shop and he suggested I just paint the seat. Seemed like a strange idea that would look good for the first ride and then look like well a painted seat, but he said they do it all the time on interior car parts and it holds up well and looks good. So I said what the heck I’ll give it a try. It should be cheaper than re-upholstering the old seat, which seems to run a couple of hundred dollars at best.
The things you'll need to do the job are: a nylon bristle brush, soapy water (I used Dawn dish detergent), a bath towel, SEM Professional Vinyl Prep, SEM Color Coat, Bulldog Adhesion Promoter, and something to keep the seat up in the air. I used a couple of tin cans and a piece of wood.
1. SEM and Bulldog products can be found at your local body shop supply store (not an auto parts store). You want a place that caters to professional auto body shops. I got mine on line at Hands On Tools.com because it was easier than calling the local suppliers or driving around and I wasn’t in a big hurry since I now have two seats.
2. Remove the seat from the bike (this is important) and clean it with a nylon brush and soapy water. I washed it three times with a heavy rinse with a garden hose between washings.
3. I used a garbage can turned upside down, a towel, and a can to support the seat. It must be in a well ventilated area so outside just made sense, apply SEM Vinyl Prep to the portions of the seat that you'll be painting, all the vinyl. Follow the directions on the can, but basically you just spray it on, rub it around and rinse it off. Don't worry, it's not rocket science. I prepped the seat three times to be sure all the wax was off and the water didn’t bead up when I rinsed. Remember to rinse well and let it dry well before you proceed
4. Then I tape the bottom of the seat so you can paint all the vinyl and keep the plastic frame sort of clean. I didn’t want any purple showing when I finished.
5. Prime all the vinyl with Bulldog Adhesion Promoter. Follow can directions--you want several light coats. Bulldog is extremely tacky and ready for recoat in 3-5 minutes. Ensure that all vinyl to be painted is covered with Bulldog
6. After waiting 10-15 minutes for the Bulldog to cure, you can now paint the seat. Use the same process as the Bulldog--several light coats. I used six coats to fully cover my seat, most of one can.
7. Now you're basically done! If any of you are concerned that it won't look "real", don’t worry. It will look exactly like a fresh piece of vinyl. Here is a close-up of the texture showing through the paint.
8. Let the paint cure for at least 24 hours before reinstalling. I'm paranoid so I let mine cure for 36 hours just to be sure! If it doesn't have time to cure, it will rub off. If left to cure long enough, it will become one with the vinyl and will never wear through.
9. This is it! Not bad, looks like a brand new seat! It also looks like the fairings, swing arm, and exhaust need paint soon.
This is what the professionals do when they repair or refurbish vinyl upholstery. I believe it all ran around $30 plus $15 for the seat. One can of Bulldog is enough to prime a half a dozen seats, The SEM Vinyl Prep will do a three or four seats easily, and I bought two cans of SEM Flexible Coating but one can was more than enough for one seat.
I have a future project of turning the old seat into a solo seat with cowl, which is why I bought two cans of SEM Flexible Coating.
Stay tuned!


Comment