
 Tweet
Tweet
 Cylinder compression check would be a good idea too..make sure the marks r lined up for the proper valves..
-
Cylinder compression check would be a good idea too..make sure the marks r lined up for the proper valves..
-
Yeah it's on the list.Originally posted by Parts man View Post
So worked on it a bit today. Stripped down the top end since I had put it all back together after the initial inspection. A pain but I've learned that when working on projects that you don't see every week things get foggy!! lol Ready to go and motor turned to what I think is the right place and just need my feeler gauge. Just used it for plugs on the jeep a couple months ago. Probably spent an hour looking for it Frustrated I moved to rear brakes.
And have a couple questions. 1st is about the reservoir/ground bolt. The cap bolt I have there doesn't look right and is to long. I'll do some searching but anyone know what it should be.
2nd Not sure what its called but the 3 pointed part the rear brake lever connects to. Had trouble finding which hole the cylinder and the spring attach to.
3rd says dot 4 fluid. Curious why different than most cars.
Dismantled and cleaned the whole system since the fluid was so old.
Didn't do the front cause I need a lever. Curious what the difference is to the lever between the 88-91 and 92(I think) on for when I talk to the salvage guy.Comment
-
Think I found the ground bolt. Forgot to snap a pic but makes way more sense than what I had there. And guessing that the brake part goes on the way it's pictured in the parts diagrams unless someone says otherwise.
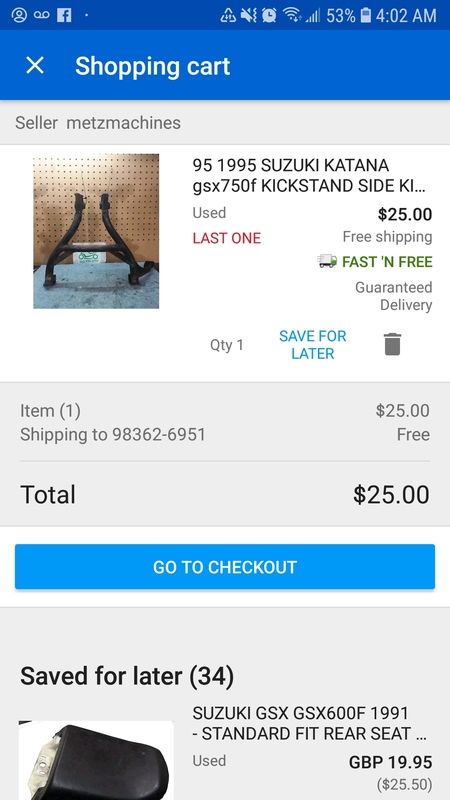
Talked to the salvage guy today but it was right at closing so he asked if I was in a hurry or if I could call back. So tomorrow I'll see what he has. Read a post about interchangeable parts between bikes and the 750 headlight is the same so that will help the search. I've got a bunch of parts marked on Ebay and if I buy all at once the shipping isn't to bad. Basically $25 for the first part and then $5 or so after that with import charges included.
Here's an example of what us Canucks deal with.
First pic shipped to port Angeles just across the water from me. $25 US, about $33 cdnas
And to my door
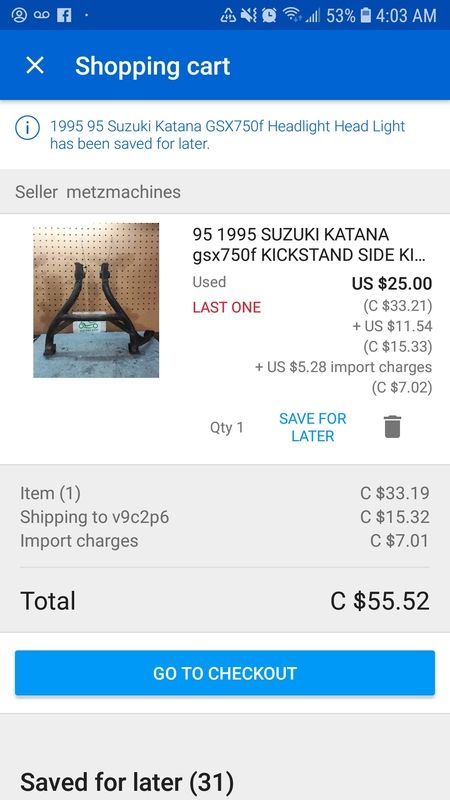
And if they ship ups or FedEx the charges can be 3 times more than the actual part.
Didn't have time for the valve check today so slapped the fairings on. Partly to see what I have for hardware and for motivation. Only 3c today so by 8pm it gets cold out there. Wish I had a real shop or super understanding wife! Buddy at work is rebuilding an old triumph in his spare room! lol
So the hardware seems to be mismatched. Some of it is obviously some cheap Ebay stuff. Any advice on complete hardware kits?
I had just slapped the front forks on so they weren't taking up space when I started several years ago. I'm guessing the end of the shock tube should be flush at the top of the triple tree? not sure if that's the correct terminology.

I just noticed that the bearing at the top of the stem is visible so obviously something is wrong. Once I get a center stand I'll strip all the front apart. You're probably asking yourself why put it together in the first place only to take it off again. I learn by doing and I'm in no hurry. The more I attach and remove parts the more familiar I get with the bike. Speaking of the front end, still unclear if the front brake disk is on the right way. Pic in earlier post. Tire is right direction but friend thought the direction of the slots was wrong. I'll search if I remember.
Also no one answered my question about what needs anti seize or locktite. Not sure if it's in the Haynes manual. Going to print off some sections because the pdf is kind of painful on the phone.Last edited by y2ktj; 12-06-2018, 04:04 AM.Comment
-
"And if they ship ups or FedEx the charges can be 3 times more than the actual part."
Don't get that! I've had lots of parts literally shipped (flown) from the other side of the world land at my door in 3 days and shipping has always been somewhat reasonable using FEDX and DHL maybe they all add on the ferry charges for your location.
The tire is the right direction
Rotor - don't think it really matters I just bought two and they're identical but one obviously has to go the other way. Basically the holes are just to reduce rotating mass might help sweep the pads I remember a mate drilling his CB1100R disc himself making up his own pattern back in the day.
I generally try to avoid using lockite or anti seize anywhere but it is recommended for the disc's BTW they reckon disc bolts/studs are only good for two in and outs.
I have just put Copper grease on my exhaust studs very sparingly but only cause two were a bit squeeky. I will probably check them every month
Forks should be level with the top of handle bar fitting I havent had a 600 maybe someone else can check but it would seem logical.
There is usually a rubber seal cover thing that sits over the head bearing just to keep dust out without it there you will see the bearing.
Good luck worth the effortLast edited by Lachie; 12-06-2018, 03:47 AM.�Anything that happens, happens. Anything that, in happening, causes something else to happen, causes something else to happen.
Anything that, in happening, causes itself to happen again, happens again. It doesn�t necessarily do it in chronological order, though.�
― Douglas AdamsComment
-
Couple questions on the body work and some random parts. If I ever use the wrong name for a part please correct me. I've been doing a ton of reading on here on lots of topics and it can start to blend together! lol I know, get it running before worrying about this stuff but I try to get an idea on what lays ahead. After reading through carbs 101 I needed some easier stuff to think about.
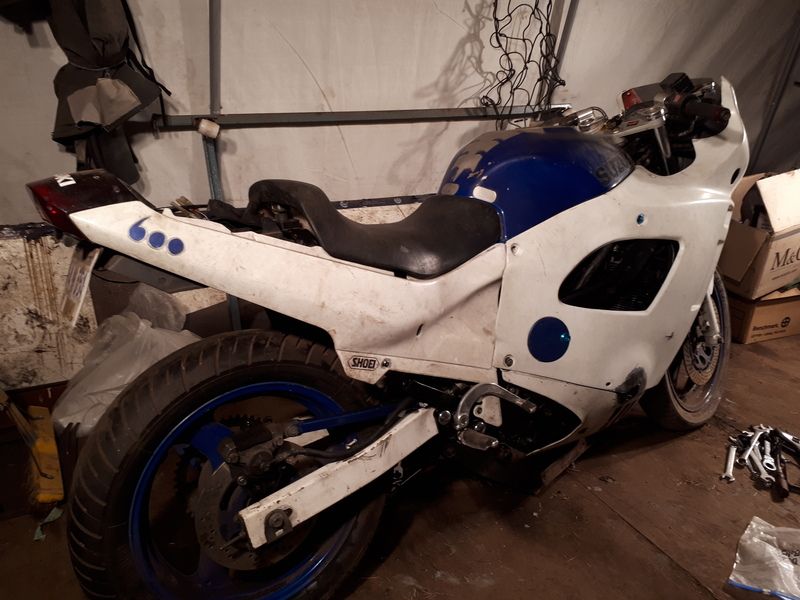
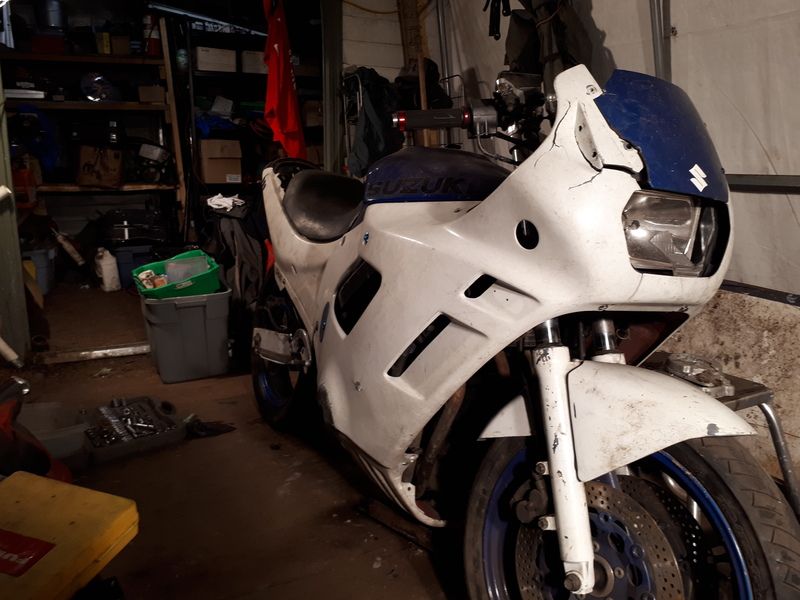
Pics of the damage.
Stator cover.
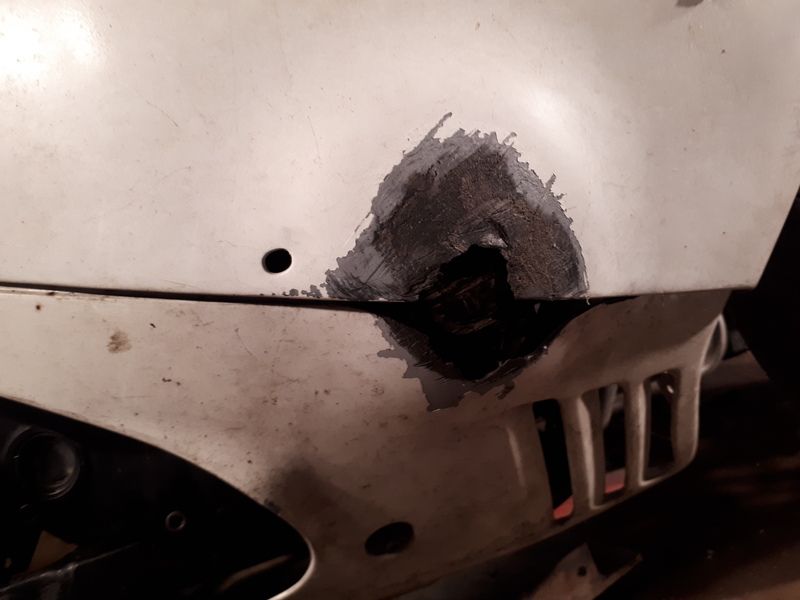
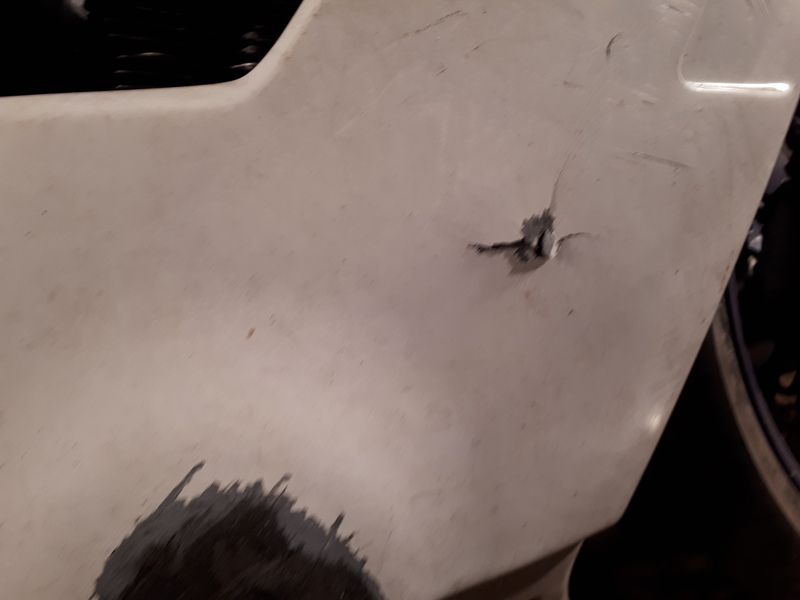
And the front around the headlight and gauges is worse than I remember.
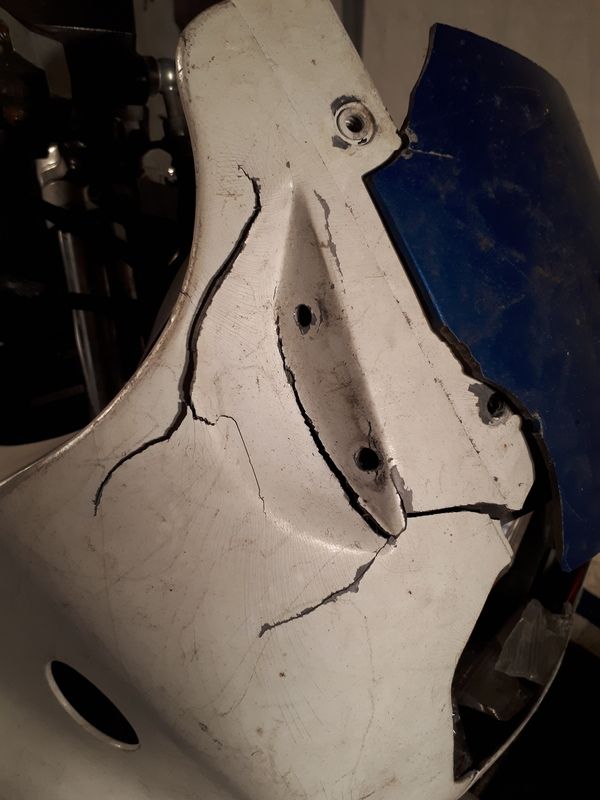
While fitting the fairings it seems that there is a fair amount of stress on this area. Granted I dont think I have all the hardware and at the very least I'm unclear on what bolts go where and I don't have them all in or tight. I thought the front stay was bent after testing the fairings years ago but think I must have had something wrong because it seemed fine now. Should all the plastics fit together easily? What I'm asking is that when putting the main fairings on they didn't just line up with all the mounts. I had to bend them a bit. Maybe it was just the cracks that made me think it should fit better. I'm guessing its normal and answering my own question.
So I've read the fairing repair threads using Lego but wonder if I should just replace it. Guess I'll see what the salvage has and decide.
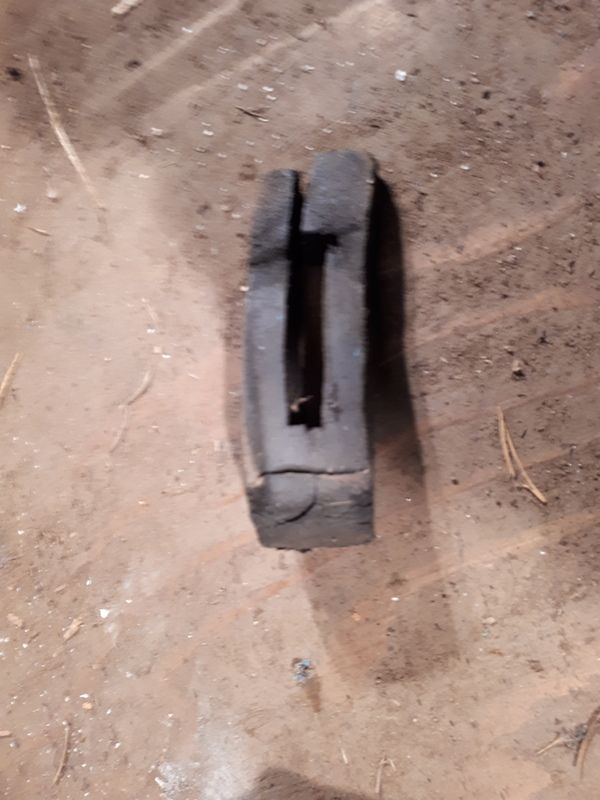
Bike came with a box of parts. Some obviously off his zx6.
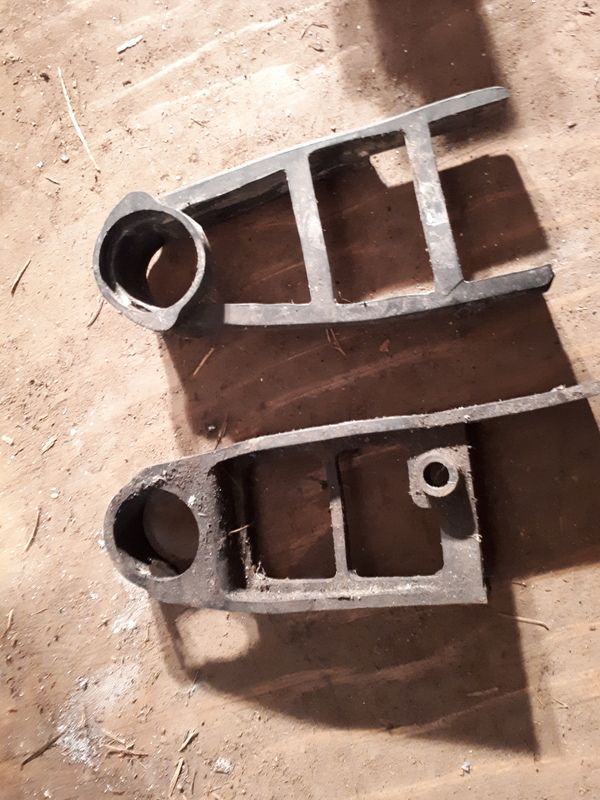
think this is the original chain guide.
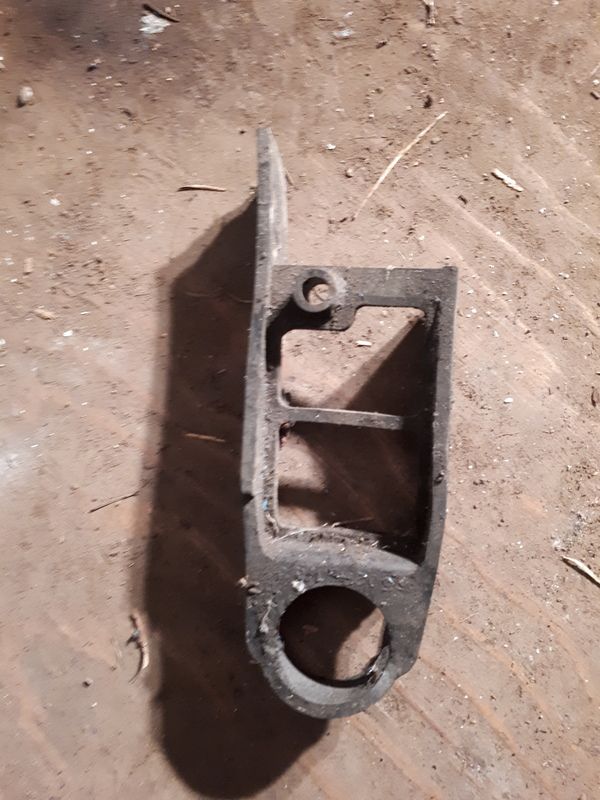
Looks damaged to me
And one in the box that doesn't look the same
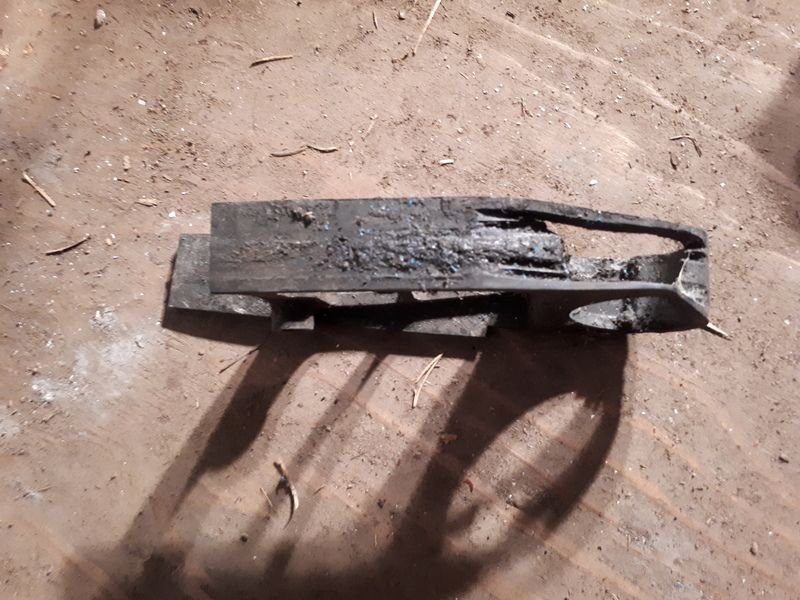
No idea what this is or if it's off the bike
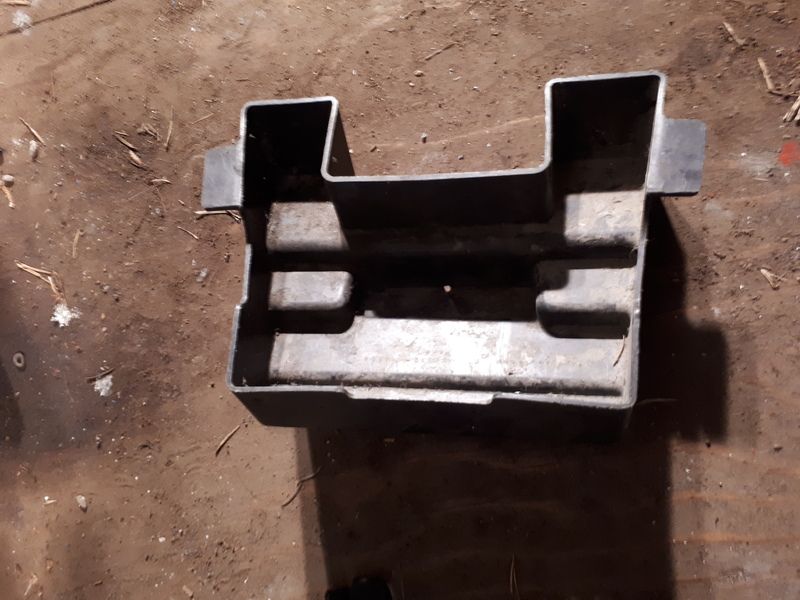
And I think this is the "glove box " but haven't found much online about it or how it mounts
When I first got my jeep I ordered something cheap. Cant remember what it was but something I needed right away. Parts were under $20 and ups charged me something like $50. I've avoided them ever since and always request usps.Originally posted by Lachie View Post
Thanks for the other info. I haven't touched the rotor bolts, that's how I got it. I knew I was missing the rubber caps on the shocks but didn't know about the head bearing one so thanks for that info.Comment
-
Going back to my fork question. Lachie you said "
Forks should be level with the top of handle bar fitting" So flush with the inner recess? I've looked at lots of pics and some are flush and some below. Does it matter much or am I over thinking it. Just trying to make sure that the key components are put together properly. And looks like the bike has 88 forks on it and not the later year forks it should have since there is no adjuster?
Talked to the salvage guy today and he doesn't have a center stand, or headlight but does have a rear seat with the brackets so I'll grab those on Monday. Going to order a stand and headlight of Ebay which should get here by the new year. Not sure how important it is but I'm going to replace the chain guide and was wondering about the chain guard? Thought I read that some take it off.Comment
-
I think your over thinking that the forks hold the handle bars so should be somewhere around the top of there is a plastic cover then just so the cover fits in really half inch either way would not be noticed.
The chain saver looks too have extreme amount of wear I would run with one on a street bike looks to me either the bike has huge millage or the chain has been loose or maybe running with a smaller f front drive sprocket when back together make sure chain is tensioned correctly
Have tried lots of fairing repair options all with somewhat good results some not.
The upper part will need some support under to help stop it flexing and breaking again if you decide to repair it. You need to assess how much work you want to v do on the fairing if repairing and keep in mind it may not be really successful. I might post some pics of a repair I did when I get a chance�Anything that happens, happens. Anything that, in happening, causes something else to happen, causes something else to happen.
Anything that, in happening, causes itself to happen again, happens again. It doesn�t necessarily do it in chronological order, though.�
― Douglas AdamsComment
-
Bike has 30,000km or 19,000 miles on it. He said the rear tire came loose which is why he dropped it so maybe that's why. I'll replace it anyway.
As for the fairings what kind of reinforcement? My time is free so I'll give it a go before replacing it. Really my goal for this year is to first get it back together and running. I'll worry about cosmetics next winter but would like to fix the upper part of the fairing this year.
Spent alittle time on the bike today and did the valve lash check. All the valves were within the specs. Picked up a battery today. Talking to the PO he had cleaned the carbs not long before dropping the bike. Should I still clean them since it sat so long? Cant wait to try firing it up!!Comment
-
My Katana doesn't like sitting for a several weeks, much less several years. Pretty sure y'all Canadians are on the ethanol band wagon too. Who knows, you may get lucky My Katana-1100 17" wheel swap
http://katriders.com/vb/showthread.php?t=136894Comment
-
Hey ya
I never had any luck doing the acetone lego block thing IDK maybe it was low grade Acetone or something but I couldn't melt anything with it.
When I mixed some ABS glue with it things would happen but had a horrible time trying to get it to set when applied in thick areas.maybe it was the acetone in the mix was the problem IDK. When I repaired my fairing the PO had riveted a bit of Al plate across the break and just taped it up. In this shot you can see the rivets. I had the "luxury" of chopping up a damaged beyond repair fairing to use as filler material.

I cut and fashioned the front piece from the damaged fairing and glued that in place with ABS glue.
On the back I glued some Stainless mesh across the entire area (I left the Al plate there for strength.

The crack went right to the indicator hole.
After this I brushed on the ABS glue fairing mixture and laminated it up over a series of goes sanding back each time. The last couple of coats were just straight ABS glue (which at times can be a pain to paint

After some time this was the end result.

From the outside you wouldn't (well immediately) know it was repaired. The stainless mesh is still very well bonded to the back of the fairing and still in use and done lots of miles.
Takes some patience.
Another spot I did was the lower fairing mount at the front cut the opposite bit out of the damaged side and glued it in place.

On the backside laminated the stainless mesh

sanded and painted the front side with the ABS glue etc
An blurry but get the picture is proved to be a strong repair.

I have had some success with filler also but some may say it doesn't bond properly.
If I was going to do your repair these are the items I would source.

Clean the surfaces well and make sure there is about 2 inches of mesh bonded to the back use the filler (or if you want melted plastic filler to bond through the mesh and then layer up the ABS / plastic or just ABS glue over the top.
Everything is always a little different and what may work for someone may not work for every body so it is a little ( or quite a) bit of try and see.
You may need to use something like my PO did and rivet a plate across the backside to strengthen it.
Make sure you have good clean surfaces to bond to.
if the plastic is a little brittle which happens with age I have very lighty applied a heat gun to the plastic to soften it up a bit.
BE WARNED
Any heat will tend to shrink the plastic not greatly if done lightly but it is also accumulative.
PS I used a 600 fairing for the side I couldn't repair�Anything that happens, happens. Anything that, in happening, causes something else to happen, causes something else to happen.
Anything that, in happening, causes itself to happen again, happens again. It doesn�t necessarily do it in chronological order, though.�
― Douglas AdamsComment
-
Google says were on the ethanol wagon. So if you don't ride in the winter should they be cleaned every year? I'll probably give it a go first.
Thanks for the info lachie I appreciate it. The fairings do feel brittle.Comment
-
I just start my bike about once a month and go for a spin around the lake by my house. The longest I've let it sit was 2-3 months and it usually takes several cycles of choke on, choke off, choke on to get it to start when I do that. Some times I have to re-charge the battery when I neglect it like that.
1)When you try to start it, prime the carbs by turning the petcock to prime for about 1 minute, WITH THE BIKE UP RIGHT/LEVEL TO EQUALIZE THE AMOUNT OF FUEL IN ALL THE CARB BOWLS. YOU ONLY NEED TO DO THIS ONCE BECAUSE THERE IS NO GAS IN THE CARBS FROM SITTING... DO NOT DO THIS EVERY TIME YOU START THE BIKE !
2)Put choke on and crank the engine for about 10 seconds. If you hear any type of stumble like its trying to start but doesn't...
3) turn choke off and try to start it for approx. 5-7 seconds.
4) turn choke on, try to start it for approx. 5-7 seconds. If you hear any type of stumble, but it doesn't start immediately turn choke off.
What your attempting to do is prevent flooding/fowling the spark plugs by turning choke off and trying to crank it. Don't twist the throttle unless the bike starts.
If your lucky, you'll get a really-really loud back fire like I some times do when my bike sits for 2-3 months...

EDIT: One important thing to remember, the choke is really a "Enricher" meaning to squirts gas instead of blocking the air flow like a "Choke" does. So when you turn choke on and crank over the engine, the vacuum causes gas to get sucked into the cylinder.
At the very least, once you get the bike tuned properly, just a simple start/warm up for about 5 minutes about once a month is ok to keep it in tune. I normally do that on the warmest of days during the winter months. I ride ALL SUMMER !Last edited by katanarider; 12-09-2018, 04:53 AM.My Katana-1100 17" wheel swap
http://katriders.com/vb/showthread.php?t=136894Comment
-
Sorry , but I keep thinking of things after I've already written a reply.
Before you try starting the bike for the first time...do this...
Take all the float bowl drain screws out.
Then flood the bowls with gas to wash out any rust and trash.
Then do the steps I provided above to start the bike.My Katana-1100 17" wheel swap
http://katriders.com/vb/showthread.php?t=136894Comment
-
thAnks for the info. Need to replace the clutch and starter gaskets as they are damaged and I'm guessing Rtv is a no no! lolComment
-
Question on reinstalling the carb. Should I be connecting the rubber peices to the carb first and then bolting the rubber to the motor? Just tried fitting it with the 4 rubber peices still on the motor and seems impossible. Going to check the manual now but any tips appreciated.Comment


Comment