
 Tweet
Tweet
Originally posted by Kreylyn
View Post

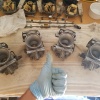
Here are some terms I am a little confused about:
- Choke rails, different from choke slide?
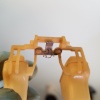
- Float rails, are these the plastic hinged bit with the very snug O-rings?
- Linkage, I am guessing this is the coiled spring/butterfly?
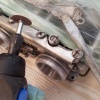
I must say it makes me quite nervous to soak the float components in the dip, as I've read that carb cleaner can eat plastic.... and I don't want to kill 4 expensive float assemblies. Also as previously mentioned I am concerned about taking them apart without breaking them. Plastic and I don't always get along...
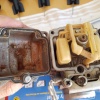
Good tip about sanding the caps, I haven't seen that anywhere else. I will check them for flatness. I also ordered some silicone spray lubricant, as I read that is the best lube for o-rings and will not cause swelling unlike petroleum-based things.


Comment